
Century V6-3100 3.1L VIN M SFI (1998)
Crankshaft Position Sensor: Service and Repair
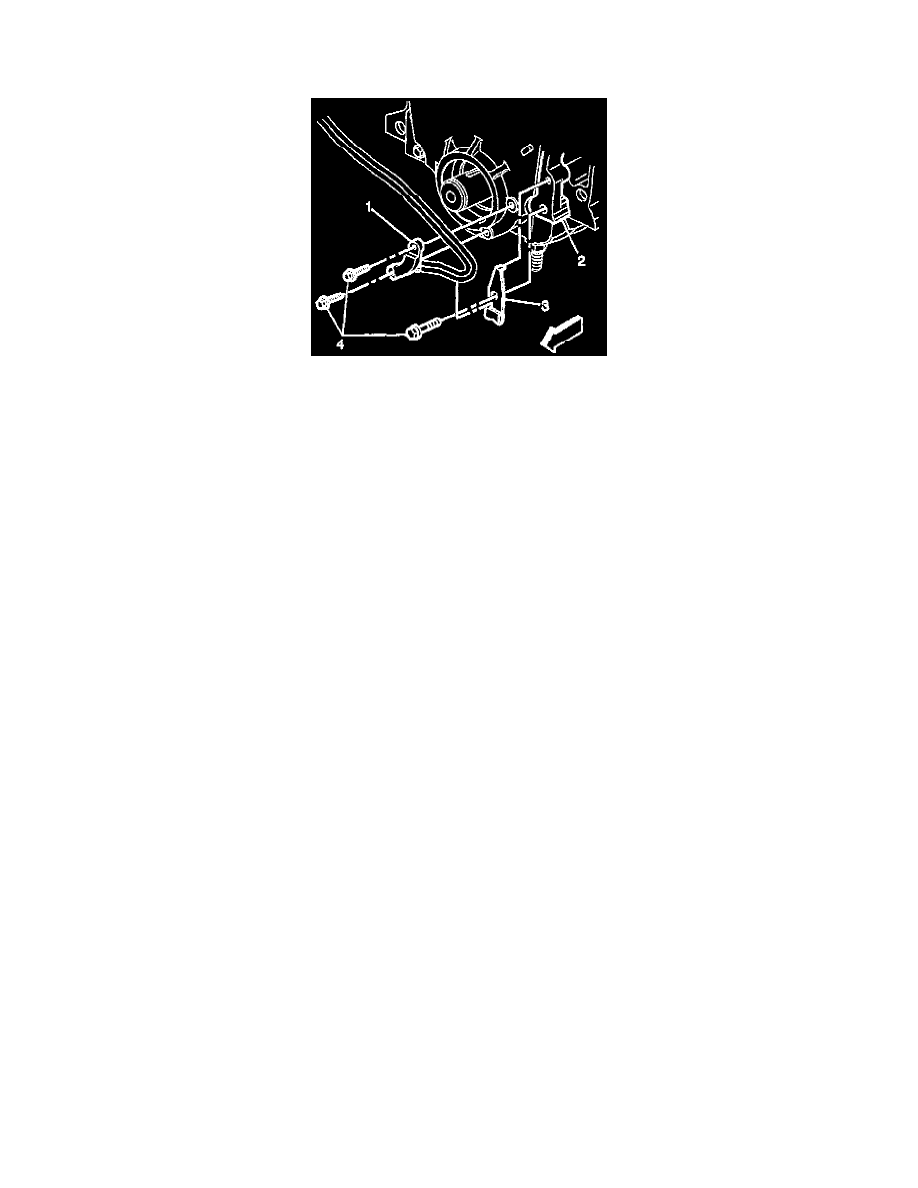
Crankshaft Position Sensor Replacement (24X)
Removal Procedure
1. Disconnect the negative battery cable. Refer to Battery Disconnect Caution in Service Precautions.
2. Remove the serpentine drive belt from crankshaft pulley.
3. Raise the vehicle on hoist.
4. Remove the crankshaft harmonic balancer retaining bolt.
5. Remove the crankshaft harmonic balancer using special tool (J 24420-B).
6. Note the routing of sensor harness before removal.
7. Remove the harness retaining clip with bolt (1).
8. Remove the sensor electrical connector.
9. Remove the sensor bolts (2).
10. Remove the sensor.
Installation Procedure
1. Install the 24X Crankshaft Position Sensor with bolts (2) and route harness as noted during removal.
2. Install the harness retaining clip with bolt (1).
Tighten
Tighten the bolts to 10 Nm (8 lb. ft.). Refer to Fastener Notice in Service Precautions.
3. Install the sensor electrical connector.
4. Install the balancer on the crankshaft using special tool (J 29113).
5. Apply thread sealer GM #1052080 or equivalent to threads of the crankshaft harmonic balancer bolt.
Tighten
Tighten the bolt to 150 Nm (110 lb. ft.).
6. Lower vehicle.
7. Install the serpentine drive belt.
8. Connect the negative battery cable.