
Century V6-3100 3.1L VIN M SFI (1998)
Important:
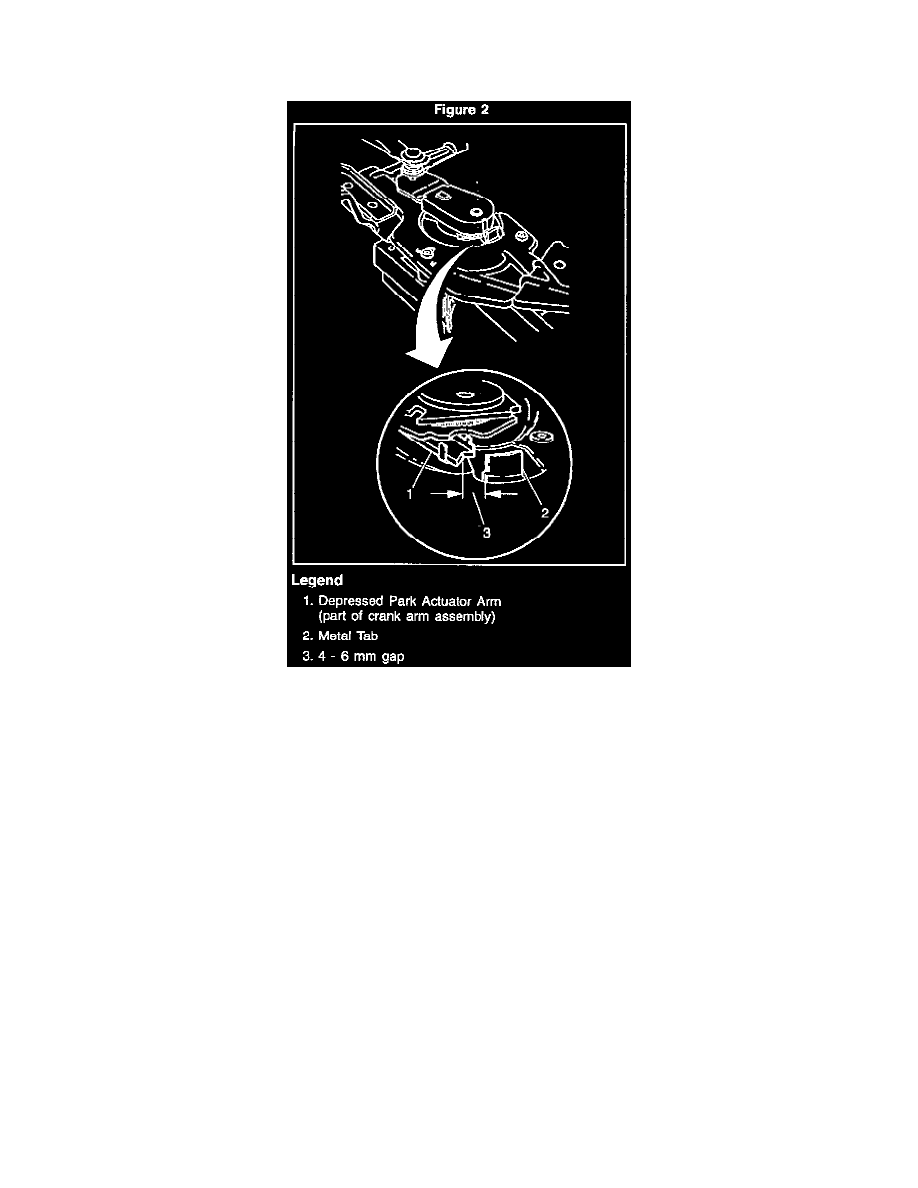
Crank arm must rotate freely on motor shaft during next step. If the crank arm does not move freely, remove it and re-perform Step # 14.
15.
Install new crank arm assembly on the wiper motor shaft while maintaining a 4-6 mm gap between the end of the depressed park actuator arm and
the metal tab. See Figure 2. Proper positioning has been achieved if a 13/64 drill bit can be inserted down through the center of the hole in the top
of the crank arm and into the threaded hole in the motor housing. See Figure 1.
Important:
Firmly hold crank arm in position to prevent the wiper motor shaft from rotating when tightening the retaining screw in the next step.
17.
Install crank arm retaining screw and tighten to 14-17 N.m (124-150 lb in.).
18.
Install plastic crank arm cover on crank arm assembly.
19.
Apply a bead of sealant, P/N 12345739 or equivalent, along the gap between the crank arm cover and the crank arm as shown in Figure 3.
20.
Cut a 30 mm (1 & 3/16 inch) square piece of barrier material, P/N 11515174 or equivalent, and place it over the hole in the crank arm cover as
shown in Figure 3. Apply light pressure to the material to ensure a good seal.
Important:
When used as instructed, the sealant and barrier material listed above can repair approximately 50 vehicles.
21.
Install the wiper linkage on the crank arm ball stud using J 39529.