
Electra V6-181 3.0L (1985)
hammer or mallet to install cover. 6.Tighten locknut by turning wrench clockwise until nut bottoms out. This will secure cover.
7.
Snap medallion into center of cover.
8.
Store wrench in glove box.
9.
To service or repair, follow wire wheel cover removal instructions.
NOTE:
THIS INSTRUCTION SHEET MUST REMAIN WITH VEHICLE FOR CUSTOMER REFERRAL PLACE IN GLOVE BOX
FIG. 1 - ANTI-ROTATION CLIP INSTALLED INTO LOCK BRACKET
FIG. 2 - ANTI-ROTATION CLIP INSTALLED INTO SLOT ON BRACKET
ASSEMBLY INSTRUCTIONS
FOR INSTALLATON OF ANTI-ROTATION CLIPS TO FACTORY MOUNTED BRACKETS
CAUTION: ANTI-ROTATION SPRING CLIPS MUST BE INSTALLED PRIOR TO INSTALLATION OF WHEEL COVER.
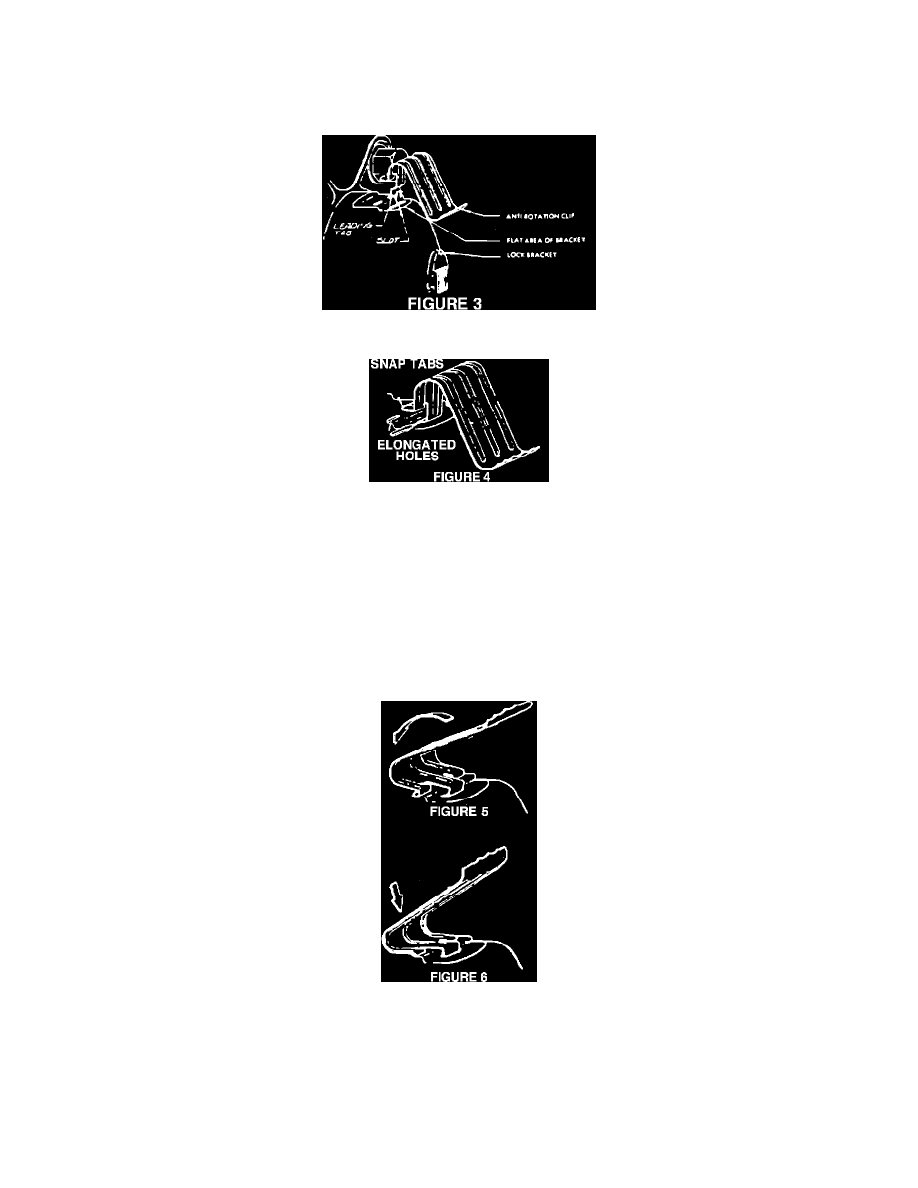
Anti-rotation clips should be installed into flat areas of lock brackets. (FIG. 3)
Insert leading tab of anti-rotaion clip into long slot on bracket. (SEE ARROW IN FIG. 4)
ALIGN CLIPS
With leading tab inserted swing anti-rotation clip in direction of arrow. (TOWARD WHEEL) Snap tab must align with elongated holes on bracket.
Insert snap tabs by pushing on base of anti-rotation clip. (SEE ARROW IN FIG. 5 & 6) Repeat instructions for each of the 3 clips on all 4 of the wheels.
After all clips are installed securely, proceed to STEP 2.