
Electra V6-181 3.0L (1985)
1.
Remove center pillar trim panel.
2.
Loosen roof drip scalp molding and retainer.
3.
Remove center pillar applique.
4.
Carefully pull back roof drip scalp molding and retainer to access joint area.
5.
Joint area may be resealed using 3M #08531 heavy drip check sealer, 3M #08578 Strip Caulk (or equivalent). See Figure 2, View A.
6.
Reinstall all previously removed item. Make sure that the center pillar applique mounting holes and opera lamp hole (if so equipped) are properly
sealed prior to installation of the applique.
DOOR WEATHERSTRIP
Area 1 - Item 2
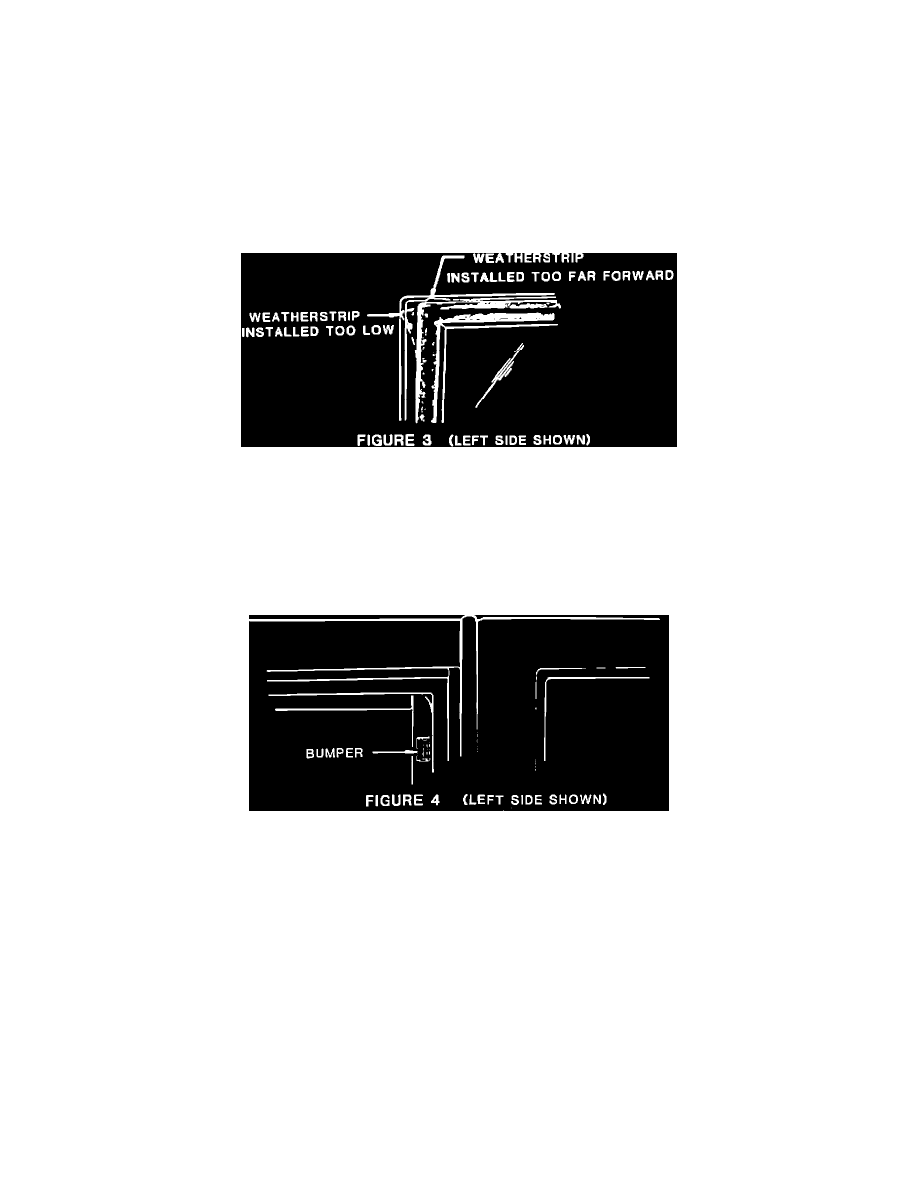
Door Weatherstrip Installation
The rear upper corner of the door weatherstrip should conform to the contour of the door frame. It should not be seated forward or low (shown by broken
line in Figure 3), as this would increase the chance for marginal weatherstrip to body contact.
FRONT DOOR FRAME BUMPER
Area 1 - Item 3
The rear leg of the front door frame should contact the bumper on the lock pillar or center pillar garnish molding with the door in the closed position.
Contact should not be so great to increase door closing efforts (see Fig. 4).