
Electra Park Avenue V8-307 5.0L (1983)
C.
Applicable OSHA standards should be reviewed.
D.
Allow converter to cool before handling.
5.
Stand the old converter upright on the inlet end and pour 16 ounces of water into the outlet end to control catalyst dust.
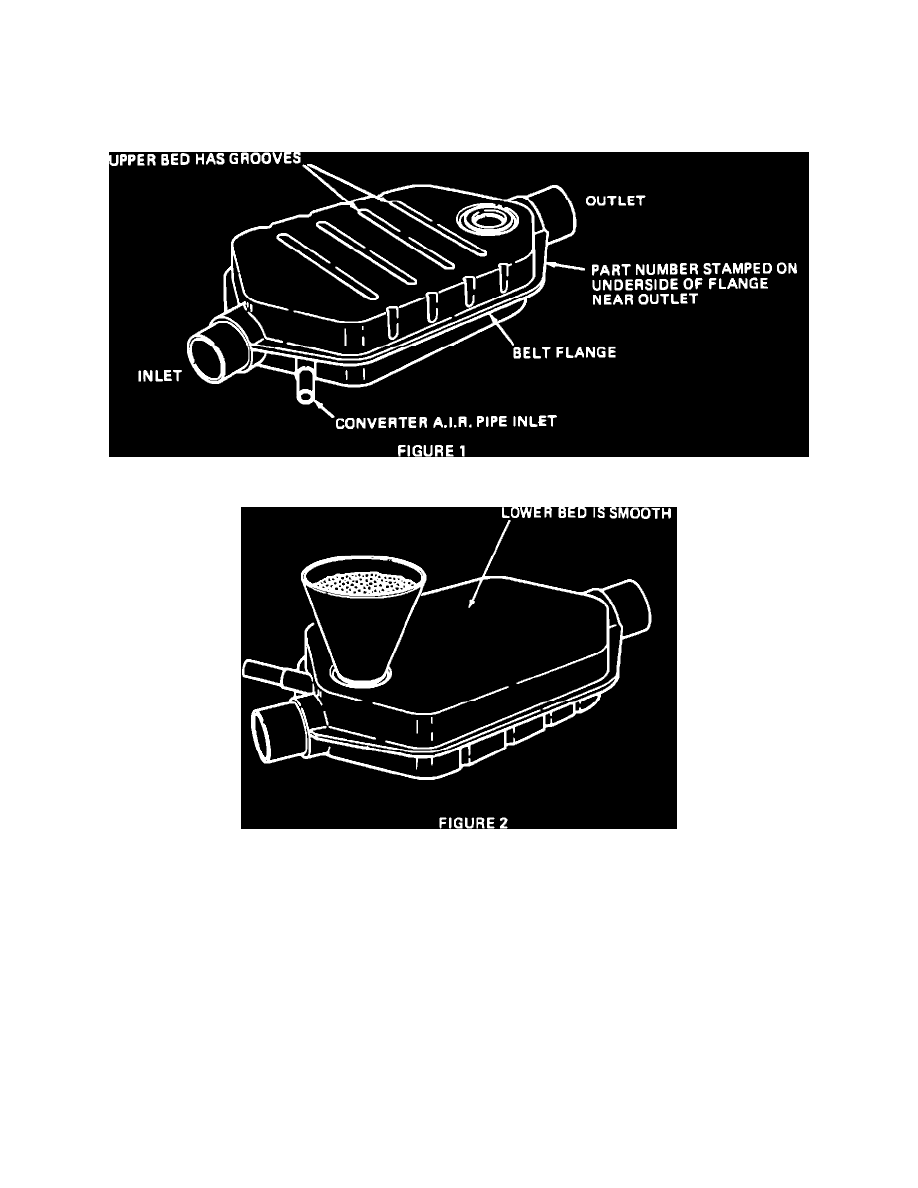
FIGURE 1 - CATALYTIC CONVERTER
FIGURE 2 - LOWER BED SIDE - CATALYTIC CONVERTER
6.
Using a hammer and chisel, remove the fill hole plug from the lower bed. (The smooth side of the converter is the lower bed side). See
Figure 1 and 2.
7.
Hold the converter over a clean pan (J-34155-2) and empty the catalyst beads by shaking. It may be necessary to tap the converter belt flange
with a hammer to loosen the beads.
8.
Pour the beads into a sifting pan (J-34155-1) and sift to remove under-sized beads.
9.
Prop the new converter up at a 45-degree angle with the lower bed fill hole at the top.
10.
Using funnel J-34155-3, pour the sifted beads into the lower bed of the new converter. If additional beads are required to completely fill the
lower bed, it will be necessary to obtain a lower bed bead kit from the parts department. Excess beads from the kit should be saved in a clean
container for future use.