
Electra Park Avenue V8-307 5.0L VIN Y 4-bbl (1984)
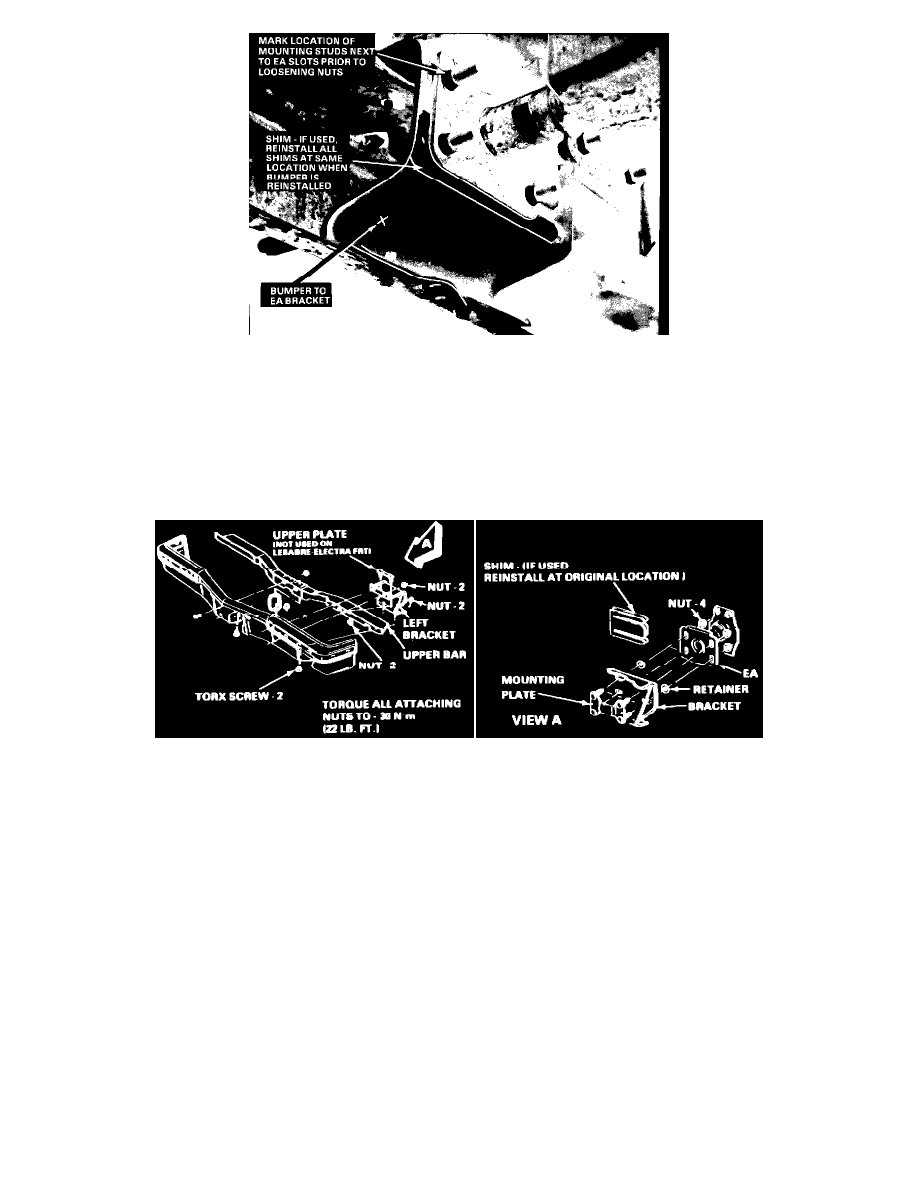
FIGURE 2 - BUMPER BRACKET TO BE REPLACED (RIVIERA FRONT BUMPER SHOWN - OTHER MODELS SIMILAR)
1.
Hoist vehicle.
2.
Mark location of bracket attaching studs on energy absorber prior to removing nuts. This will allow maintaining bumper height adjustment when
bumper reinstalled. If shims are used between bracket and E.A., note position. Refer to Figure 2.
3.
On LeSabre and Electra front bumpers, disconnect parking and turn signal lamp sockets. On Rivieras, disconnect grille return springs.
4.
Remove bumper assembly from energy absorbers, and lay face down on a clean protected surface.
FIGURE 4 - BRACKET INSTALLATION (RIVIERA SHOWN - OTHER MODELS SIMILAR)
5.
Replace right and left bumper brackets:
a.
Remove E. A. mounting plate and retainers from old brackets and install in new brackets. Refer to Figure 4, View A.
b.
A T-45 Torx head drive is required to remove screws that retain brackets to lower edge of bumper.
c.
Flanged edge on brackets go towards outboard side of bumper.
d.
Torque specification for all bracket attaching nuts is 30 NM (22 ft.lbs.).
6.
Reinstall Bumper Assembly
a.
Install any removed shims in original location between brackets and EA.
b.
Position mounting plate studs in original position in EA's vertical slots, center bumper on vehicle and tighten attaching nuts to 30 N-m (22
st.lbs.).
c.
On LeSabre and Electra front bumpers, plug in lamp sockets.
d.
On Rivieras, attach grille return springs to their brackets.
e.
Lower vehicle and install Campaign identification label.