Enclave AWD V6-3.6L (2009)

Compressor Clutch: Service and Repair
Compressor Clutch Assembly Replacement
Removal Procedure
1. Raise and suitably support the vehicle. Refer to Lifting and Jacking the Vehicle (See: Maintenance/Vehicle Lifting/Service and Repair).
2. Remove the drive belt. Refer to Drive Belt Replacement (See: Engine, Cooling and Exhaust/Engine/Drive Belts, Mounts, Brackets and
Accessories/Drive Belt/Service and Repair).
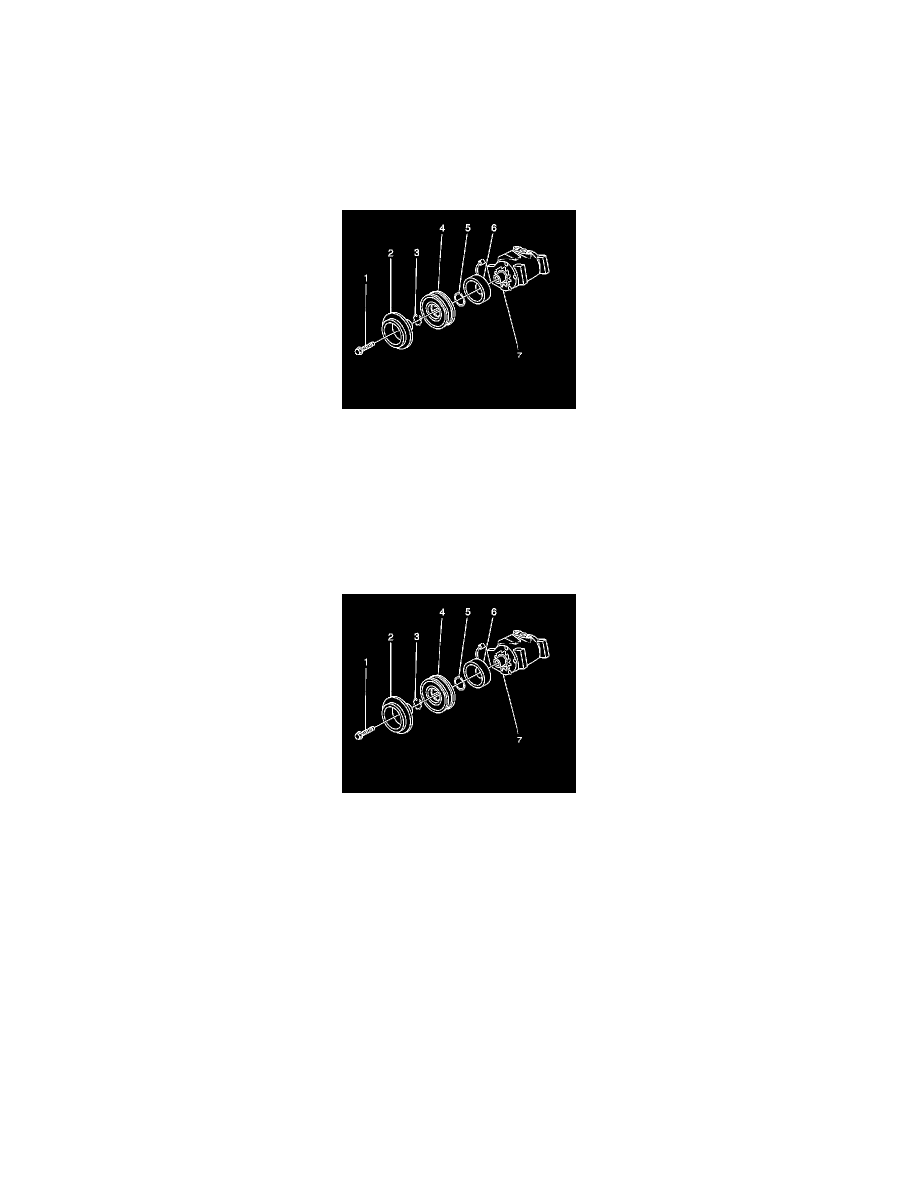
3. Remove the clutch plate retaining bolt (1).
4. Remove the clutch plate assembly (2).
5. Remove the clutch hub/bearing snap ring (3).
6. Remove the clutch hub/bearing assembly (4).
7. Remove clutch coil harness retainer.
8. Remove the snap ring (5) from the clutch coil (6).
9. Remove the clutch coil (6) from the A/C compressor (7).
Installation Procedure
1. Install the clutch coil (6) to the A/C compressor (7).
2. Install the snap ring (5) to the clutch coil (6).
3. Install clutch coil harness retainer.
4. Install the clutch hub/bearing assembly (4).
5. Install the clutch hub/bearing snap ring (3).
6. Place a small amount of oil on the thinnest air gap shim and place it inside the clutch plate.
