
LaCrosse V6-3.6L (2007)
Tip
The cylinder head gasket kit contains all the gaskets and seals necessary to perform this repair.
1. Disconnect the engine wiring harness electrical connectors from the intake and exhaust camshaft position (CMP) actuator solenoid valves and
sensors.
2. Remove the intake and exhaust CMP sensor bolts and sensors.
3. Remove the intake and exhaust CMP actuator solenoid valve bolts and valves.
Important
Rotate the crankshaft balancer bolt in a clockwise direction ONLY.
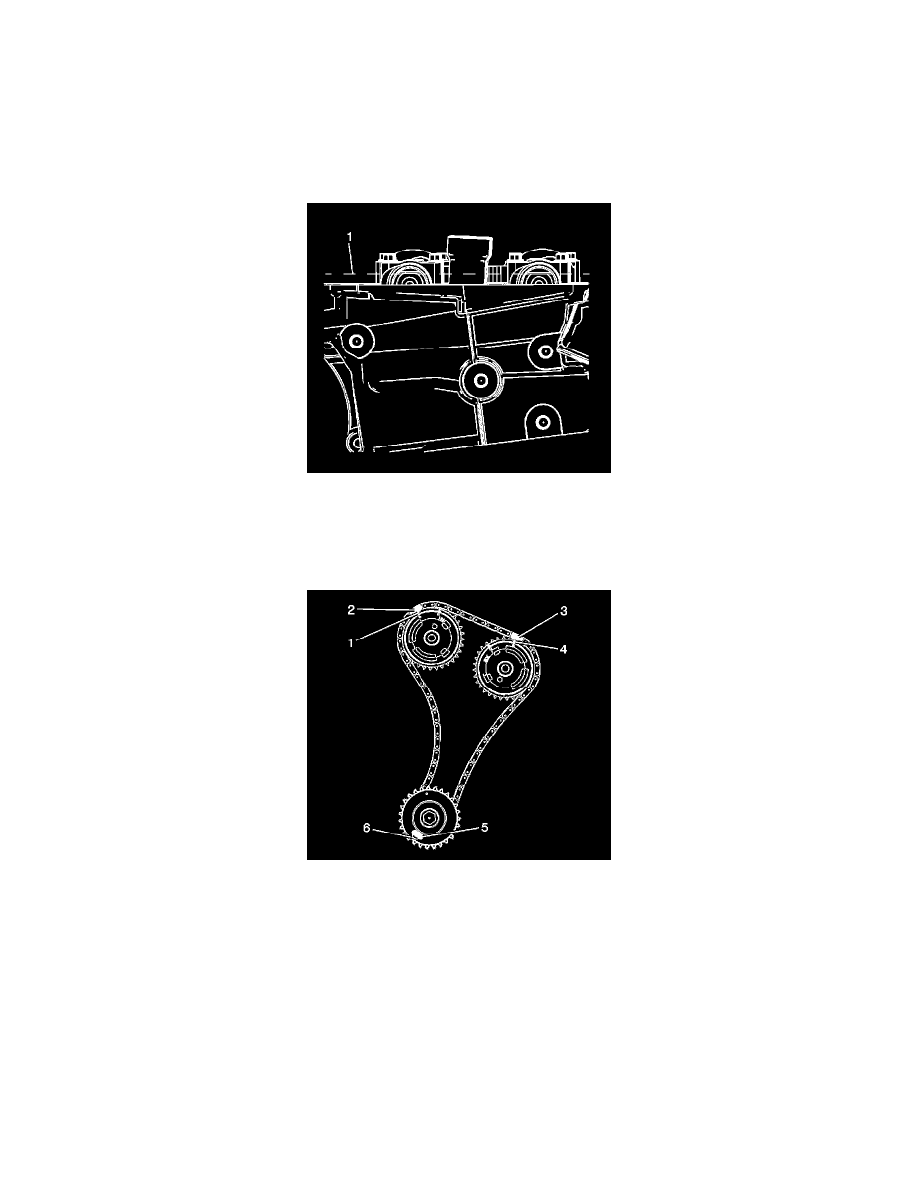
4. Rotate the crankshaft balancer using the balancer bolt until the camshafts are in a neutral (low tension) position. The flats on the rear of the
camshafts will be parallel with the camshaft cover rail (1).
5. Use a paint stick to create an alignment mark on one of the timing chain links (2) and the adjacent tooth on the exhaust camshaft position actuator
(1).
6. Use a paint stick to create an alignment mark on one of the timing chain links (3) and the adjacent tooth on the intake camshaft position actuator
(4).
7. Use an open end wrench on the hex cast into the camshaft in order to prevent engine rotation when loosening the camshaft position actuator bolts.
Slightly loosen the camshaft position actuator bolts. DO NOT remove the bolts.