
LaCrosse V6-3.6L (2007)
applying this force.
-
Apply force to move the camshaft rearward.
-
Measure and record the distance between the camshaft cap and the camshaft lobe.
-
Re-measure and record the distance between the camshaft cap and camshaft lobe. Subtract the two readings; this is the camshaft shaft end play.
Camshaft Position Actuator to Front Camshaft Cap Measurement Procedure
Important
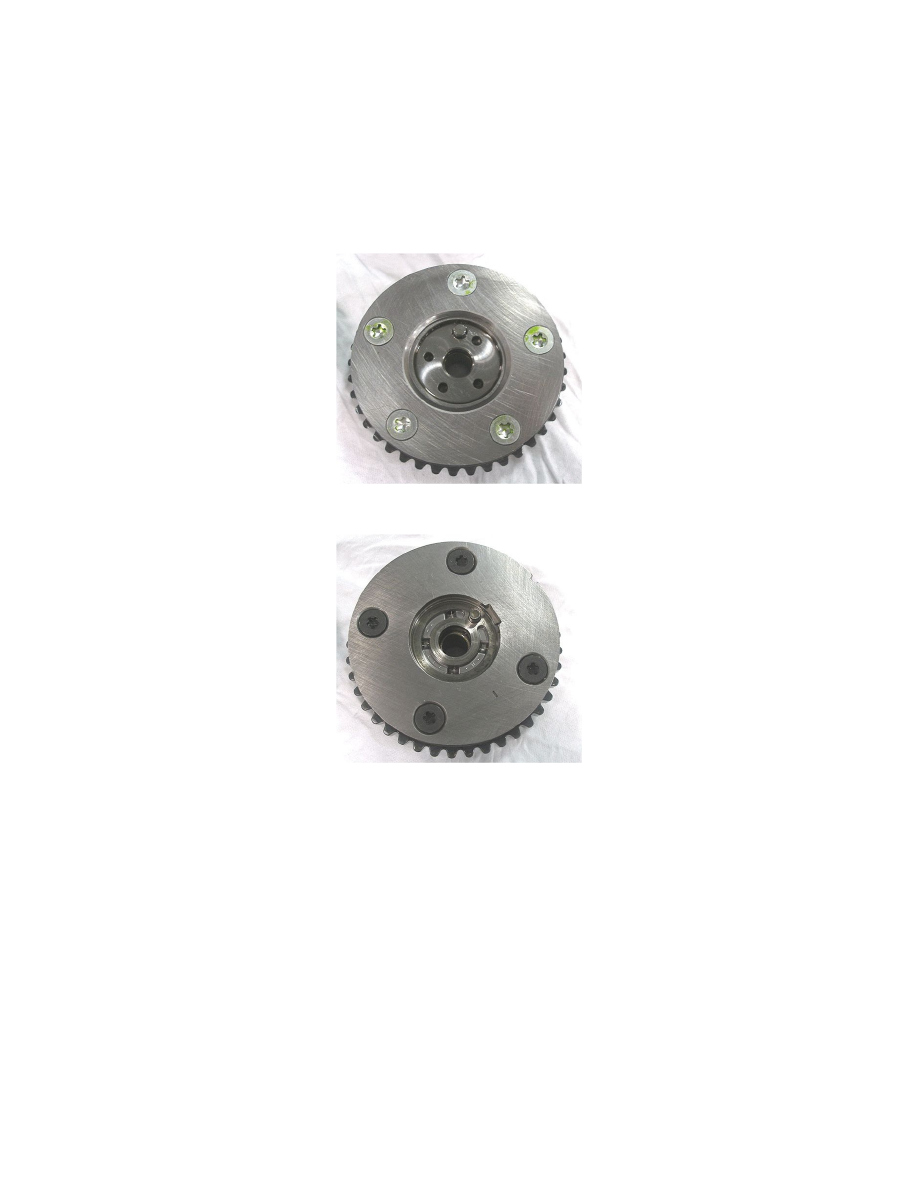
Before performing this procedure, inspect the rear of the camshaft position actuator. Refer to the pictures below to determine which actuator is
installed on the vehicle. Use the appropriate procedure listed below.
Aisin Actuator (5 Screw Design, Use 2.5 mm Hex Wrench)
Delphi Actuator (4 Screw Design, Use 2.0 mm Hex Wrench)
5 Screw Aisin Design Actuator
Use a 2.5 mm hex (allen) wrench as a determination gauge to measure the gap between the rear of the camshaft position actuator and the front camshaft
cap of both camshafts of the suspect head.
1. Position a screwdriver or medium pry bar between the camshaft cap and camshaft lobe.
2. Apply force to move the camshaft FORWARD. Be cautious not to damage the camshaft lobe while applying this force.