
LaCrosse V6-3.6L (2007)
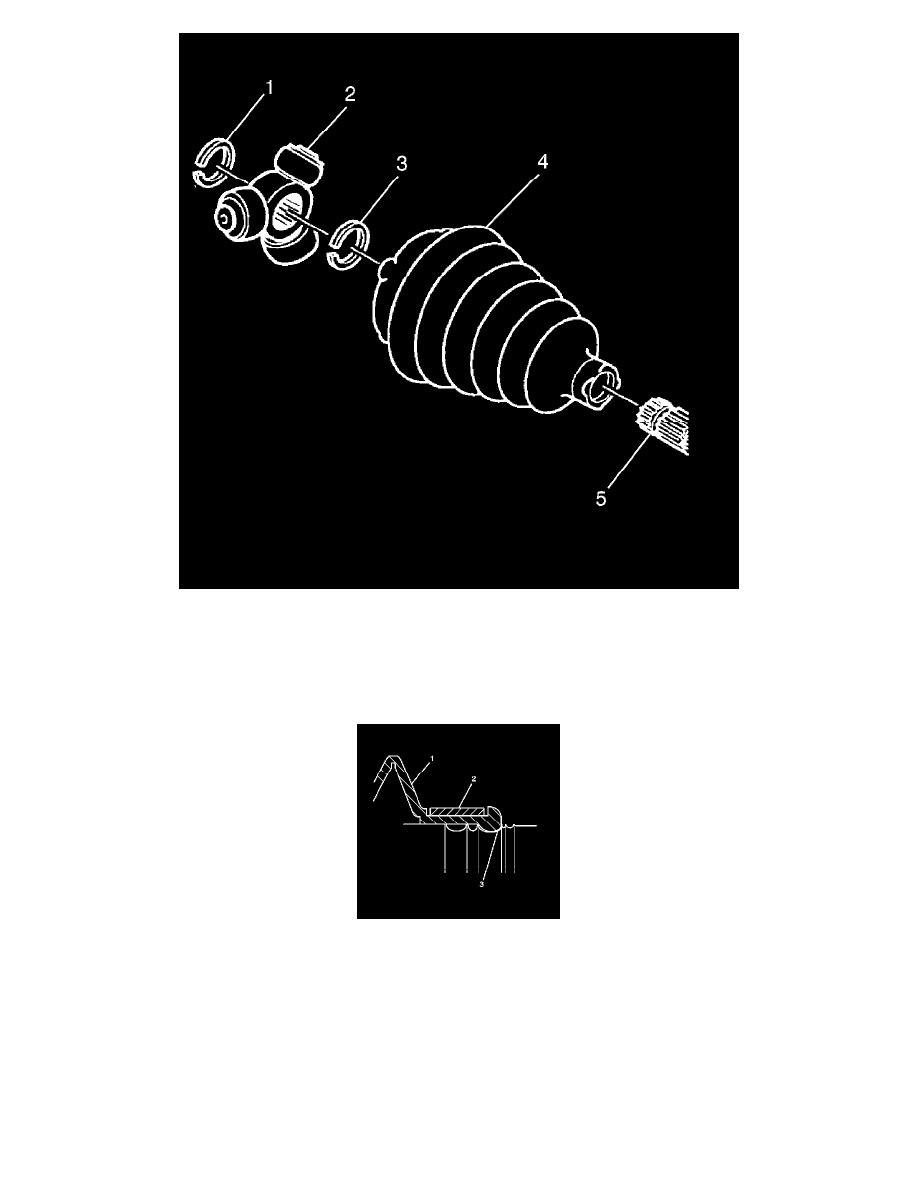
7. Remove the spacer ring (1), spider assembly (2), spacer ring (3) (if equipped) using J 8059, and tripot boot (4). Discard the boot and rings.
8. Clean the halfshaft bar (5). Use a wire brush in order to remove any rust in the boot mounting area (grooves).
9. Inspect the needle rollers, needle bearings, and trunnion. Check the tripot housing for unusual wear, cracks, or other damage. Replace any
damaged parts with the appropriate kit.
Installation Procedure
Important: For eared clamp, place a towel in the vise before inserting the halfshaft.
1. For eared clamp installation, mount the halfshaft into a vise.
2. Place the new small swage ring or eared clamp (2) onto the small end of the joint seal (1). Slide the joint seal (1) and the small swage ring or eared
clamp (2) onto the halfshaft bar.
3. Position the small end of the joint seal (1) into the joint seal groove (3) on the halfshaft bar.