
LaCrosse V8-5.3L (2008)
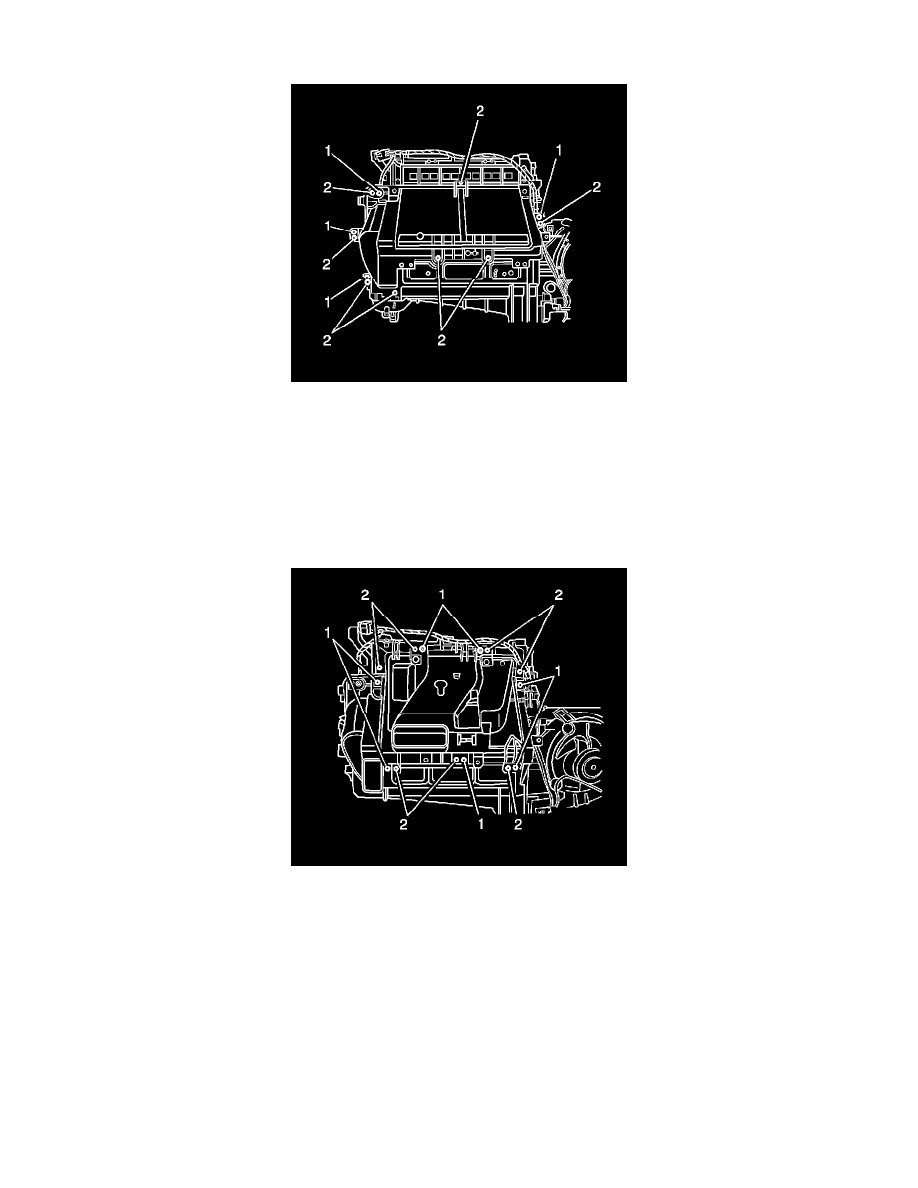
1. From the inside of the heater core cover, drill the dimples adjacent to the heat stakes using a 5.5 mm (7/32 in) drill bit.
2. Install the heater core cover to the HVAC module assembly.
Notice: Refer to Fastener Notice (See: Service Precautions/Vehicle Damage Warnings/Fastener Notice).
3. Install the heater core cover screws (2).
Tighten all screws to 1.5 N.m (13 lb in).
4. From the inside of the heater air outlet cover, drill the dimples adjacent to the heat stakes using a 5.5 N.m (7/32 in) drill bit.
5. Install the heater air outlet cover.
6. Install the heater air outlet cover screws (2)
Tighten the screws to 1.5 N.m (13 lb in).
7. Connect the rear floor air outlet duct to the heater air outlet cover.
8. Install the rear floor air outlet duct to the holes in the floor reinforcement.
9. Install the communication interface module. Refer to Communication Interface Module Replacement (See: Accessories and Optional
Equipment/Cellular Phone/Communications Control Module/Service and Repair).
10. Install the floor carpet. Refer to Front Floor Panel Carpet Replacement (See: Body and Frame/Interior Moulding / Trim/Carpet/Service and Repair
).
11. Install the RH instrument panel closeout/insulator panel. Refer to Instrument Panel Insulator Panel Replacement - Left Side (See: Body and
Frame/Interior Moulding / Trim/Dashboard / Instrument Panel/Service and Repair).
12. Install the LH instrument panel closeout/insulator panel. Refer to Instrument Panel Insulator Panel Replacement - Right Side (See: Body and
Frame/Interior Moulding / Trim/Dashboard / Instrument Panel/Service and Repair).