
LaCrosse FWD V6-3.0L (2010)
11. Remove the camshaft position actuator bolt.
12. Remove the camshaft bearing caps and the camshaft. Refer to Camshaft Removal - Right Side (See: Service and Repair/Overhaul/40. Camshaft
Removal - Right Side).
Installation Procedure
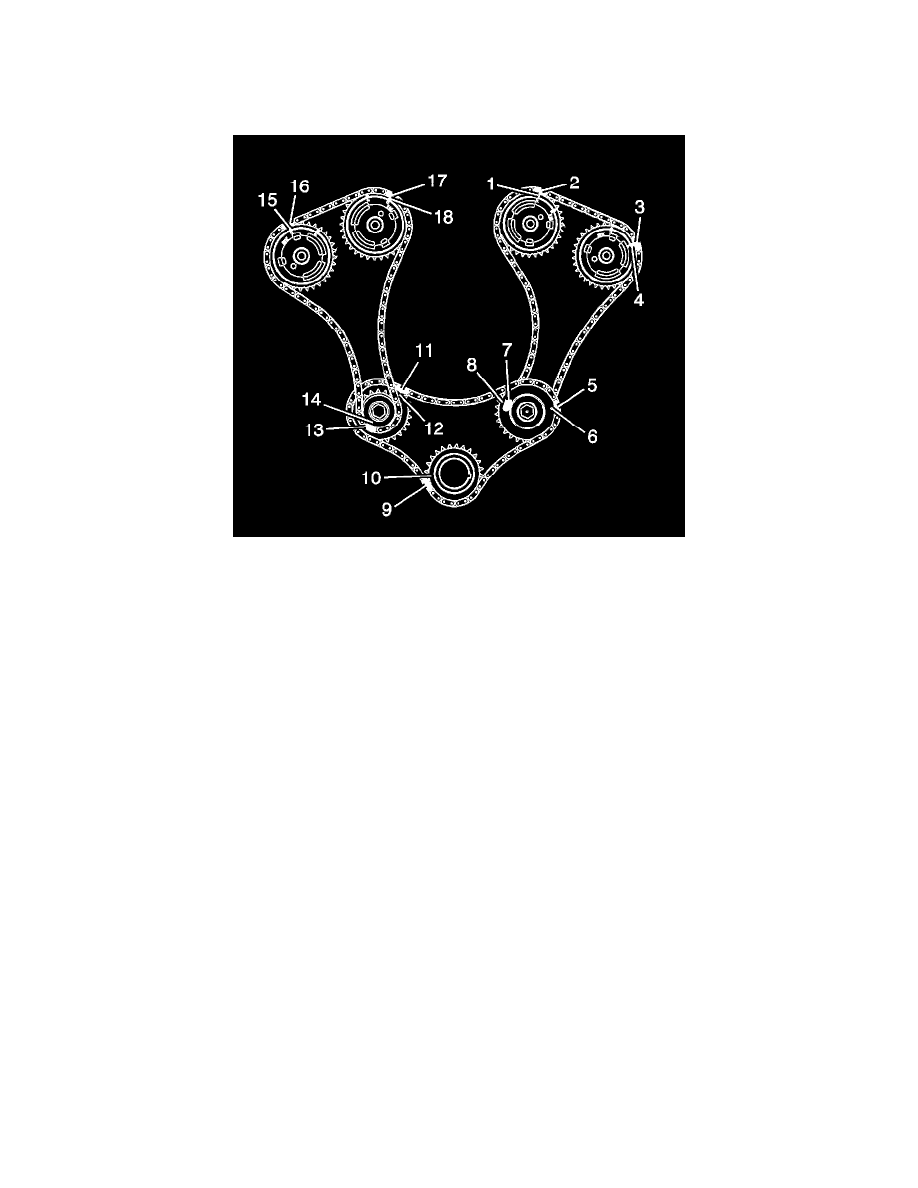
Note:
*
Ensure that the marks on the camshaft position actuators and the timing chain (15-18) are aligned.
*
DO NOT tighten the camshaft position actuator bolt at this time.
1. Locate the camshafts to the cylinder head and assemble the camshaft actuators to the camshafts.
2. Install the camshafts and the camshaft bearing caps. Refer to Camshaft Installation - Right Side (See: Service and Repair/Overhaul/99. Camshaft
Installation - Right Side).
3. Remove the EN-46313 - tool.
4. Install the crankshaft balancer. Refer to Crankshaft Balancer Replacement (See: Cylinder Block Assembly/Harmonic Balancer - Crankshaft
Pulley/Service and Repair).