
LaCrosse FWD V6-3.0L (2010)
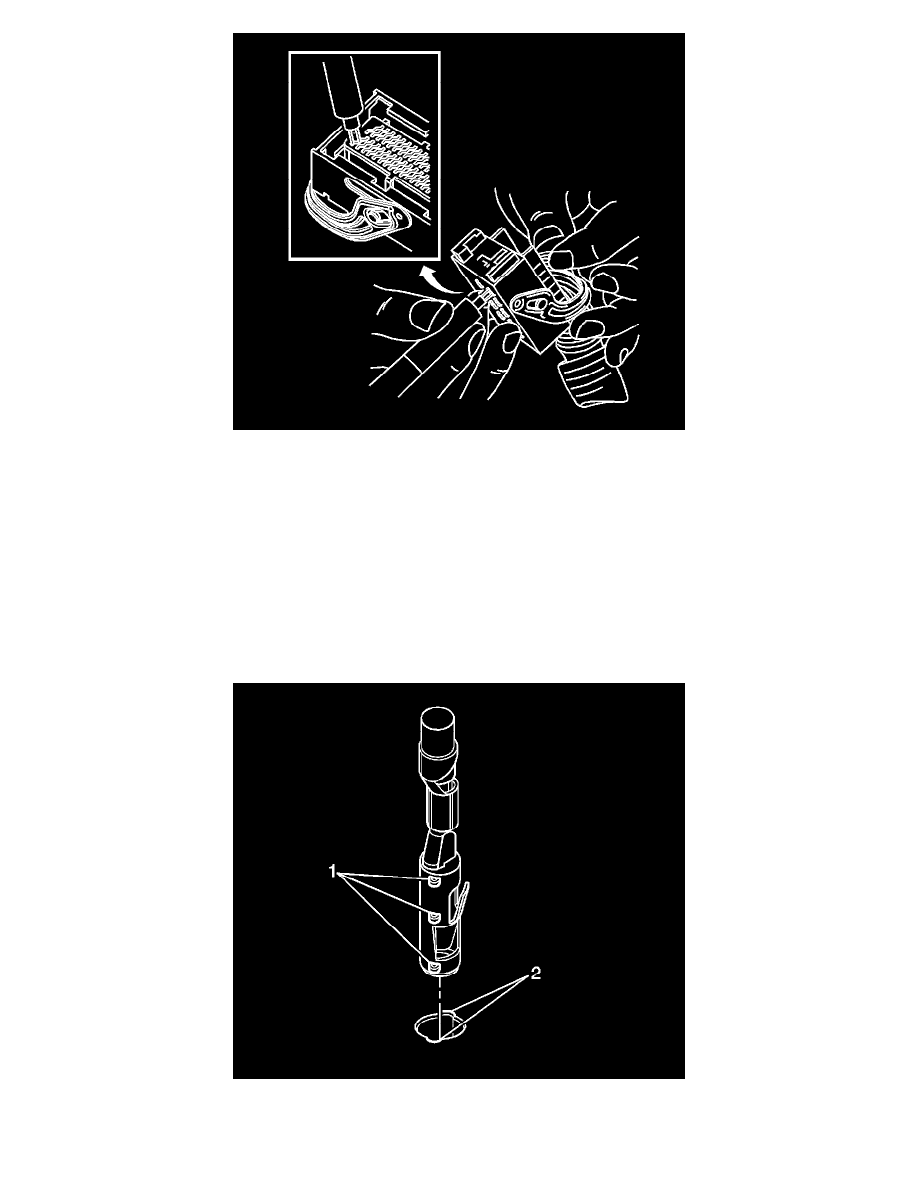
11. Insert the EL-38125-560 into the 2 triangular cavities on each side of the terminal at the front of the connector.
12. Carefully pull the terminal out of the connector. Always remember never use force when pulling a terminal out of a connector. If the terminal is
difficult to remove, repeat the entire procedure.
Terminated Lead Repair
1. Remove the terminal.
2. Find the appropriate terminated lead.
3. Use the appropriate splice sleeves depending on the gauge size.
4. Refer to Splicing Copper Wire Using Splice Sleeves (See: Testing and Inspection/Component Tests and General Diagnostics/Wiring
Repairs/Splicing Copper Wire Using Splice Sleeves).
Terminal Replacement Procedure
1. Prior to installation the terminal must be aligned so the (1) coding lugs align with the (2) coding grooves on the connector.
2. Once the terminal is aligned, slide the terminal into the cavity until the retainer has engaged in the cavity of the connector.
3. Slide the TPA in the connector body and seat it using a small flat bladed tool. The TPA is seated when it is flush with the contact housing.