
LaCrosse FWD V6-3.0L (2010)
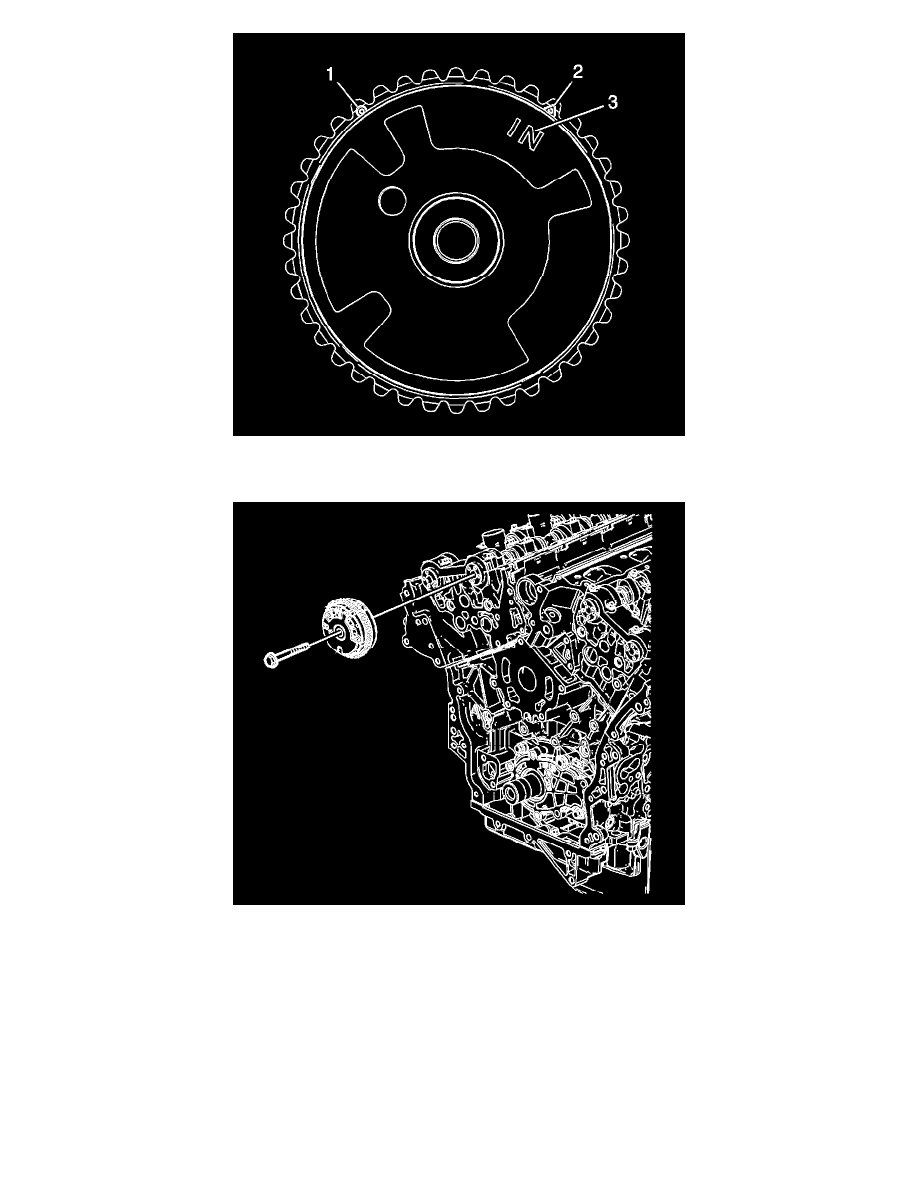
4. Ensure the proper timing mark is used. Observe the outer ring of the camshaft position actuator for the triangle marking (2).
The triangle marking is for alignment to the highlighted timing chain link on the right side of the engine.
5. Locate the intake camshaft position actuator to the camshaft and loosely install the bolt.
Caution: Refer to Fastener Caution (See: Service Precautions/Vehicle Damage Warnings/Fastener Caution).
Note: Use an open-end wrench at the camshaft hex to prevent camshaft/engine rotation.
6. Tighten the camshaft position actuator bolt. Refer to Camshaft Position Actuator Installation - Right Side Intake (See: Service and
Repair/Overhaul/106. Camshaft Position Actuator Installation - Right Side Intake).
7. Install the right exhaust camshaft actuator. Refer to Camshaft Position Actuator Replacement - Bank 1 (Right Side) Exhaust (See: Camshaft
Position Actuator Replacement - Bank 1 (Right Side) Exhaust).