
LeSabre V6-181 3.0L (1986)
1.
Lubricate new O-Ring and O-Ring groove with silicone lubricant and install new O-Ring in groove, Figure 4.
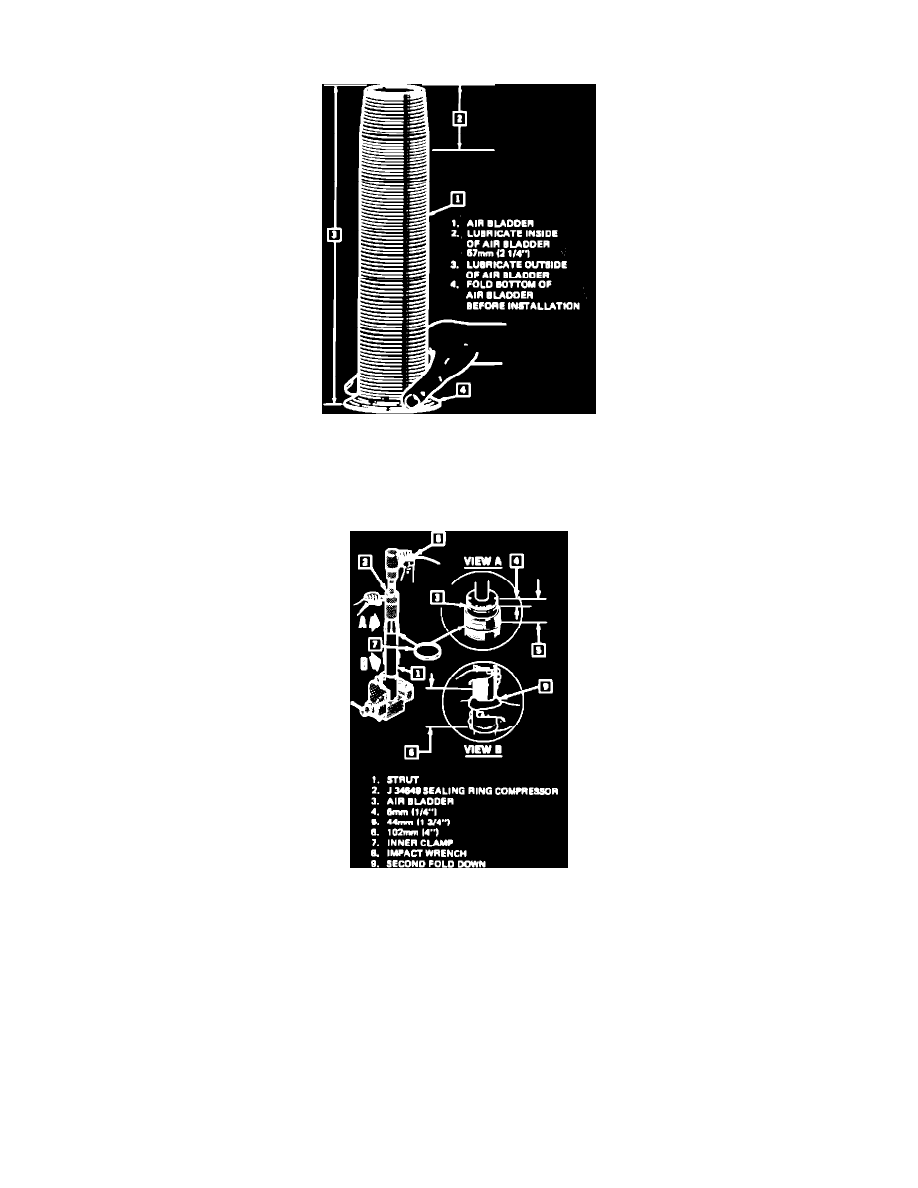
Figure 6 - Lubricating New Air Bladder
2.
Silicone lubricant to inside top of new air bladder and entire outside of air bladder, Figure 6.
3.
Fold Bottom of air bladder before installing on inner tube.
Figure 7 - Installing Inner Clamp
4.
Air bladder over inner tube, continue folding bottom up. Position top of air bladder as indicated in Figure 7.
IMPORTANT:
Do not use tools to fold the air bladder. Use of tools can cause damage to the air bladder, resulting in leaks.
5.
Inner clamp to top of air bladder at specified dimension, Figure 7.
6.
Tighten inner clamp with J-34649.
7.
Fold bottom of air bladder up and fold top of 102 mm (4") section down.
8.
Apply silicone lubricant to polished diameter of inner tube shaft.
9.
Outer tube over air bladder and push down against folded portion of air bladder.