
LeSabre V6-3.8L VIN K (1996)
5.
Rub hands across trim in seating area to smooth out any remaining wrinkle.
6.
If necessary, detach Velcro(R) attachments on trim which run along the seam where the patterned fabric and unpatterned fabric meet, and reattach
to help smooth out any remaining wrinkle (this is most easily done while J-channel is detached).
7.
Hog ring front J-channel permanently to wire in four places.
8.
Install seat assembly.
Procedure B
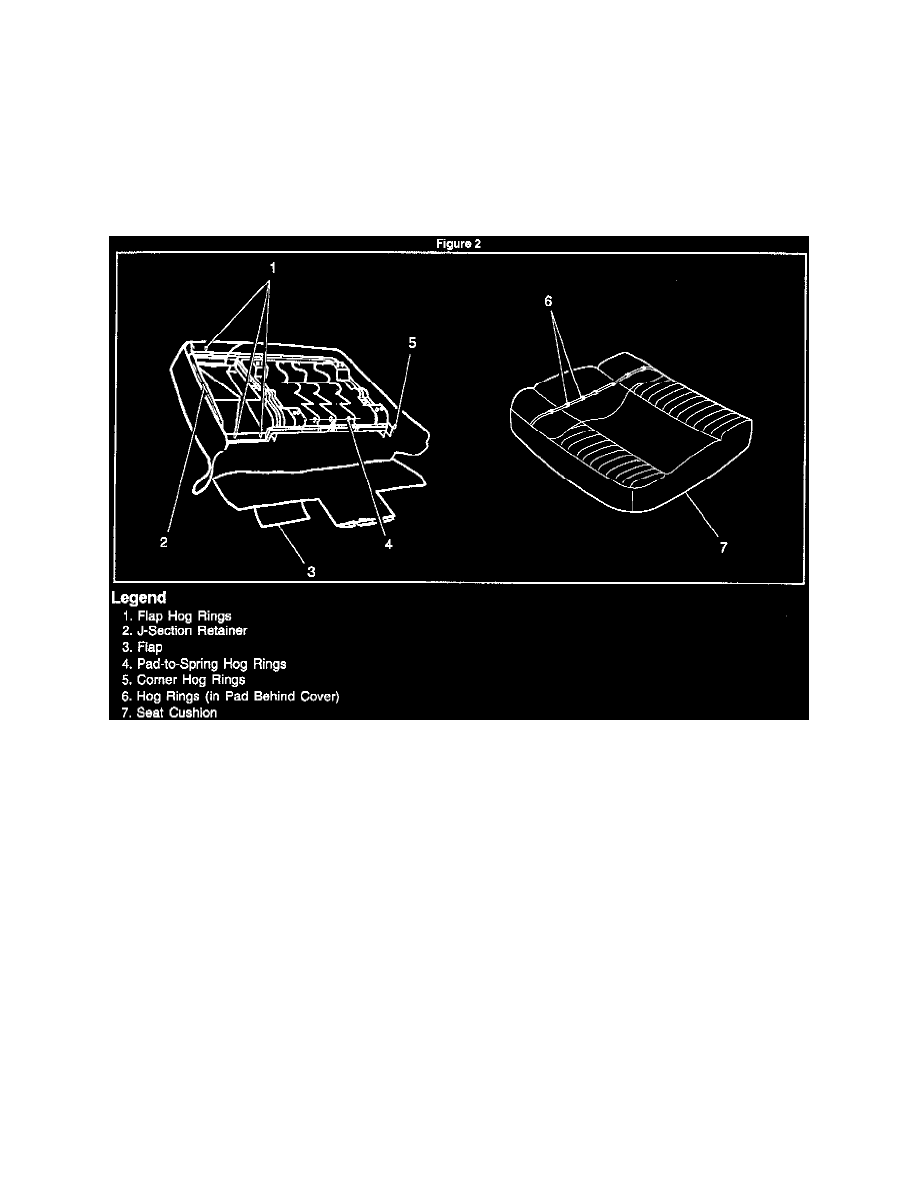
See Figure 2.
1.
Remove seat from vehicle, refer to Section 10-10 of the Service Manual.
2.
With entire seat upside down, detach both rear trim attaching flaps (gray in color),
3.
Pull second flap out from under seat frame and reattach with new hog rings just as it was, but with flap over the frame.
Important:
Do not over-stretch the trim; this can cause additional appearance issues.
4.
Reinstall first flap.
5.
Install seat assembly.
Warranty Information