
Lucerne V8-4.6L (2008)
Important: DO NOT loosen the front and rear frame-to-body bolts on the right side.
25. Loosen, but do not remove, the right center frame-to-body bolt.
Important: Ensure that all pipes, hoses and wires are clear and not being bound or stressed when lowering the frame.
26. Lower the left side of the frame.
27. Lower the vehicle enough to gain access to the engine support fixture.
28. Using the engine support fixture, lower the transaxle.
29. Raise the vehicle.
30. Position an oil drain pan under the left side of the transaxle.
31. Remove the left drive axle from the transaxle. Refer to Wheel Drive Shaft Replacement (See: Drive Axles, Bearings and Joints/Axle Shaft
Assembly/Service and Repair).
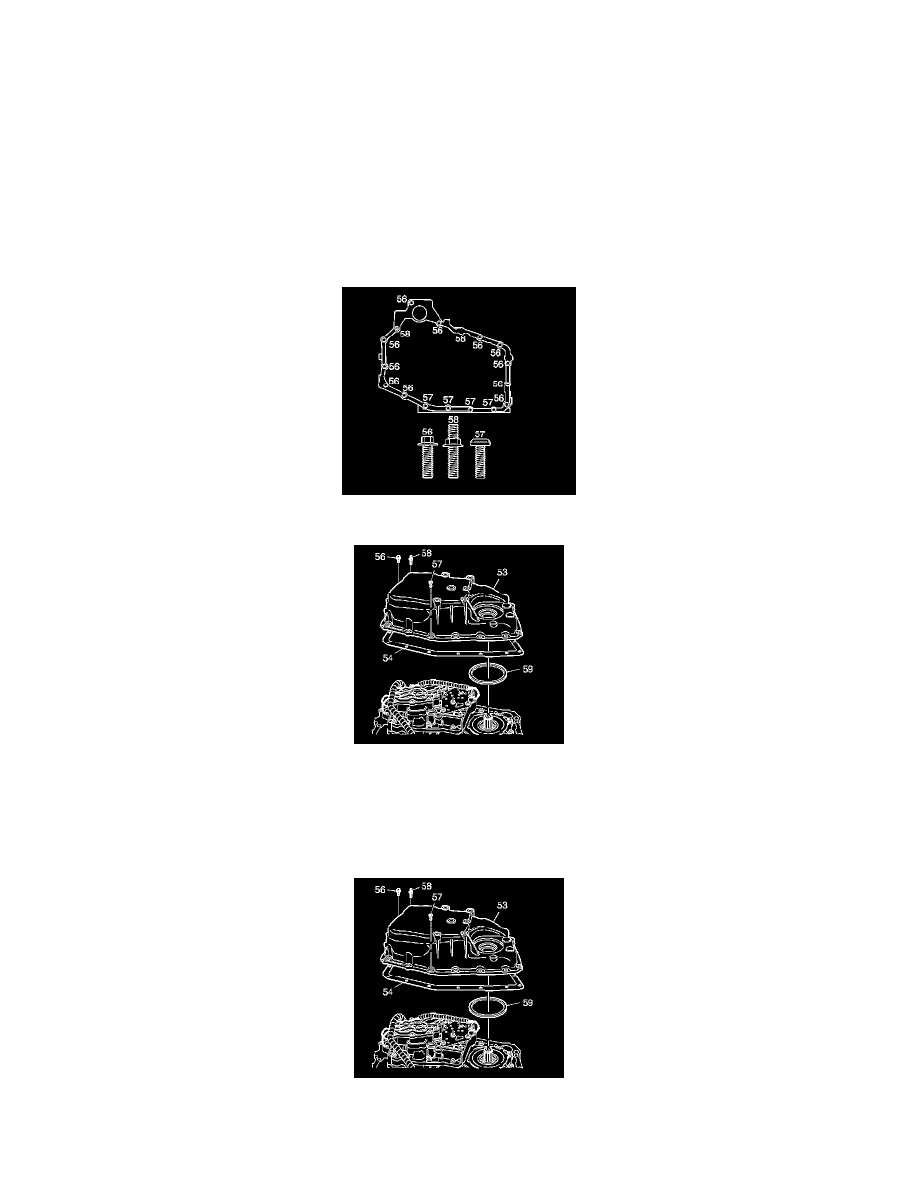
32. Remove the case side cover bolts.
33. Remove the case side cover (53).
34. If replacing the side cover, remove the transmission mount bracket. Refer to Transmission Mount Bracket Replacement - Left Side (See:
Transmission Mount/Service and Repair/4T65-E - Automatic Transaxle/Transmission Mount Bracket Replacement - Left Side).
35. Clean the case and side cover gasket surfaces.
Installation Procedure
1. Assemble the case side cover inner gasket (59) to the case side cover (53). Use J 36850 on the seal surfaces.
2. Install the case side cover gasket (54) and case side cover (53) onto the case. Make sure the gaskets and electrical connector are positioned
correctly.