
Park Avenue V6-231 3.8L VIN L SFI (1993)
3. Remove connecting rod cap bolts and remove caps. Push connecting rods away from crankshaft.
4. Remove each piston and rod assembly from block and reinstall the appropriate rod cap to the assembly.
NOTICE: Do not mix the rod caps with other rods.
5. Remove the piston rings by expanding them and sliding them off pistons.
CAUTION: Take care when removing piston rings as worn rings may have sharp edges.
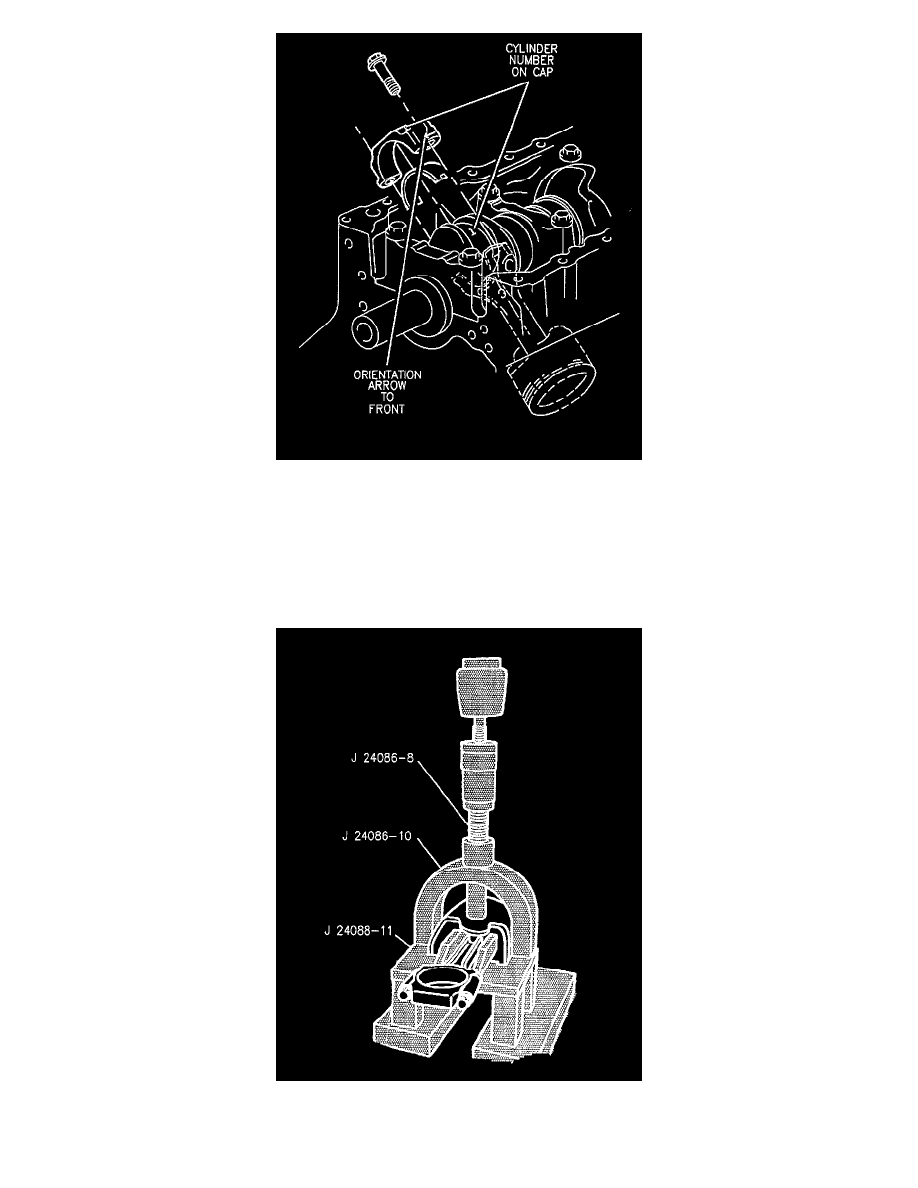
6. Place the piston and connecting rod assembly into fixture J 24086 and press out the piston pin. This applies to non-supercharged engines only. See
Steps 7 and 8 for supercharged engine piston pin removal.