
Park Avenue Ultra V6-3.8L SC VIN 1 (1991)
2.
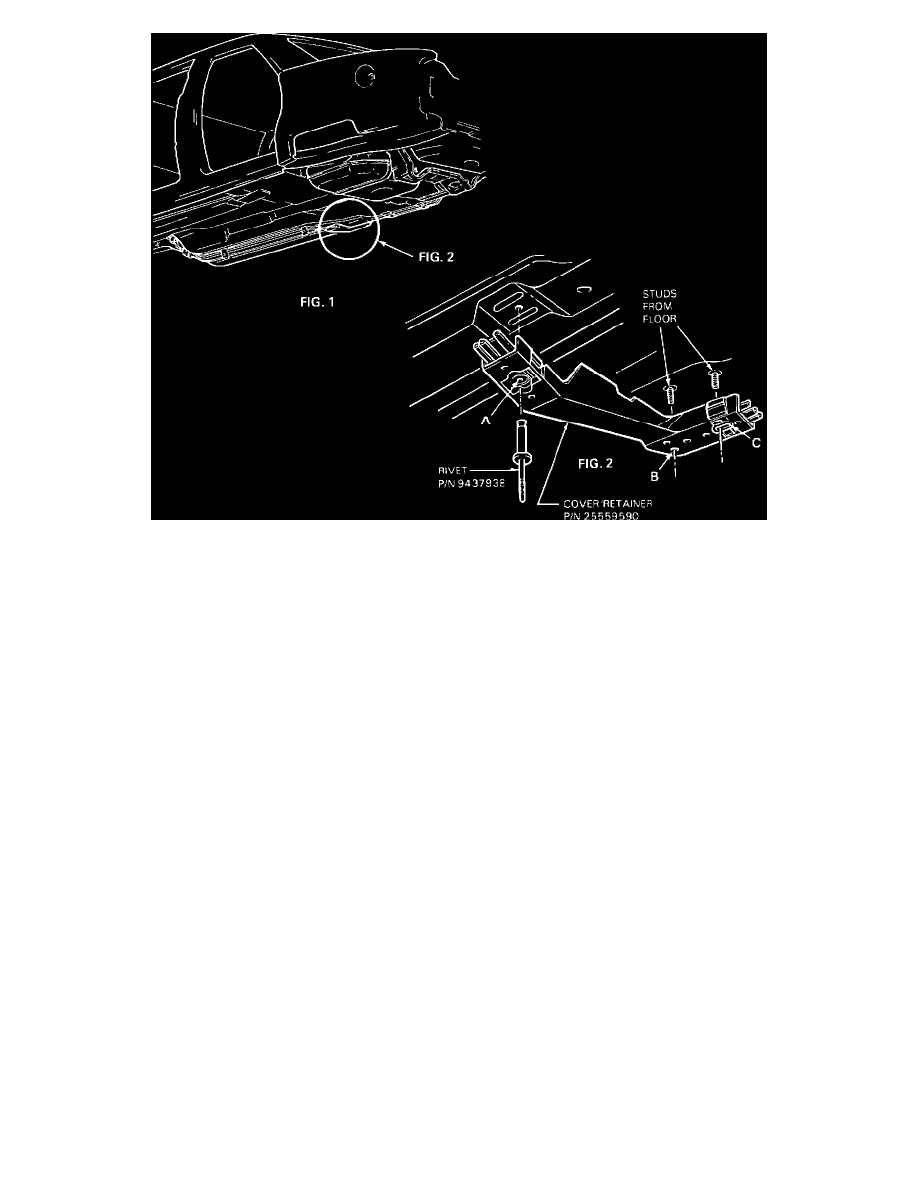
Position the cover/retainer on the floor pan as shown in Figure 1. With a scribe or marker, locate position "B" on the floor pan.
3.
Remove the required interior trim to allow a 5/16" (8 mm) hole to be drilled through the floor at position "B".
4.
Install, P/N 11504330, bolt from inside the vehicle. Coat the underside of the bolt head with sealant, P/N 12345743, or equivalent, to prevent
water from getting into the passenger compartment.
5.
Coat the bolt where it passes to the underside of the floor pan with sealant. Install hex nut, P/N 11501085, and torque to 10-20 N-m (10 lb.ft.).
6.
Snap the cover/retainer over the studs at positions B and C.
7.
Install the rivet, P/N 9437938, at position "A" as shown in the illustration.
Population 2:
Park Avenue/Ultra - M1611201 through M1667943
A cover/retainer may be added by ordering cover/retainer, Part Number 25559590, and rivet, Part Number 9437938 which can be attached to present
studs at positions B and C.
SERVICE PROCEDURE:
1.
Remove the retainer clips as currently installed. See Figure 2.
2.
Snap the cover/retainer over the studs at position B and C.
3.
Install the cover/retainer as shown in Figure 1. Install rivet, Part Number 9437938, at Position "A" as shown in the illustration.
Population 3:
1991 Park Avenue/Ultra - M1667944 through M1708668
1992 LeSabre - NH400021 through NH402434
These vehicles were built with a cover/retainer and a plastic push pin at position "A".
SERVICE PROCEDURE:
1.
Remove the plastic push pin at position "A". See Figure 2.