Rainier AWD L6-4.2L (2007)

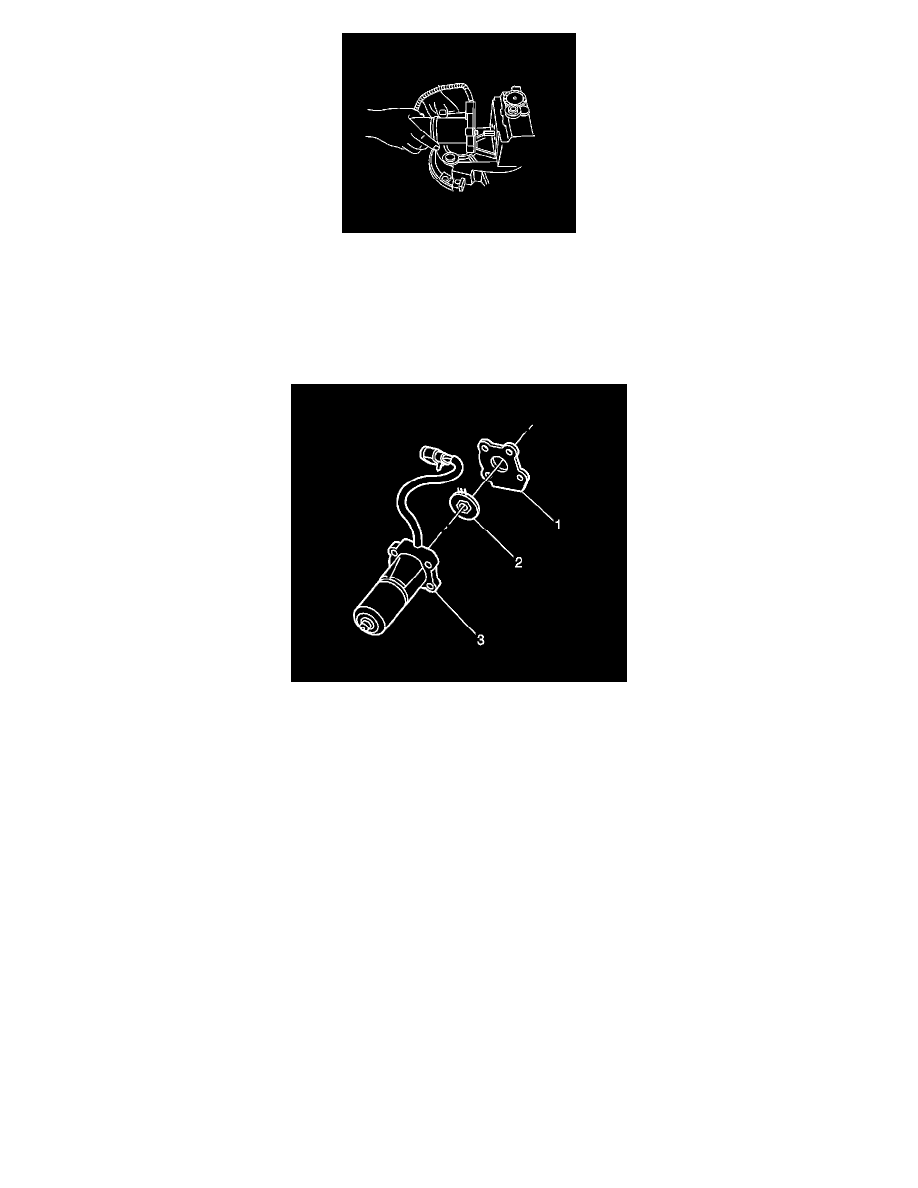
5. Remove the motor/encoder assembly.
Important: When replacing the encoder rotary position sensor follow steps (6-10). The rotary position sensor is circular with 3 contacts
on one side and is positioned behind the motor/encoder baseplate/gasket. The rotary position sensor replacement kit consists of a rotary
position sensor, baseplate/gasket, and detailed instruction sheet.
6. Position the motor on a work bench.
7. Release the 4 tabs that retain the motor/encoder plastic baseplate and remove the baseplate/gasket (1).
8. Discard the old baseplate/gasket, replacement baseplate/gasket provided in rotary position sensor kit.
Important: The motor/encoder rotary position sensor internal wires go to a connector within the motor housing. This internal wire
connector does not have a locking tab and is easily disturbed.
9. Gently lift the motor/encoder rotary position sensor (2) from the motor shaft.
10. Disconnect the rotary position sensor (2) from the wiring harness.
Important: Look at the motor/encoder housing (1) where the rotary position sensor was removed from. Take note of the "Hex"; in the
housing where the new sensor will seat when properly installed.
Installation Procedure
Important: Provided the rotary position sensor was removed, follow steps (1-5) to install the sensor, otherwise proceed to step 6 installing
the motor/encoder to the transfer case.
1. Connect the wiring harness to the rotary position sensor.
2. Gently insert a suitable tool along side the internal wires and press down on the internal wire connector to insure the connector is fully installed.
