
Rainier AWD L6-4.2L VIN S (2005)
Assemble the arbor, forcing screw, attaching bolts and socket. Refer to the illustration titled, Special Installation Tool Assembly Needed. Install the tool
press assembly to the end of the crankshaft flange and position the socket and service cup plug into the bore of the crankshaft flange. Refer to the above
illustration for proper tool set up before pressing the cup plug into the end of the crankshaft.
The forcing screw will fit inside an 18 MM or 19 MM end of the impact style socket with the 1/2" drive side of the socket facing the service cup plug.
The forcing screw should bottom on the 15 MM step inside the socket. Refer to the above illustrations on 1/2" drive impact style socket dimensions.
Hand tighten the forcing screw into the socket, making sure that it is centered on the service cup plug.
Mark the forcing screw and arbor for reference, then tighten the forcing screw two complete turns and an additional 90 degrees or 1/4 turn more.
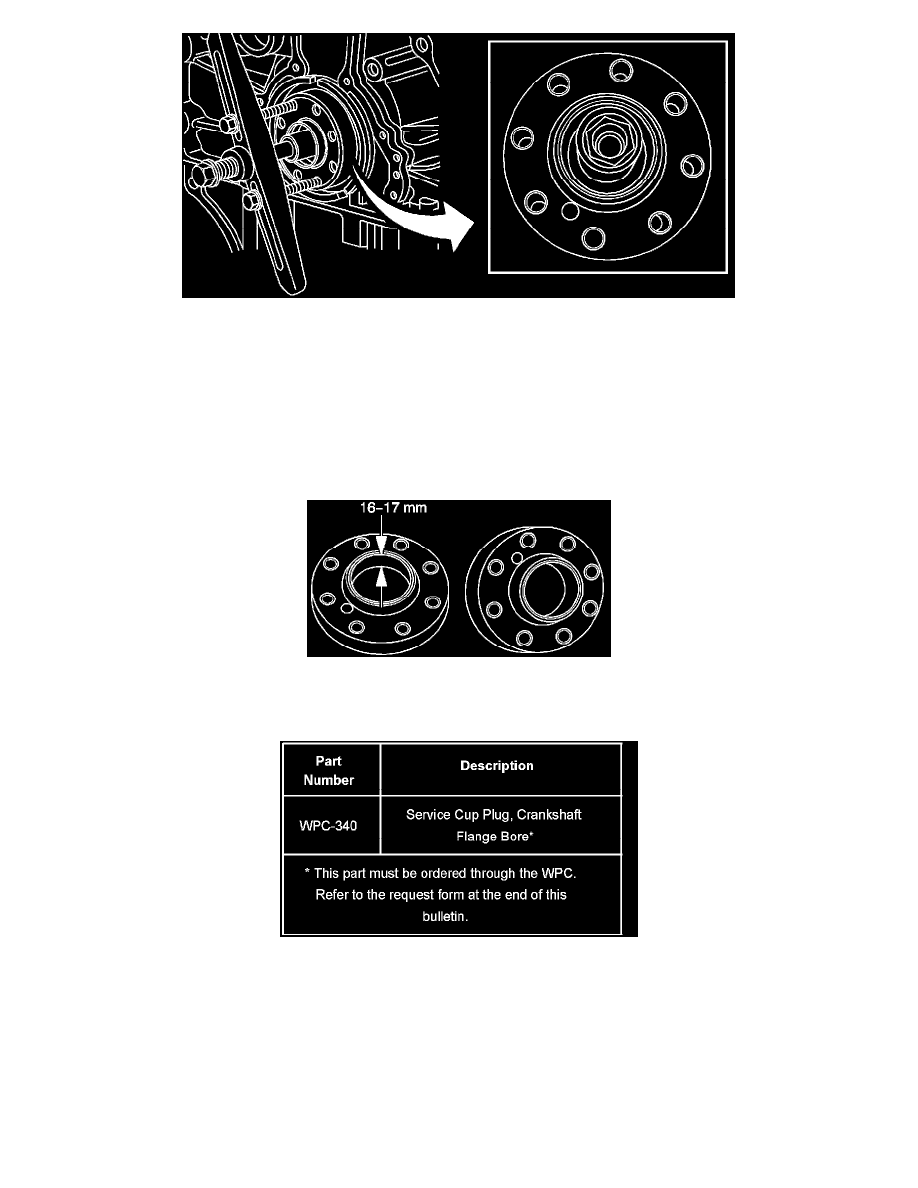
When completed, remove the installation tool assembly and confirm the installation depth of the service cup plug. Place a straight edge across the center
of the crankshaft flange as the measurement point. Measure from the straight edge to the center of the installed cup plug. The depth of the installed cup
plug should be 16-17 mm (0.63-0.67 in). Refer to the above illustration to confirm the installed depth.
Parts Information
Warranty Information (excluding Saab U.S. Models)