
Rainier AWD L6-4.2L VIN S (2005)
Housing Assembly HVAC: Service and Repair
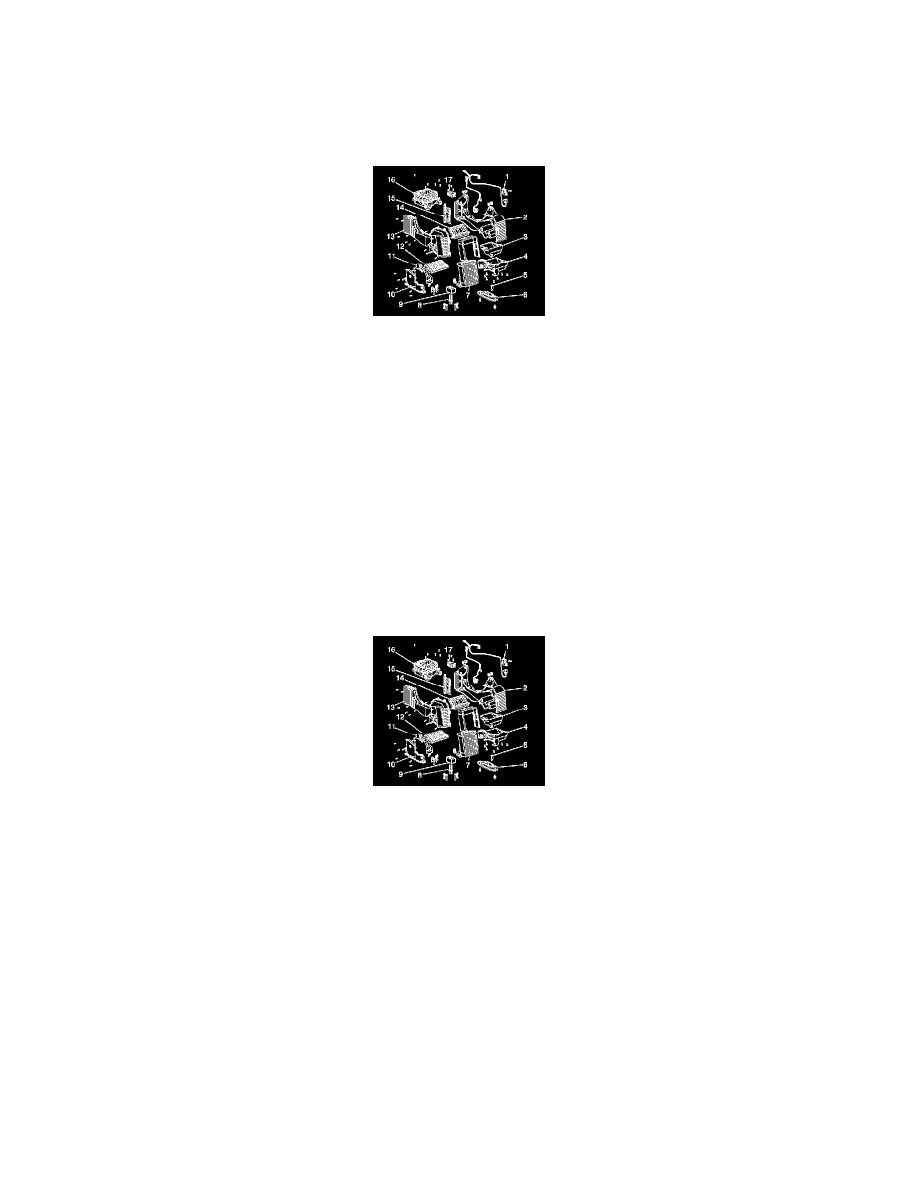
HVAC Module Case - Auxiliary
HVAC MODULE CASE REPLACEMENT - AUXILIARY
REMOVAL PROCEDURE
1. Remove the HVAC module-auxiliary.
2. Remove the screws from the blower motor-auxiliary.
3. Remove the blower motor-auxiliary.
4. Disconnect the electrical connectors.
5. Remove the evaporator core-auxiliary.
6. Remove the screws from the air temperature actuator-auxiliary.
7. Remove the air temperature actuator-auxiliary.
8. Disconnect the electrical connector.
9. Remove the screws from the mode actuator-auxiliary.
10. Remove the mode actuator-auxiliary.
11. Disconnect the electrical connector.
12. Remove all of the screws from the HVAC module-auxiliary.
13. Separate the HVAC module-auxiliary case halves (2,13).
14. Remove the mode door (15) from the HVAC module-auxiliary case half (2).
15. Remove the air temperature door (14) from the HVAC module-auxiliary case half (2).
INSTALLATION PROCEDURE
1. Transfer the air temperature door (14) to the HVAC module-auxiliary case half (2).
2. Transfer the mode door (15) to the HVAC module-auxiliary case half (2).
3. Assemble the HVAC module-auxiliary case halves (2,13).
4. Install all of the screws to the HVAC module-auxiliary.
Tighten the screws to 2 N.m (18 lb in).
NOTE: Refer to Fastener Notice in Service Precautions.
5. Install the mode actuator-auxiliary.
6. Install the mode actuator-auxiliary screws.
Tighten the screws to 2 N.m (18 lb in).
7. Install the air temperature actuator-auxiliary.
8. Install the air temperature actuator-auxiliary screws.
Tighten the screws to 2 N.m (18 lb in).
9. Install the evaporator core-auxiliary.
10. Install the blower motor-auxiliary.