
Rainier AWD L6-4.2L VIN S (2005)
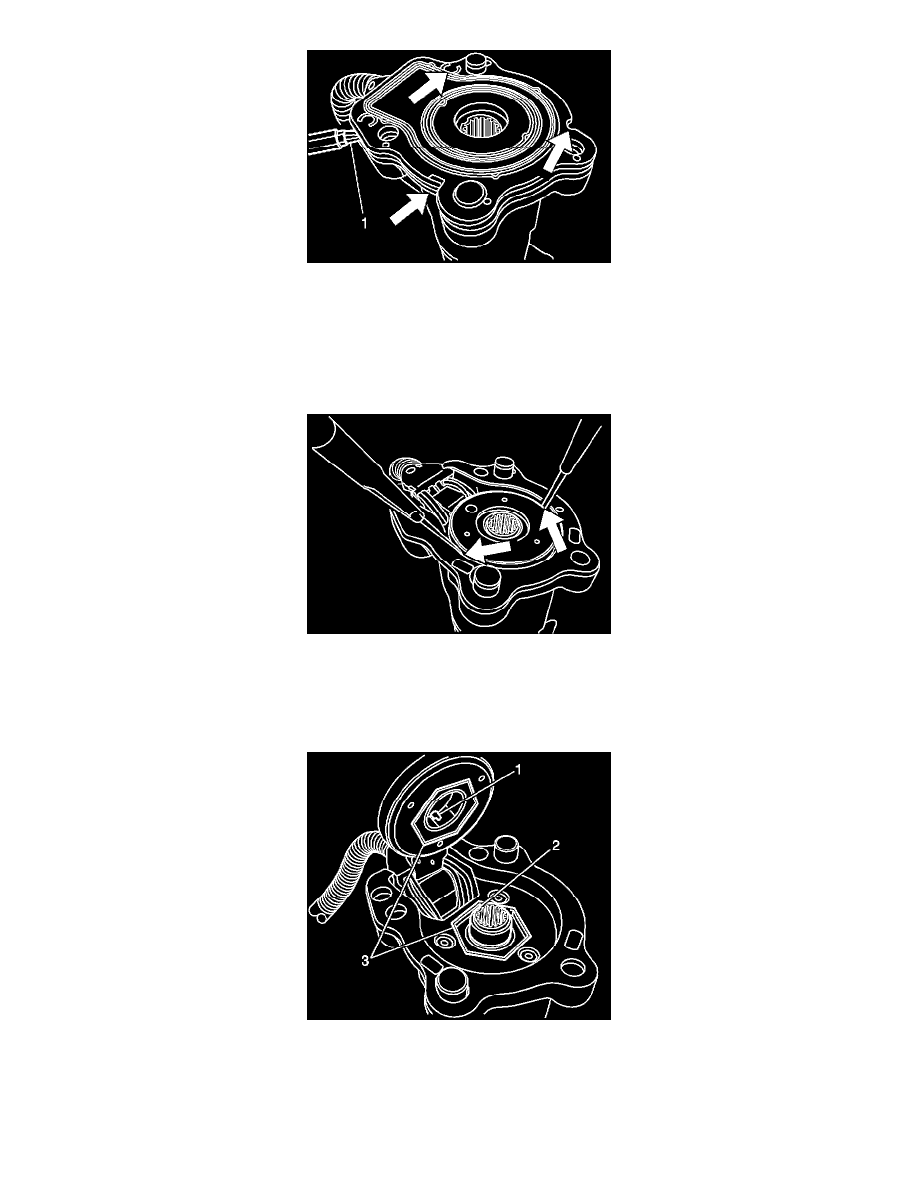
5.1.
Push out the two "single" locking tabs (two lower arrows in illustration above) located on the underside of the housing (motor end).
5.2.
At the other end of the gasket/cover plate, place a flathead screwdriver tip (1) between the gasket/cover plate and the motor housing near the
"dual" locking tabs. Twist the screwdriver clockwise/counterclockwise at both sides until the locking tabs break and the gasket/cover plate
comes off.
5.3.
Discard the gasket/cover plate.
6.
Avoiding the wire connection, take two small flathead screwdrivers (one on each side of the encoder) and rock the encoder sensor out using light
pressure on each screwdriver.
7.
Gently remove the encoder sensor from the wire harness connector. Pry these apart by inserting a small flathead screwdriver between the terminals
and the harness connector. Verify that no damage or corrosion exists on either male encoder terminals or female wiring harness terminals.
8.
Install the new encoder sensor by connecting to the harness and then gently sliding the encoder sensor over the motor shaft. The hex feature (3) on
the encoder should face down toward the motor housing. Make sure the tab (1) on the encoder mates with the notch (2) on the shaft. If the encoder
tab is not aligned with the output shaft, rotate the encoder inner ring by hand to mate properly. Press the encoder fully onto the shaft and into the
housing.