
Regal V6-173 2.8L (1988)
Brake Lamp: All Technical Service Bulletins
Service Procedure
SERVICE PROCEDURE
NOTICE:
All Dealers are being sent an instructional video tape on the Stoplamp Switch Setting Procedure in connection with Buick Product Campaign 90-C-8.
Please be sure to view this video tape before performing the procedure below.
STOPLAMP SWITCH REMOVAL AND INSTALLATION
1.
Remove air cleaner assembly and disconnect negative battery cable.
2.
Remove left side insulator panel and slide steering shaft protective sleeve towards the cowl.
3.
Remove air distribution tube and pull down.
4.
Remove retainer clip holding stoplamp switch to column bracket.
5.
Disconnect switch arm from pedal by pushing arm over and off brake pedal pin. Release switch by pulling down and releasing top snap clip.
6.
Disconnect connector position assurance (CPA) locking pins from four wire and two wire electrical connectors. (Two wire connector not present
on vehicles without cruise control feature).
7.
Disconnect four wire and two wire connectors.
8.
Remove brake stoplamp switch assembly.
9.
If vehicle is equipped with cruise control, connect two wire connector and CPA locking pin to new switch assembly.
10.
Install new switch assembly by pushing switch up until seated into top snap clip. Do not attach switch arm to pin on brake pedal at this time.
NOTICE:
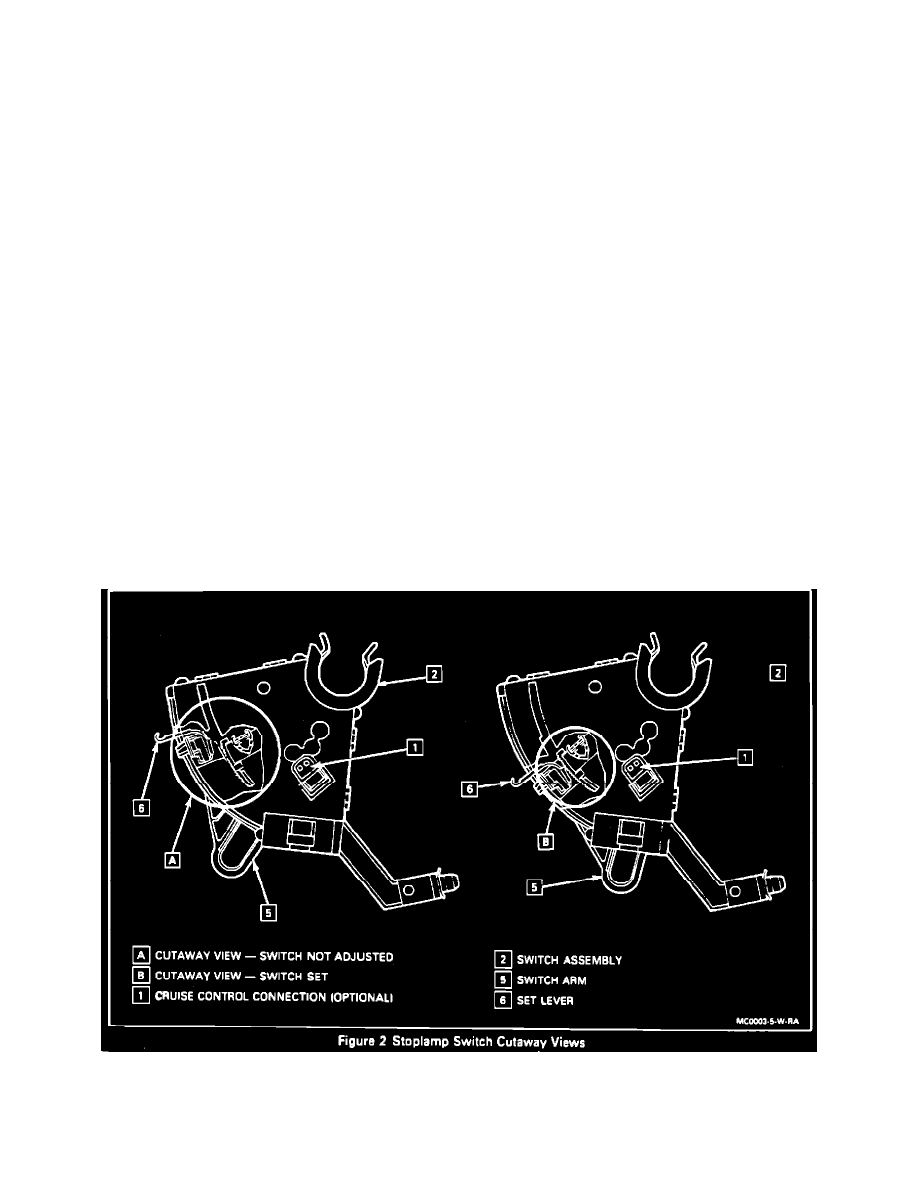
Make sure brake switch is not adjusted (metal clip on actuator is not engaged with the serrations on the bottom of the carrier) as shown in Figure
2.