
Regal V6-191 3.1L (1991)
Brake Master Cylinder: Service and Repair
Reservoir Cover, Hose & Reservoir Assembly
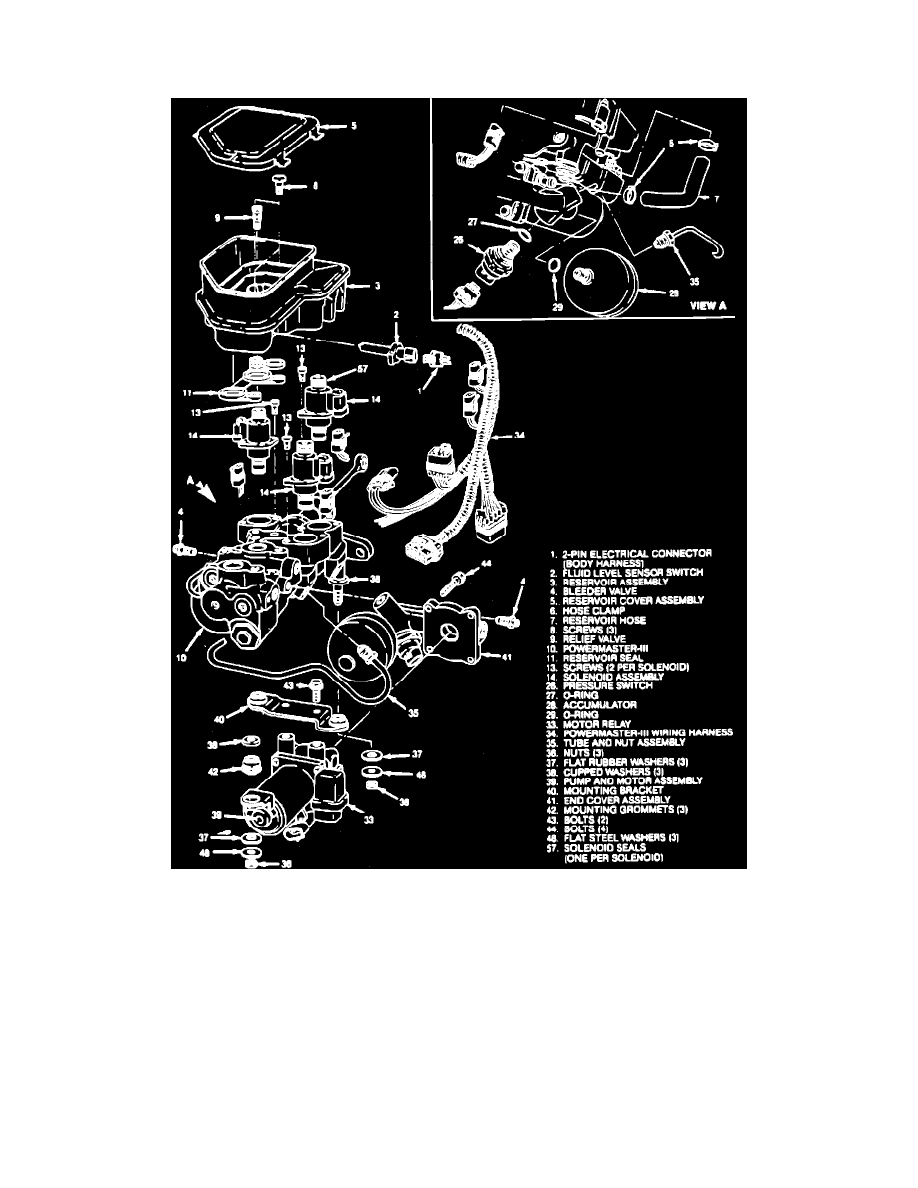
Fig. 75 Powermaster III, Exploded View
Clean reservoir cover assembly (5) and surrounding area before removing, Fig. 75.
1.
Depressurize Powermaster III, refer to MAINTENANCE PROCEDURE/DEPRESSURIZING POWERMASTER III.
2.
Unsnap reservoir cover assembly, then remove from reservoir (3).
3.
Inspect reservoir cover assembly for cuts, cracks, nicks and deformation. Replace any damaged parts.
4.
Remove fluid level sensor switch, as described in FLUID LEVEL SENSOR SWITCH.
5.
To gain access, loosen but do not remove cowl bracket attaching nuts, then pull Powermaster III forward slightly.
6.
Use a clean syringe to remove as much brake fluid from reservoir as possible. Brake fluid will cause damage to all painted surfaces.
7.
Cover electrical connectors and engine/body parts with clean shop towels to catch any brake fluid dripped from reservoir. Use a suitable container
to catch brake fluid when upper end reservoir hose is disconnected from reservoir.
8.
Remove upper hose clamp, then disconnect hose from reservoir. Discard all used brake fluid. Never reuse brake fluid.
9.
Remove reservoir assembly from Powermaster III unit, then lift rear of reservoir assembly up and carefully pull away from under secondary dash.
Use caution as to not damage solenoids or solenoid seals when removing reservoir.
10.
Remove reservoir seal. This seal may remain attached to reservoir assembly.