
Regal V6-191 3.1L (1991)
Oil Pan: Service and Repair
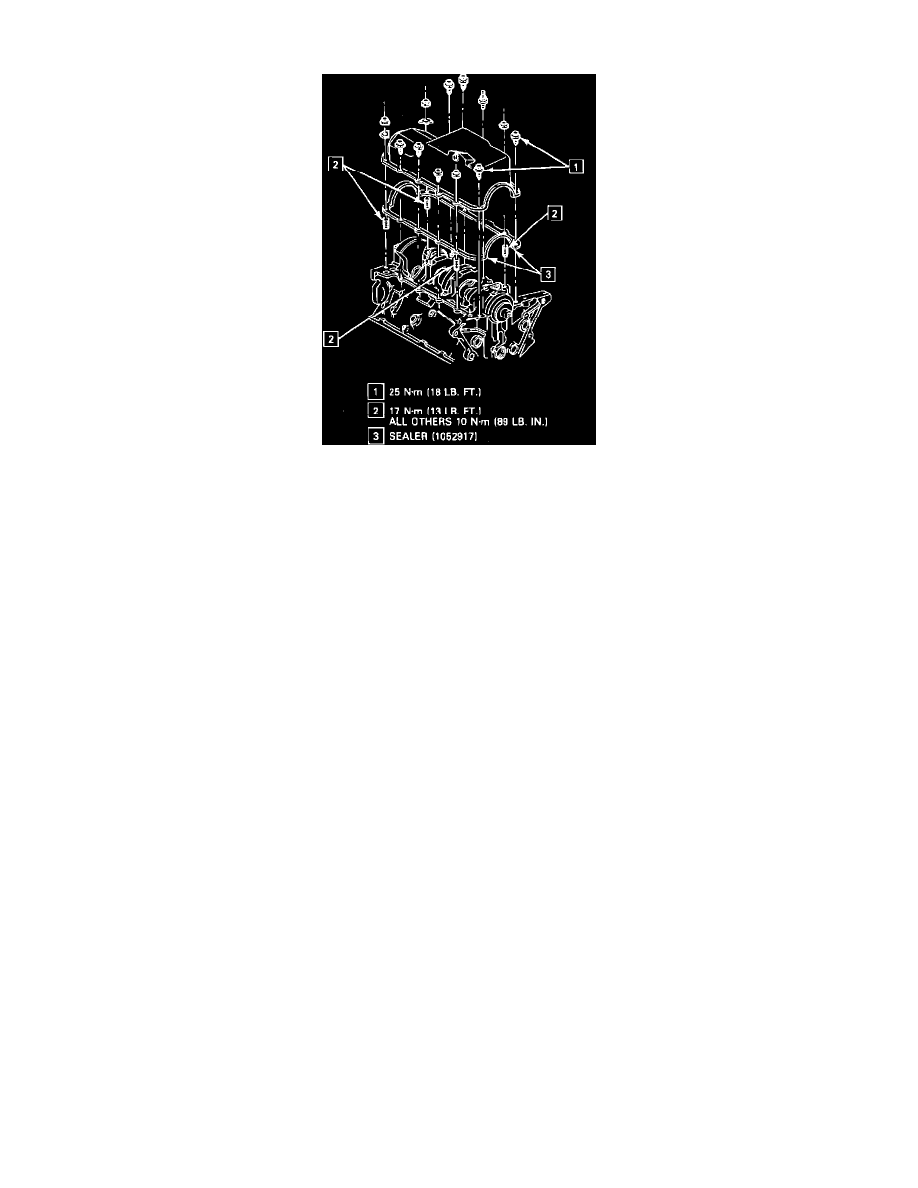
Fig. 10 Installing Oil Pan
1.
Disconnect battery ground cable, then remove serpentine drive belt cover, drive belt and belt tensioner.
2.
Using engine support fixture tool No. J-28467 or equivalent, and an extra support leg, support engine.
3.
Raise and support vehicle, then drain engine oil.
4.
Remove right wheel and tire assembly, then the right splash shield.
5.
Remove steering gear pinch bolt, then the transaxle mount retaining nuts. Failure to disconnect intermediate shaft from rack and pinion stub
shaft may cause damage to steering gear and/or intermediate shaft. This damage may cause loss of steering control.
6.
Remove engine to cradle mount retaining nuts.
7.
Remove front engine horse collar bracket from block.
8.
Remove outboard flywheel/starter plastic shield, then the inboard flywheel metal shield.
9.
Detach starter and allow to hang from body.
10.
Place jack under cradle front center crossmember.
11.
Loosen rear cradle bolts. Do not remove.
12.
Remove front cradle bolts and lower front of cradle.
13.
On 1991-92 models, disconnect DIS sensor wire.
14.
On all models, remove eight oil pan retaining bolts and four oil pan retaining nuts, then the oil pan.
15.
Reverse procedure to install, noting the following:
a. Clean oil pan flanges, oil pan rail, front cover, rear main bearing cap and the threaded holes.
b. Use new gasket.
c. Apply suitable sealant as shown and torque nuts and bolts to specification, Fig. 10.