
Regal V6-191 3.1L (1991)
3.
Remove intake manifold plenum, see INTAKE MANIFOLD PLENUM.
4.
Remove the fuel rail assembly, see FUEL RAIL ASSEMBLY.
5.
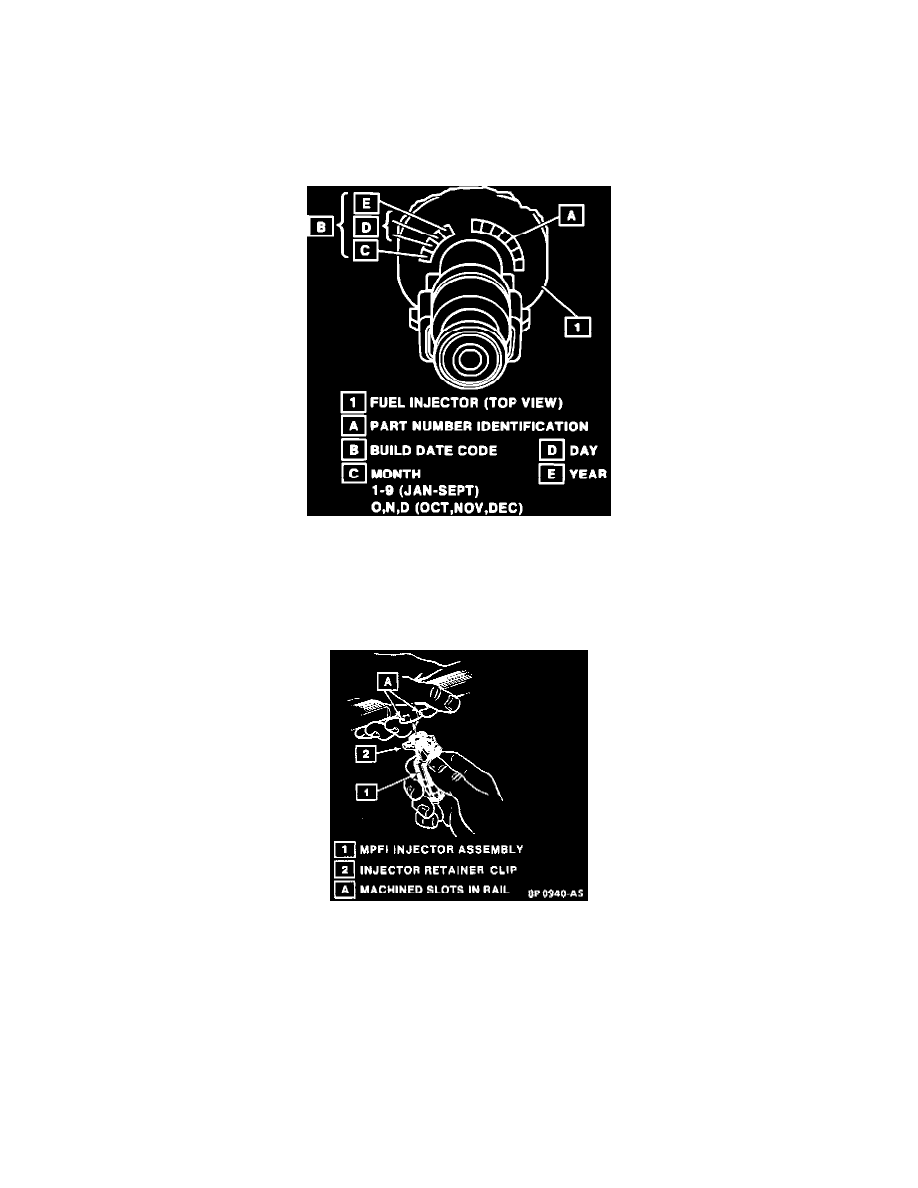
Remove the injector retainer clip and discard.
6.
Remove the MPFI injector assembly.
7.
Remove the O-ring seals from both ends of the injector, and discard.
NOTE: Different injectors are calibrated for different flow rates. When ordering new fuel injectors, be sure to order the identical part number
that is inscribed on the old injector.
Injector Part Number Location
INSTALLATION:
1.
Lubricate new O-ring seals with clean engine oil, and install on each injector assembly.
2.
Position the new injector retainer clips on the injector assembly. Position the open end of the clip facing the injector electrical connector.
Injector Installation
3.
Insert the injector assembly into the fuel rail injector socket with the electrical connectors facing outward. Push in far enough to engage the
retainer clip with the machined slots on the rail socket.
4.
Install the fuel rail assembly.
5.
Check for fuel leaks:
a.
Temporarily connect the negative battery cable.
b.
With the engine OFF and ignition ON, check for fuel leaks.
c.
Disconnect the negative battery cable.
6.
Install the intake manifold intake plenum.
7.
Connect the negative battery cable.
IDLE LEARN PROCEDURE: Any time the battery is disconnected, the programmed position of the IAC valve pintle is lost, and replaced with a