
Regal V6-231 3.8L Turbo VIN 7 FI (1986)
Timing Cover: Service and Repair
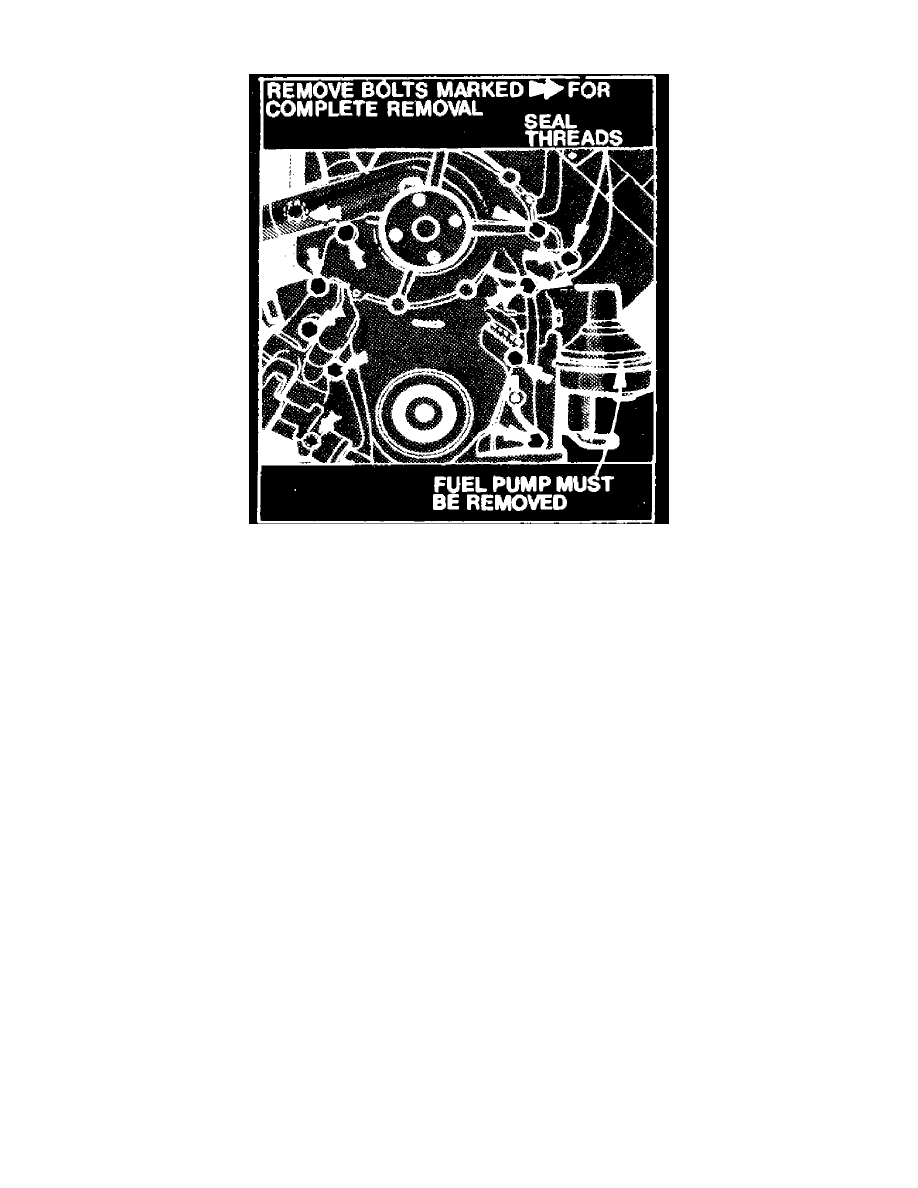
Fig. 9 Timing chain cover installation. V6-231 & 252
V6-231 & 252
1.
Drain cooling system and remove radiator and heater return hose.
2.
Remove fan, pulleys and belts.
3.
Remove crankshaft pulley and balancer.
4.
If equipped with power steering, remove any pump bracket bolts attached to timing chain cover and loosen and remove any other bolts necessary
that will allow pump and brackets to be positioned aside.
5.
Remove fuel pump.
6.
Remove alternator and brackets.
7.
Remove distributor cap and pull spark plug wire retainers off brackets on rocker arm cover. Swing distributor cap with wires attached aside.
8.
Disconnect distributor wiring, then remove distributor. If chain and sprockets are not to be disturbed, note position of distributor rotor for
installation in the same position.
9.
Loosen and slide clamp on thermostat bypass hose rearward.
10.
Remove bolts attaching chain cover to block.
11.
Remove two oil pan-to-chain cover bolts and remove cover.
12.
Reverse procedure to install, noting data shown in Fig. 9. Remove the oil pump cover and pack the space around the oil pump gears completely
full of Vaseline. There must be no air space left inside the pump. Reinstall the cover using a new gasket. This step is very important as the oil
pump may lose its prime whenever the pump, pump cover or timing chain cover is disturbed. If the pump is not packed it may not begin to pump
oil as soon as the engine is started.