
Regal V6-231 3.8L Turbo VIN 8 4-bbl (1983)
Ignition Control Module: Service and Repair
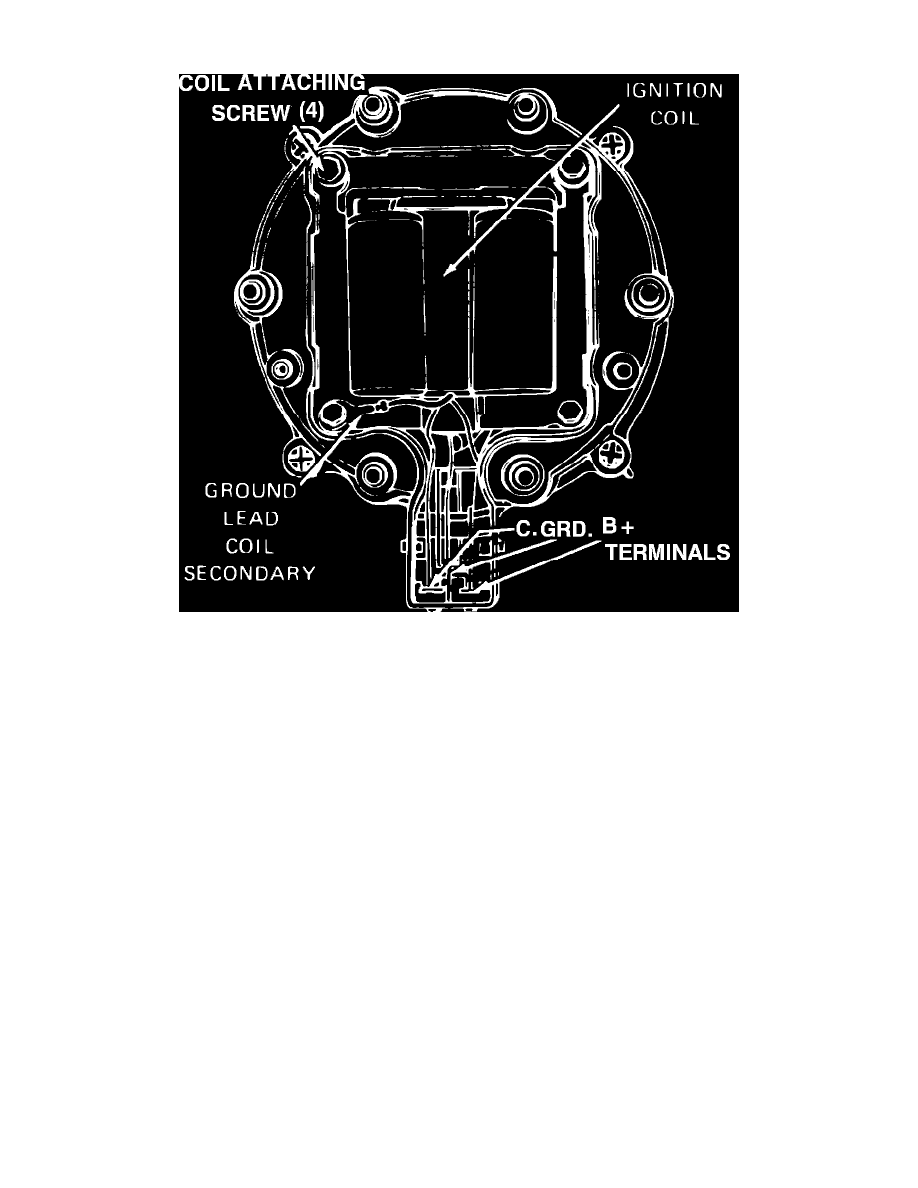
Removing ignition coil cover. Models with internal coil--Typical
Units With Internal Coil
1. Remove electrical connector from distributor cap by lifting retaining tabs.
2. Remove three coil cover attaching screws, then remove cover, Fig. 1.
3. Remove coil attaching screws, then remove ignition coil with leads from distributor cap.
4. Remove coil arc seal.
5. Reverse procedure to install.
Units With External Coil
1. On 1982-85 Skylark, 1982-86 Citation, Omega, Phoenix, 1982-86 Celebrity, Century, Cutlass Ciera, 6000 & 1984-86 Cutlass Cruiser, proceed as
follows:
a. Remove bolt securing radio capacitor to coil.
b. Disconnect coil electrical connector and high tension lead.
c. Remove three coil mounting bolts, then remove coil.
d. Reverse procedure to install.
2. On Chevette and 1000 models, proceed as follows:
a. Remove coil cover, then disconnect ignition switch to coil lead at coil.
b. Disconnect coil high tension lead, then remove coil retaining bolts and the coil.
c. Reverse procedure to install.
3. On Cavalier, CIMARRON, FIRENZA, 2000, Sunbird & Skyhawk models, proceed as follows:
Note:On 1982-86 FIRENZA, Skyhawk, Sunbird & 2000 with 1.8L OHC engine, the coil is located at the rear of the engine near the end of the
cam cover.
a. Disconnect battery ground cable, then raise and support vehicle.
b. Disconnect fuel pump lines at fuel pump, then remove vacuum pipe retaining bracket nut at coil and position pipe aside.
c. Remove fuel pump, then remove coil mounting bolts.