
Regal V6-231 3.8L VIN L SFI (1990)
Evaporator Core: Customer Interest
Procedure:
1. Raise vehicle and remove the rubber A/C drain tube.
2. Disconnect the negative battery cable.
3. Rotate and secure the engine in the forward service position as specified in the Service Manual, page 6A5-2 (1989-90), 6A3-7 (1988).
4. On 1988 and 89 vehicles, remove the upper attachments (Pal Nuts) of the secondary metal dash panel and pull the panel forward.
5. Remove the upper and side splash shields of the R.H. fender well for access to the R.H. electrical center and ECM.
6. Remove the A/C evaporator core from the vehicle. Use the appropriate Service Manual procedures on the removal of the evaporator core.
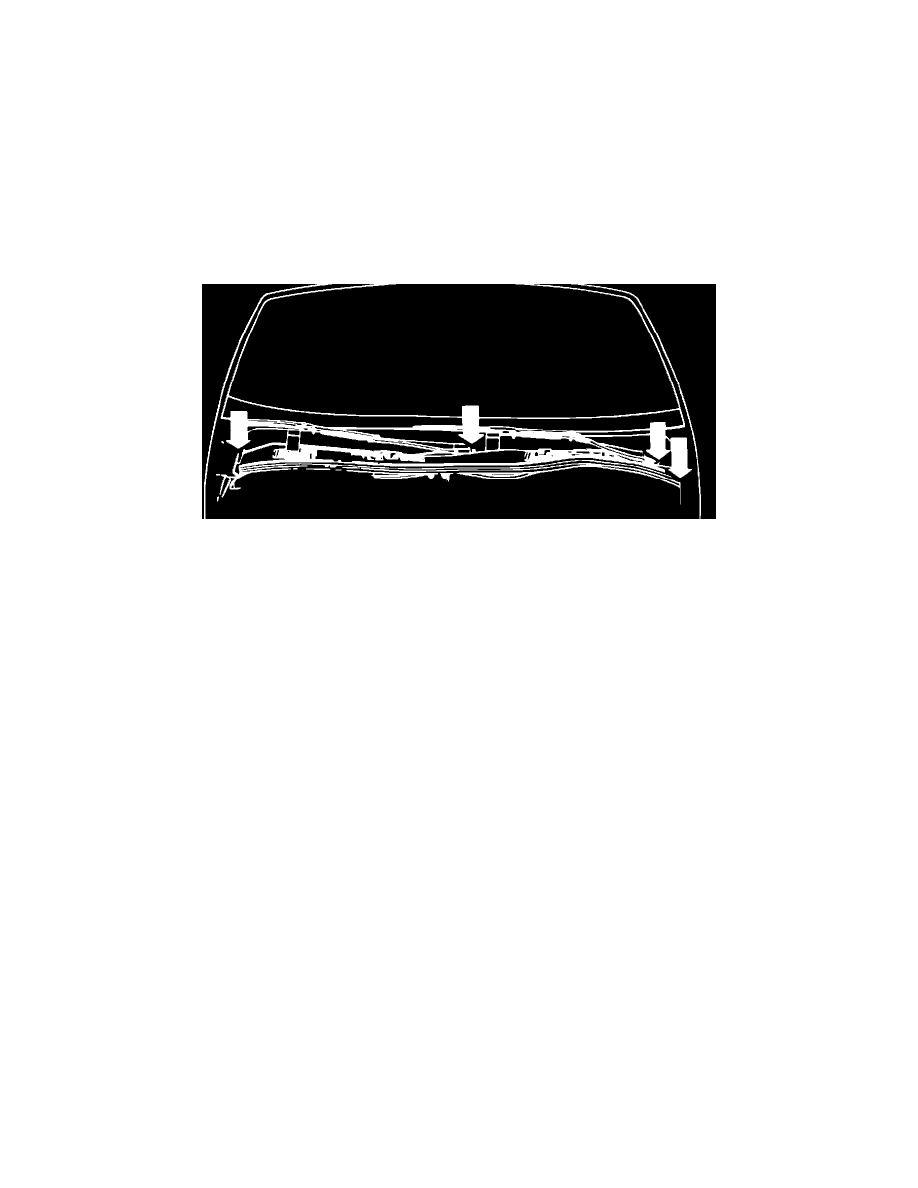
FIGURE 1 - SEALING AIR INLET SCREEN
7. Check the heater/evaporator case and core for debris. Remove any debris that is present in the case or imbedded in the core. If a large amount of
debris is present in the case, the air inlet screen will require sealing around the windshield wiper post holes and fender edges, as shown in Figure 1.
8. Seal the inlet and outlet pipe ends of the evaporator core, using duct tape or plastic plugs if available.
9. Put on rubber gloves and safety goggles.
10. Pour the small bottle of A/C disinfectant kit, P/N 25533404, into the large bottle. Seal and invert the large bottle once or twice to mix contents.
11. Place the evaporator in a large sink, tub or basin.