
Regal V6-252 4.1L VIN 4 4-BBL (1983)
^
Catalyst dust should be controlled by wetting with water prior to bead removal, as described in Step 4.
^
The use of a suitable dust mask, rubber gloves, and safety glasses is recommended when handling catalyst beads.
^
Applicable OSHA standards should be reviewed.
^
Allow converter to cool before handling.
1.
Loosen clamp and disconnect AIR pipe from converter.
2.
Disconnect intermediate exhaust pipe and hanger from rear of converter.
3.
Remove clamp and disconnect converter from front exhaust pipe.
4.
Stand the old converter upright on the inlet end and pour 16 ounces of water into the outlet end to control catalyst dust..
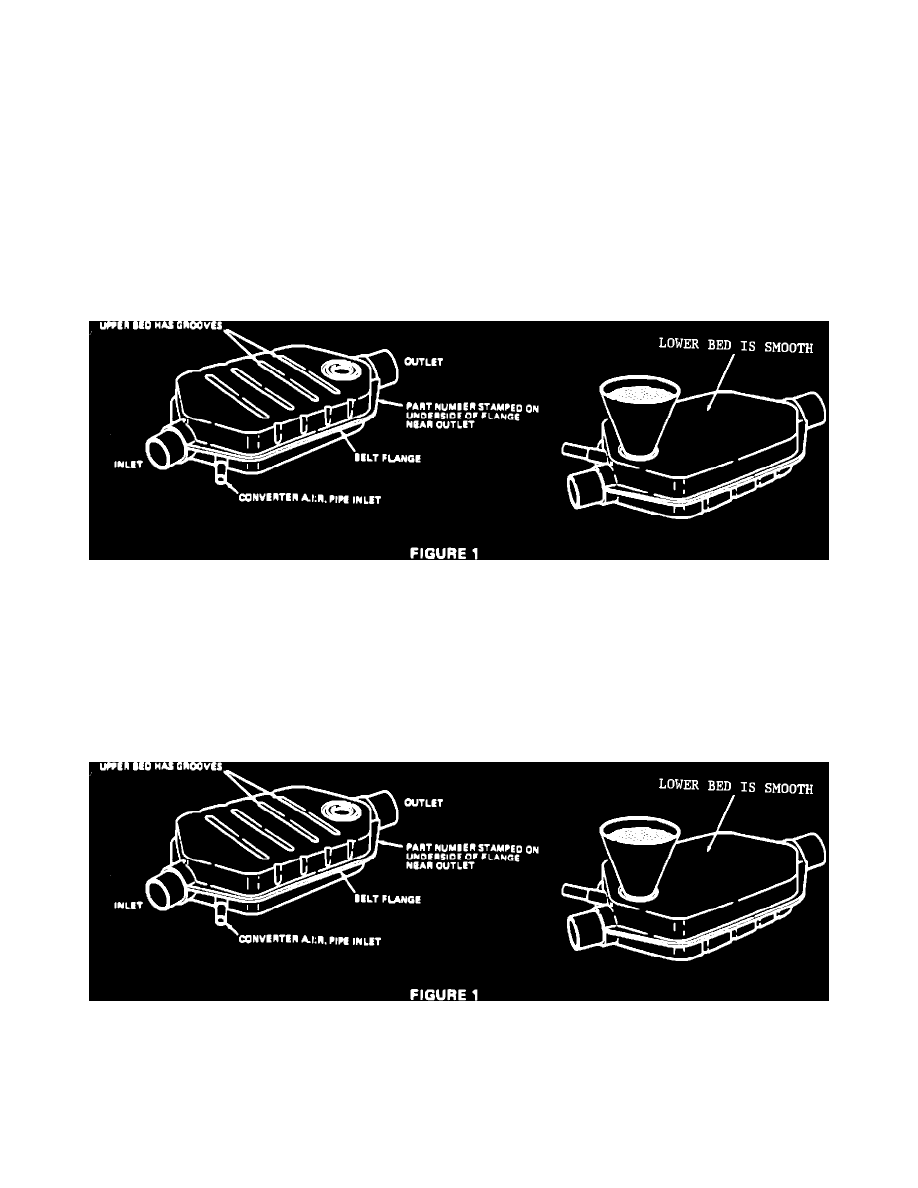
FIGURE 1 - CATALYTIC CONVERTER
5.
Using a hammer and chisel, remove the fill hole plug from the lower bed (the smooth side of the converter is the lower bed side). See Figure 1.
6.
Hold the converter over a clean pan (J-34155-2) and empty the catalyst beads by shaking.
It may be necessary to tap the converter belt flange with a hammer to loosen the beads.
7.
Pour the beads into a sifting pan (J-34155-1) and sift to remove undersized beads.
8.
Prop the new converter up at a 45-degree angle with the lower bed fill hole at the top.
FIGURE 1 - CATALYTIC CONVERTER
9.
Using funnel J-34155-3, pour the sifted beads into the lower bed of the new converter (see Figure 1). Tap belt flange with rubber mallet to
allow beads to settle. Continue filling and tapping until converter is full. If additional beads are required to completely fill the lower bed, it
will be necessary to obtain a lower bed bead kit from the parts department.
Excess beads from the kit should be saved in a clean container for future use.