
Regal V6-260 4.3L DSL (1985)
Steering Wheel: Service and Repair
Steering Wheel
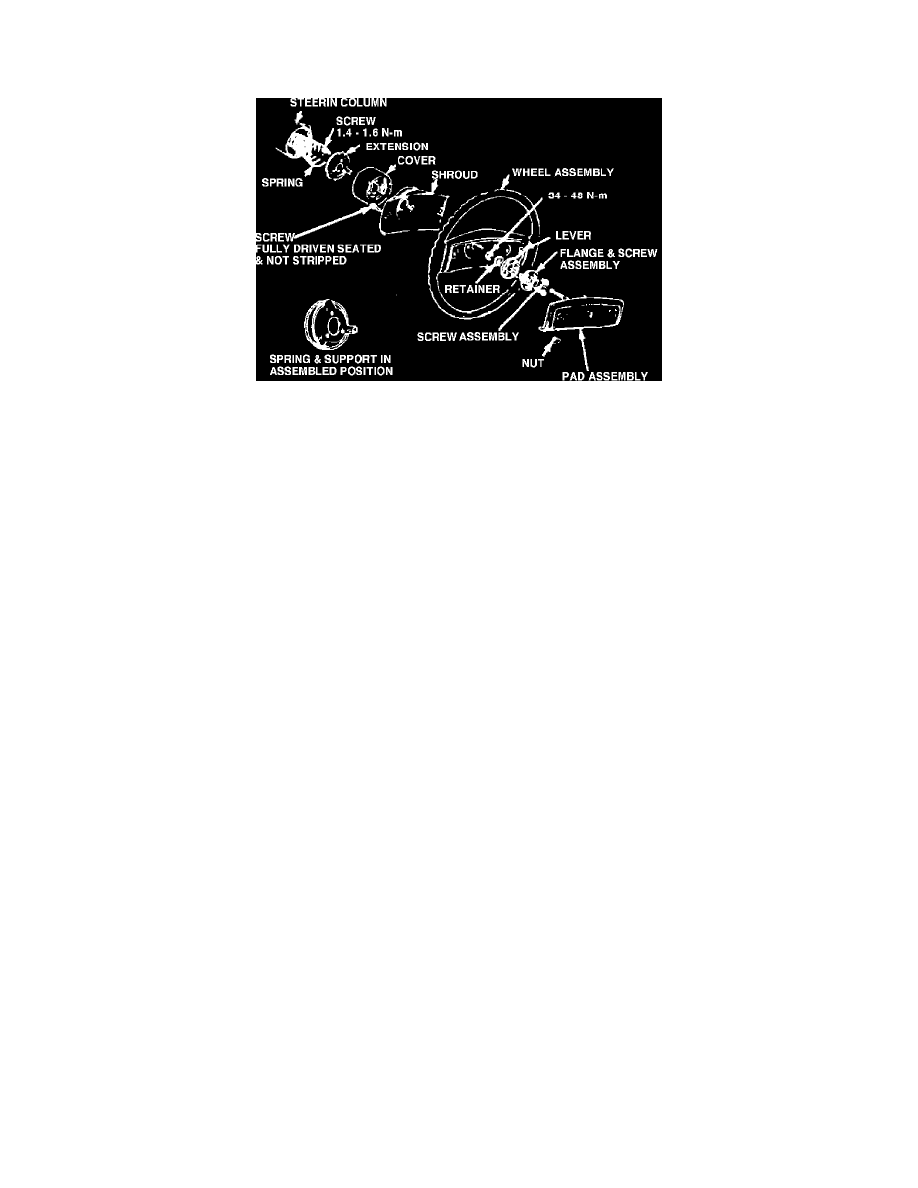
Fig. 8 Tilt & telescoping steering wheel assembly exploded view
REMOVAL
1.
Disconnect battery ground cable.
2.
Remove screws, Fig. 8, and lift pad assembly up, then disconnect horn wiring electrical connector by pushing in and turning counterclockwise.
3.
Push locking lever counterclockwise until full release position is obtained.
4.
Scribe plate assembly where the two screws secure plate assembly to locking lever.
5.
Remove screws and plate assembly.
6.
Remove steering wheel nut retainer and nut.
7.
Using tool No. J185903, remove steering wheel assembly. Use of a steering wheel puller other than the one recommended in Step 7, or a
sharp blow on the end of the steering shaft or shift lever, could shear or loosen the plastic fasteners which maintain steering column
rigidity.
INSTALLATION
1.
Install a suitable setscrew into upper shaft at the full extended position and lock.
2.
Align scribe mark on steering wheel hub with mark on end of shaft and install steering wheel. Ensure unsecured end of horn upper contact
assembly is completely seated against top of horn contact carrier assembly.
3.
Install nut onto upper steering shaft and torque to 30 ft. lbs. Install nut retainer.
4.
Remove set screw and install plate assembly and screws. Tighten screws finger tight.
5.
Position locking lever in vertical position and move lever counterclockwise until plate holes align with holes in lever. Install plate securing screws.
6.
Align pad assembly with holes in steering wheel and install screws.
7.
Connect battery ground cable. Ensure locking lever securely locks steering wheel travel and that steering wheel travel is free in the unlocked
position.