
Regal V6-3.8L VIN K (1997)
Brake Rotor/Disc: Service and Repair
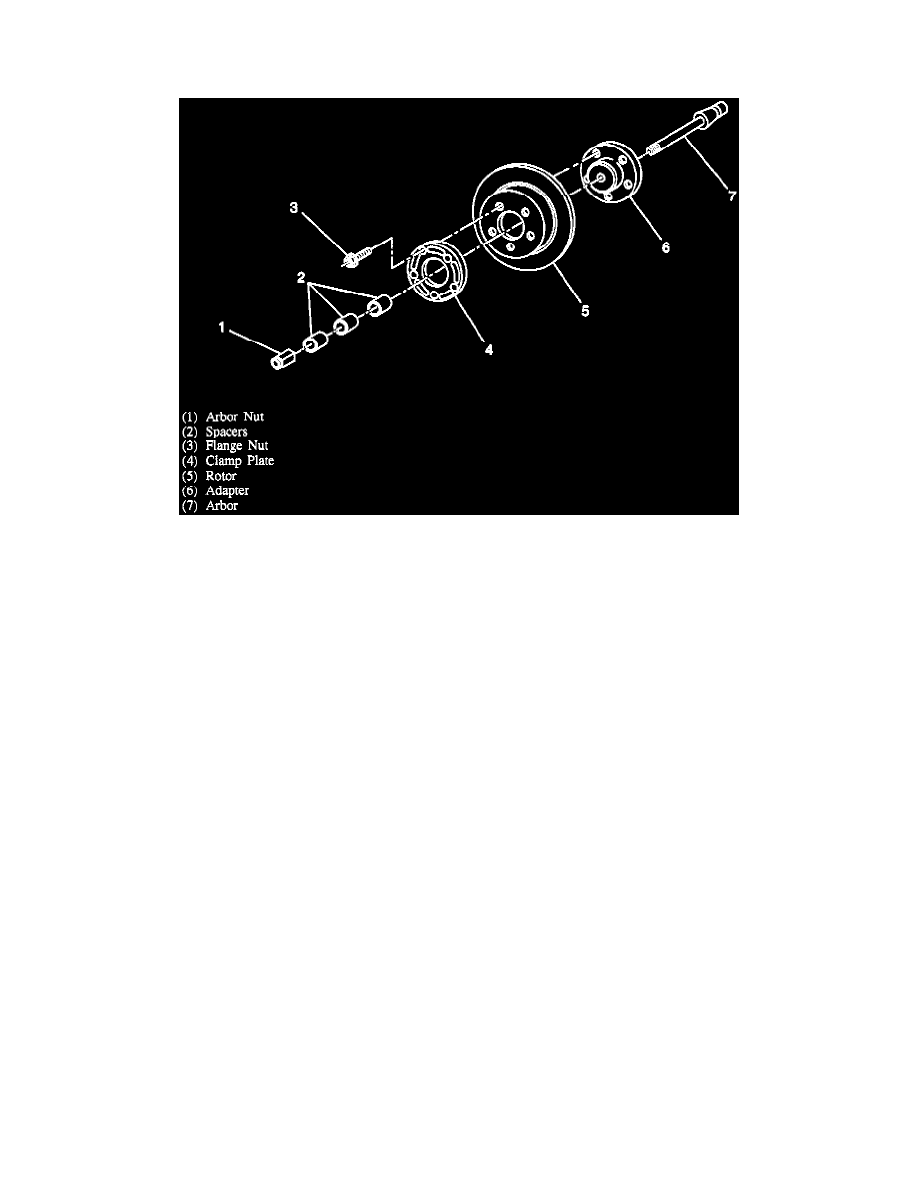
Rotor Mounting Adapter
^
Tools Required:
-
J 37160-A Rotor Mounting Adapter
-
J 37160-50 Rotor Mounting Adapter Sleeve
NOTICE: Whenever the rotor has been separated from the wheel-bearing flange, clean any rust or contaminants from the wheel flange and brake
rotor mating surfaces. Failure to do this may result in increased lateral runout of the rotor, and brake pulsation.
1. Inspect all mounting hardware for rust, nicks, dirt, or abnormal wear. All components must be in good condition and clean for proper results.
2. Inspect rotor, measure lateral runout and thickness variation per instructions in "THICKNESS VARIATION CHECK" and "LATERAL RUNOUT
CHECK." The mounting surface of the rotor must be clean and free from rust and nicks.
3. Mount J 37160-A on spindle arbor, Use suitable combination of spacers or collets to tighten J 37160-A to the arbor. When using lathes with a
7/8-inch spindle arbor, use J 37160-50, with J 37160-A. J 37160-50 is not required with lathes using a 1-inch spindle arbor.
4. Mount the rotor onto the J 37160-A. Mount the clamp plate and five nuts. The rotor can be installed and removed while J 37160-A is mounted on
the machine spindle.
-
Tighten nuts in a cross pattern to 34 Nm (25 ft. lbs.).
5. Install silencer band on to rotor.
6. Set spindle speed to approximately 150 rpm (or mid-range).
7. While the machine is running, bring tool bit up and touch off. Stop machine and check witness mark. If it goes 3/4 of the way around, the rotor is
mounted properly. Continue with normal methods to resurface the rotor.
8. If the witness mark does not go 3/4 of the way around, repeat Steps 1 through 7.