
Regal V6-3.8L VIN K (1997)
Fuel Pressure Regulator: Service and Repair
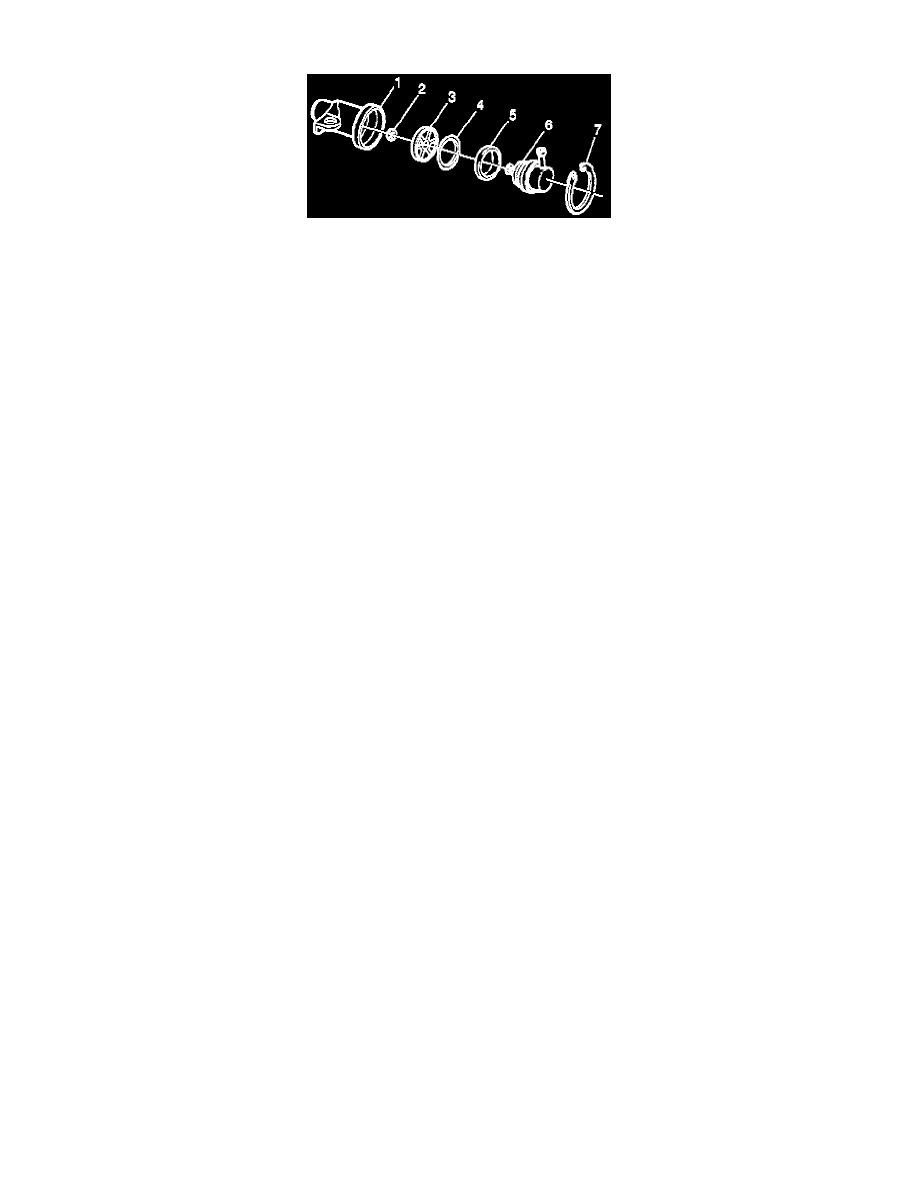
Fuel Pressure Regulator
Numbers in text refer to image references.
REMOVE OR DISCONNECT
1. Relieve the fuel pressure.
2. Clean any dirt from the fuel pressure regulator retaining ring.
3. Remove the vacuum hose from pressure regulator.
4. Remove the snap ring (7).
5. Using a shop towel to catch any spilled fuel, lift and twist the fuel pressure regulator in order to remove the fuel pressure regulator (6) from the
fuel pressure regulator housing (1).
6. Remove the regulator O-ring small (2).
7. Remove the regulator filter screen (3).
8. Remove the regulator O-ring large (4).
9. Remove the regulator O-ring back up (5).
10. Cover the fuel pressure regulator housing (1) to prevent contamination from entering the fuel system.
INSTALL OR CONNECT
NOTE:
^
Compressed air must never be used to test or clean a fuel pressure regulator, as damage to the fuel pressure regulator may result.
^
If needed, the fuel pressure regulator filter screen should be cleaned with gasoline.
^
The fuel pressure regulator should not be immersed in solvent in order to prevent damage to the fuel pressure regulator.
1. Install the new O-rings on the fuel pressure regulator (6), if a new fuel pressure regulator is not being installed. Lubricate the O-rings lightly with
clean engine oil.
2. Install the regulator back up O-ring (5).
3. Install the regulator O-ring large (4).
4. Install the regulator filter screen (3).
5. Install the regulator O-ring small (2).
6. Install the fuel pressure regulator (6) in the fuel pressure regulator housing (1).
7. Install the snap ring (7).
8. Install the vacuum hose to the fuel pressure regulator.