
Rendezvous V6-3.5L (2007)
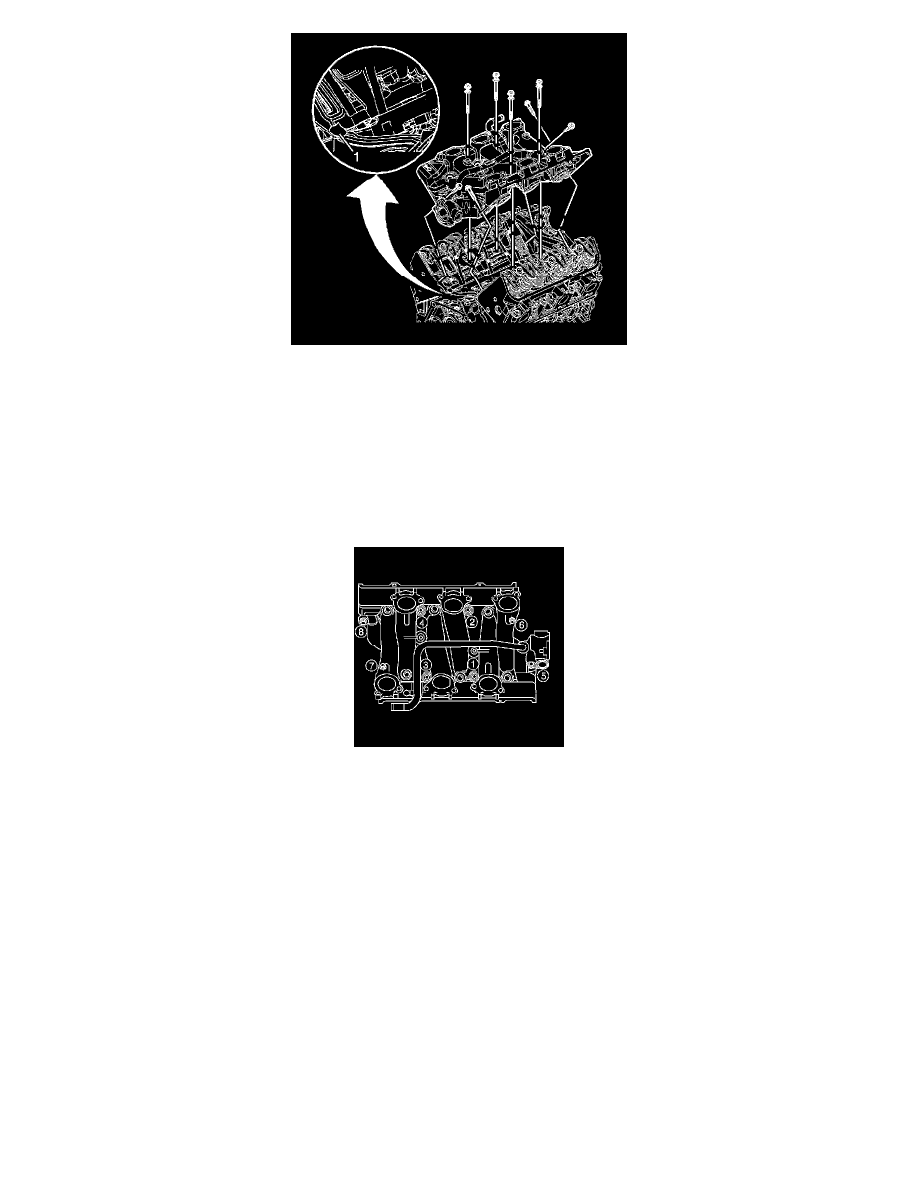
6. Apply a small drop 8-10 mm (0.31-0.39 in) of RTV sealer to the 4 corners of the intake manifold to block joints (1). Refer to Sealers, Adhesives,
and Lubricants for the correct part number.
7. Install the lower intake manifold.
Notice: Maximum gasket performance is achieved when using new fasteners, which contain a thread-locking patch. If the fasteners are not
replaced, a thread locking chemical must be applied to the fastener threads. Failure to replace the fasteners or apply a thread-locking chemical
MAY reduce gasket sealing capability.
8. Install NEW lower intake manifold bolts, if the bolts do not have the thread locking patch then apply sealer to the lower intake manifold bolt
threads.
Notice: Failure to tighten vertical bolts before the diagonal bolts may cause an oil leak.
9. Tighten the lower intake manifold bolts.
1. Tighten the bolts on the first pass in sequence to 13 N.m (115 lb in).
2. Tighten the bolts (1, 2, 3, 4) on the second pass in sequence to 20 N.m (15 lb ft).
3. Tighten the bolts (5, 6, 7, 8) on the final pass in sequence to 25 N.m (18 lb ft).