
Rendezvous FWD V6-3.5L VIN L (2006)
6.
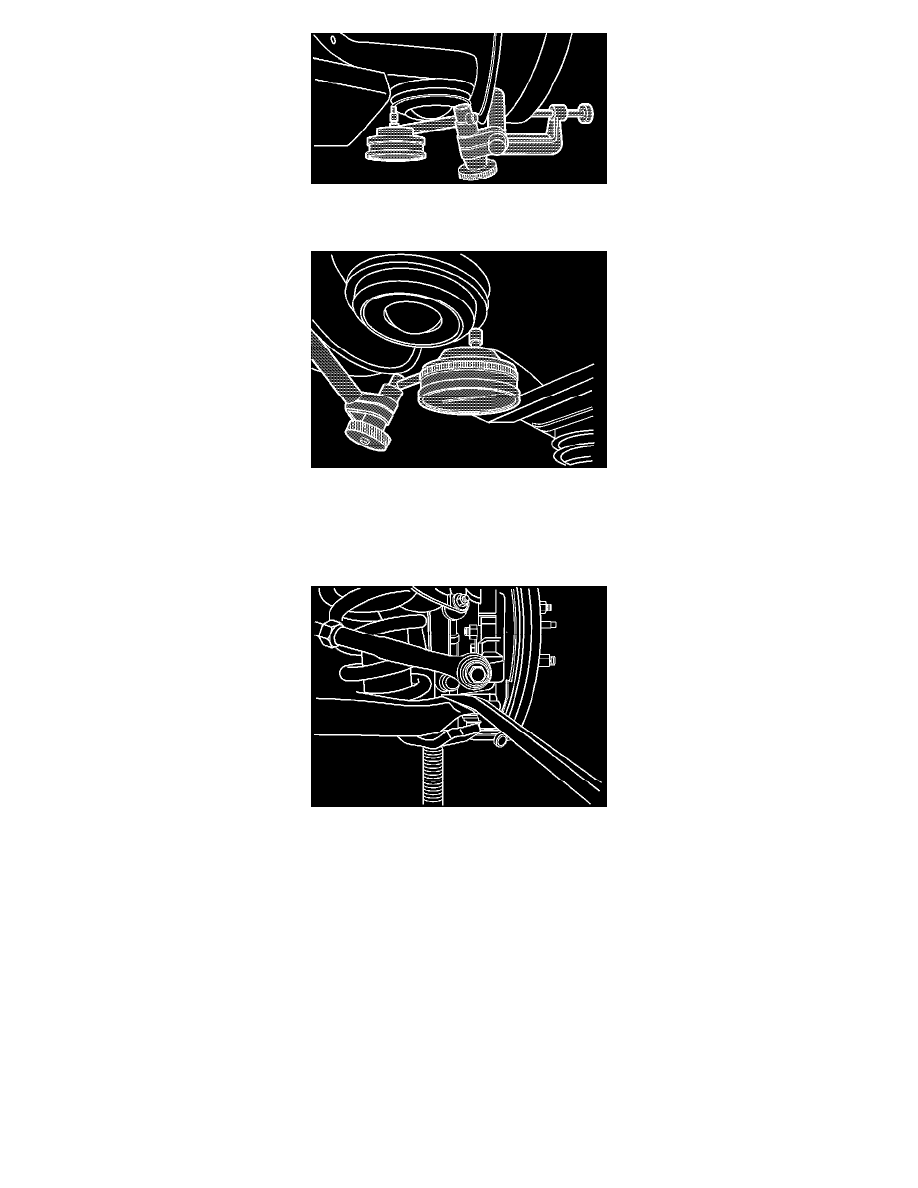
Clamp the dial indicator J-8001 (or equivalent tool) to the bottom of the brake rotor. Place the dial indicator needle against the flange of the ball
joint at the ball joint centerline (most inboard point), as shown in the illustration.
7.
Set the dial indicator to zero.
Note:
Do not pry between the lower control arm and the wheel drive shaft boot or damage may result. Do not pry on the knuckle boss near the ball
joint boot or damage to the ball joint may result.
8.
Position a pry bar between the outer tie rod end-arm of the knuckle and the lower control arm, lift the steering knuckle upward, then let it settle
while observing the dial indicator. If the reading is 0.5 mm (0.020 in) or more, replace the ball joint. Refer to Rear Axle Lower Control Arm
Replacement in SI.
Warranty Information
An add time for the ball joint inspection has been assigned to any repair procedure that requires the separation of the ball stud from the knuckle. For
example, a knuckle, bearing, or axle shaft replacement.