
Riviera V6-231 3.8L Turbo VIN 8 4-bbl (1983)
Front Steering Knuckle: Service and Repair
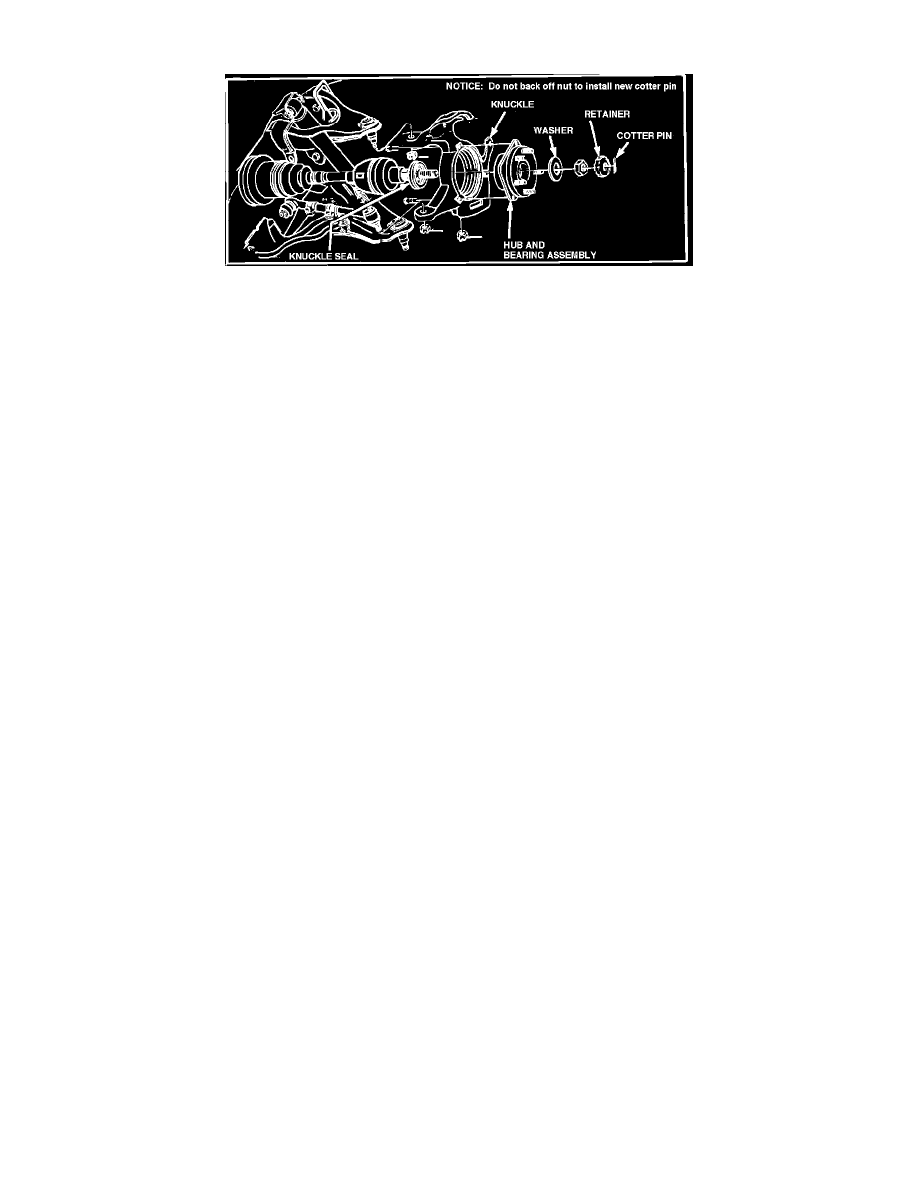
Fig. 10 Wheel bearing & steering knuckle assembly.
1.
Raise and support vehicle under lower control arms.
2.
Remove drive axle nut and washer and remove wheel and tire assembly.
3.
Remove brake hose clip from ball joint and replace nut, then remove brake caliper off disc, and using a length of wire support caliper on
suspension. Do not allow caliper to hang from brake hose as this could cause damage and premature failure of hose.
4.
Mark hub and disc assembly for alignment during assembly and remove disc, then strike steering knuckle in area of upper ball joint until upper
ball joint is loose. Use extreme care to prevent striking and damaging brake hose or ball joint seal.
5.
Place a short length of rubber hose over lower control arm torsion bar connector to avoid damage to inboard tri-pot joint seal when hub and
knuckle are removed.
6.
Using appropriate puller, disconnect tie rod end, upper and lower ball joints and remove steering knuckle and hub assembly, Fig. 10.
7.
Reverse procedure to install, noting the following torque values: drive axle nut to hub and bearing, 175 ft. lbs.; lower ball joint nut, 83 ft. lbs.;
upper ball joint nut, 61 ft. lbs.; tie rod to steering knuckle nut, 40 ft. lbs.; hub and bearing to knuckle bolts, 75 ft. lbs.