
Riviera V6-231 3.8L VIN C SFI (1989)
2.
Remove front wheel covers or wheel inserts.
3.
Remove drive axle nut and washer and discard.
NOTICE:
For Steps 4 and 5, refer to Illustration # 2.
4.
Install new washer (part number 10049691).
5.
Install new torque prevailing nut (part number 14035592) and torque to 245 N-m (180 ft. lbs.).
IMPORTANT:
Use torque wrench to tighten drive axle nut to specification.
6.
Install front wheel covers or wheel inserts.
7.
Remove support from front of vehicle.
8.
Install Campaign Identification Label.
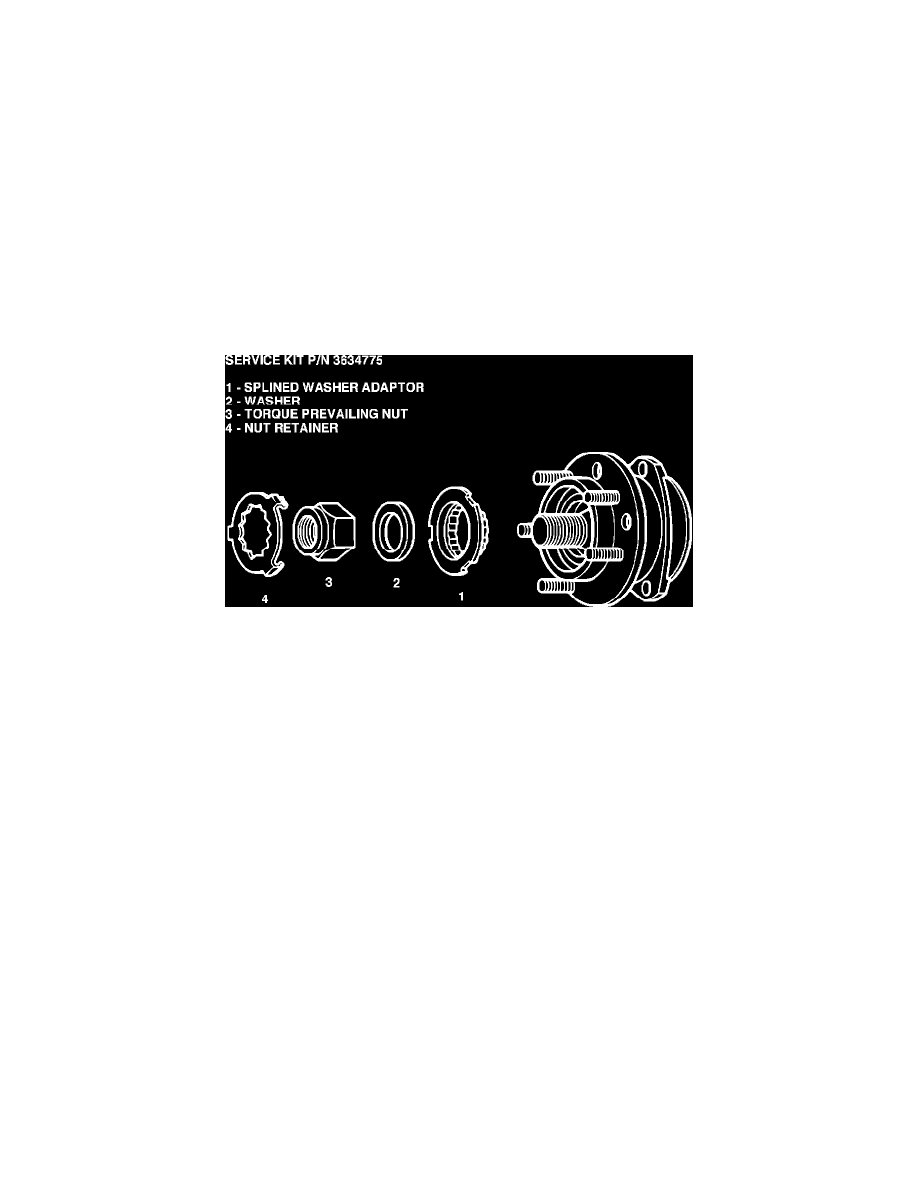
ILLUSTRATION # 1
6.
If torque in Step 5 is below 80 N-m (60 ft. lbs.) replace hub and bearing assembly and seal per 1989 Reatta Riviera Service Manual procedure,
Pages 3C-6 through 8.
NOTICE:
If a hub and bearing assembly is replaced, the two brake caliper bolts (part number 22529144) MUST also be replaced (see Notice on
Page 5B3-1 of Service Manual).
7.
Remove original drive axle nut and washer and discard.
NOTICE:
For Steps 8 through 11 refer to Illustration # 1 and use Service Kit Part Number 3634775.
8.
Install splined washer adaptor.
9.
Install new washer.
10.
Install new torque prevailing nut and torque to 245 N-m. (180 ft. lbs.).
IMPORTANT:
Use torque wrench to tighten drive axle nut to specification.
11.
Install nut retainer over nut and be certain that the three tabs latch into the three notches in the splined washer adaptor. If tabs and notches do not
align, tighten nut further to align. Do not exceed 275 N-m. (200 ft. lbs.)
12.
Install front wheel cover or wheel insert.
13.
Remove support from front of vehicle.
14.
Install Campaign Identification Label.