
Roadmaster V8-305 5.0L (1992)
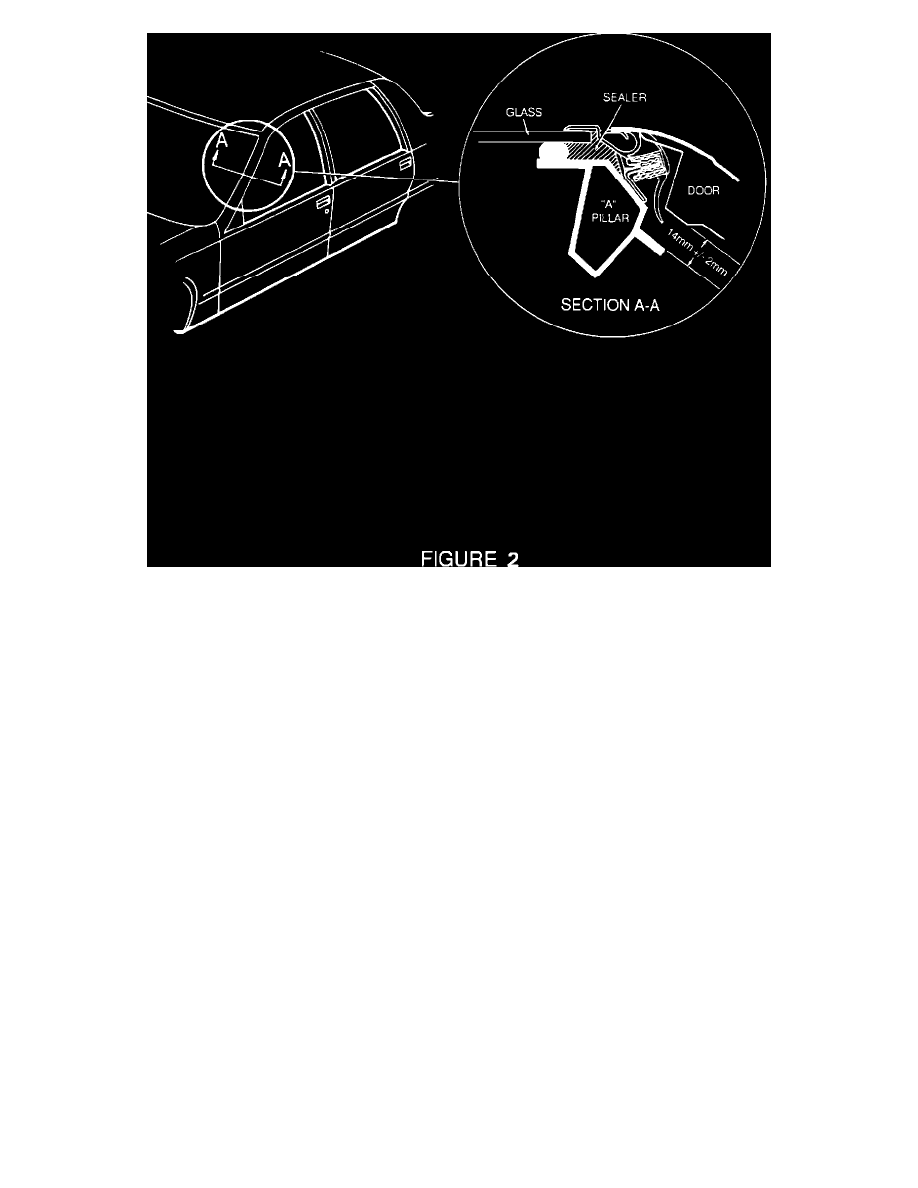
Figure 1
II.
Wind rush due to gap at windshield side reveal molding to glass, left and/or right side.
1.
Remove auxiliary weatherstrip to access the windshield side reveal molding retaining screws.
2.
Remove the retaining screws and the molding.
3.
Holding the windshield side reveal molding in position, flush the molding to the glass. Determine how much elongation of the screw holes in the
molding is necessary to position the molding flush to the glass.
4.
Using a small rattail file, elongate the retaining holes in the direction and length needed to position the molding flush to the glass.
5.
On the under side of the reveal molding run a bead of RTV or equivalent across width of molding at the lower retaining hole to fill the void
between the glass and the inside surface of the windshield side reveal. (See Figure 2, Section A-A). Sealing this area will stop a tunneling effect up
the molding.
6.
Put a light film of oil on the A-pillar at the lower retaining hole to facilitate any future serviceability for removing the molding.
7.
Reinstall the windshield side reveal molding and retaining screws per Section 10-2 of the Service Manual.
8.
Using strip caulk, fill the cavity at the top of the windshield side reveal molding to the upper windshield reveal molding.
IMPORTANT:
Be careful not to trap the primary seal under the auxiliary seal when reinstalling the auxiliary seal.
WARRANTY INFORMATION:
Labor Operation:
T1898
Labor Time:
0.3 Hr.
0.2 Hr. For Other Side