Roadmaster V8-350 5.7L (1994)

c.
The colored/grained base molding and soft vinyl trim panel surface (Figure 2, Items 3 and 4).
6.
Apply masking tape over bezel assembly to retain to trim panel, and allow to dry for 30 minutes.
7.
Install the pull strap attaching screws.
Important:
Make sure the pull strap attaching screw properly aligns with the plastic fastener on the door inner panel.
8.
After correct drying time, remove the protective and retaining tape and discard.
Procedure 2
BEZEL ASSEMBLY PULLED LOOSE AND BROKEN ON APPEARANCE SIDE. Requires replacement of the molding assembly, NOT THE
COMPLETE TRIM PANEL.
Materials required:
New Bezel Assembly (one of the following colors and numbers), and a soldering gun with a "smoothing tip" for re-staking to the trim panel.
Color
Right P/N
Left P/N
Blue
16671246
16671247
Ruby Red
16671401
16671402
Gray
16671403
16671404
Med. Beige
16671248
16671249
1.
Remove the door trim panel from the door and place on a clean work surface.
2.
Apply 2" wide masking tape to the soft door trim surfaces for protection during bezel removal.
3.
Peel down top portion of sound absorber from the back of the trim panel to expose the "heat staked" areas.
4.
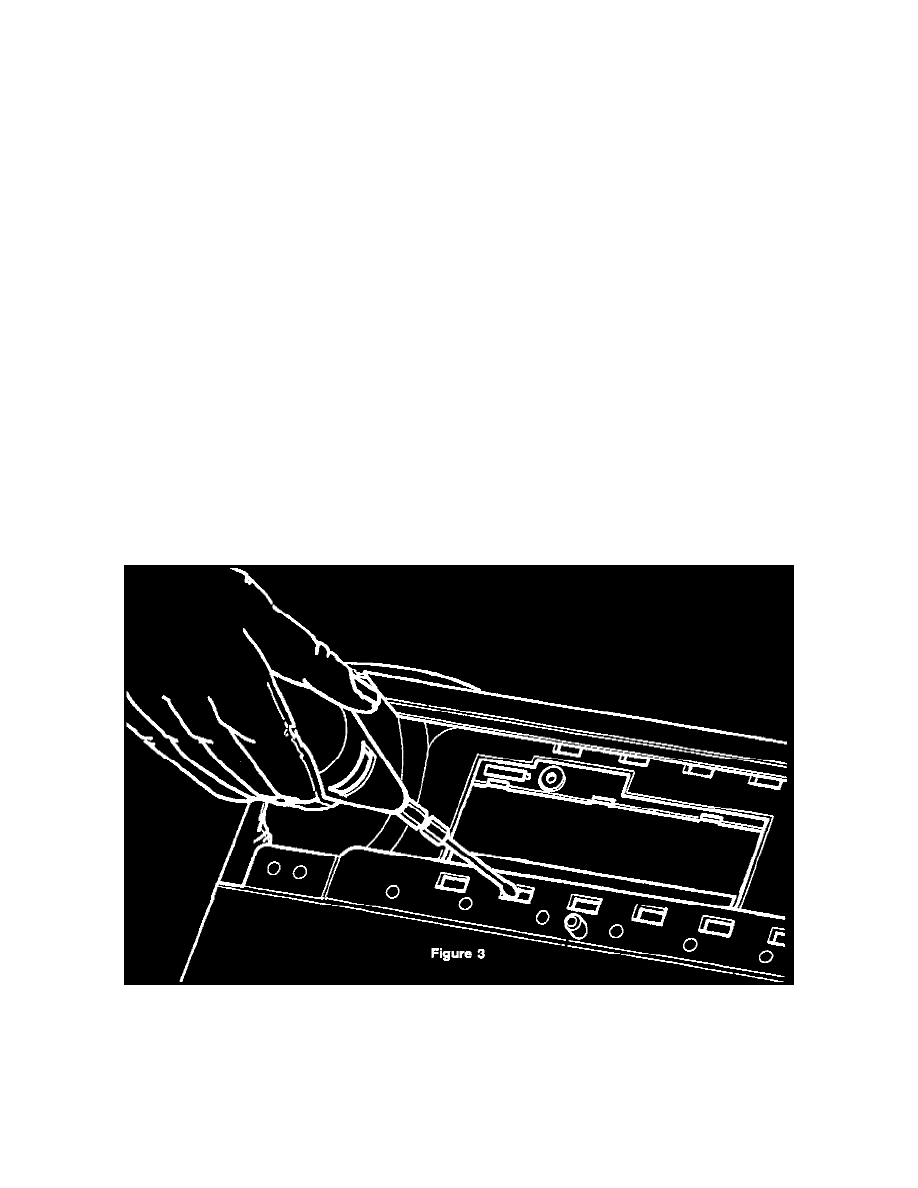
Remove the "heat stakes" using an electric drill with a "de-burring" bit or other suitable tool and remove bezel from trim panel, see Figure 3.
5.
Position the new bezel assembly to the trim panel.
