
Roadmaster V8-350 5.7L (1994)
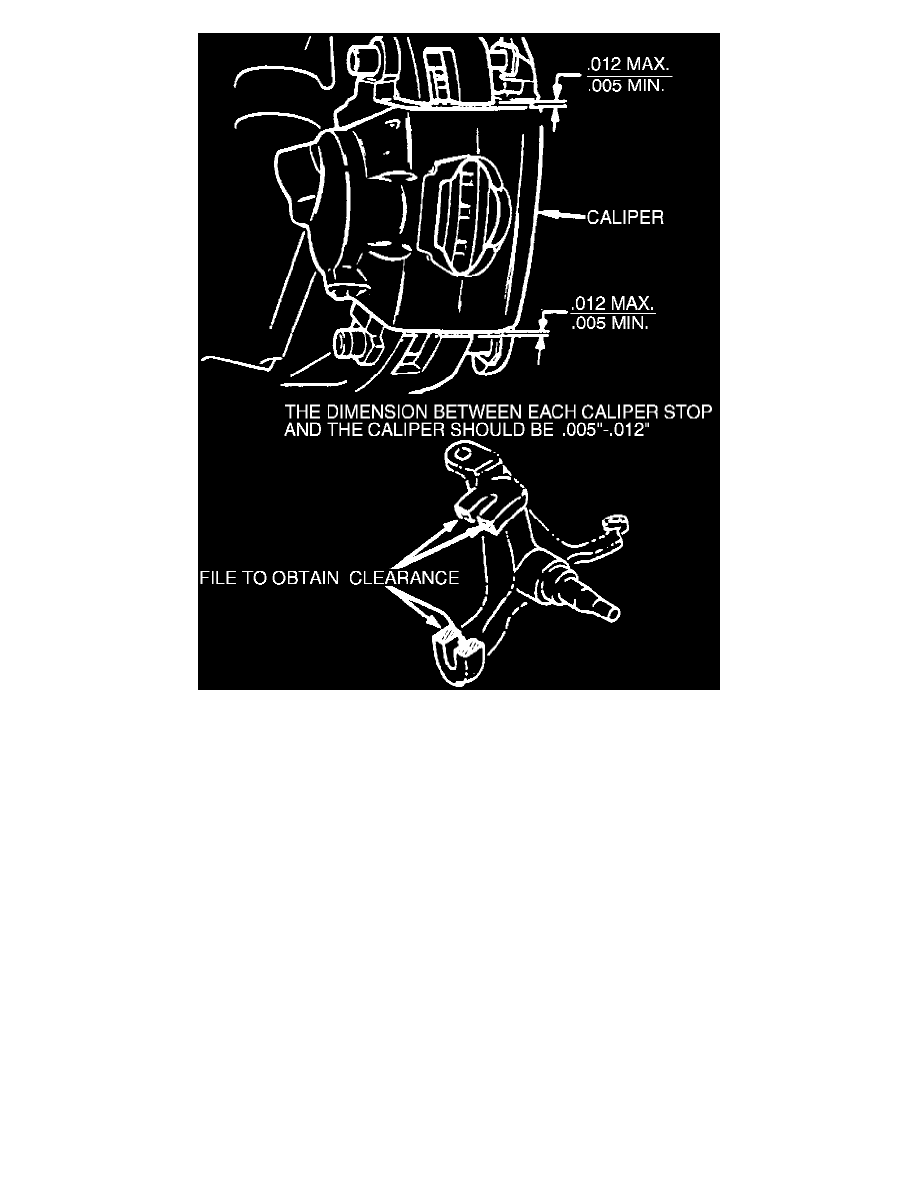
Fig. 8 Caliper & Stops Clearance Inspection
REMOVAL
1. Siphon enough brake fluid out of master cylinder to bring fluid level to 1/3 full to avoid fluid overflow when caliper piston is pushed back into its
bore.
2. Raise vehicle and remove front wheels.
3. Using a C-clamp, as illustrated in Fig. 3, push piston back into its bore.
4. If caliper assembly is to be serviced, remove inlet fitting attaching bolt, copper washer, and inlet fitting from caliper housing. Plug opening in inlet
fitting to prevent fluid loss and contamination. Do not crimp brake hose, as this may damage internal structure of hose. If only shoe and
lining assemblies are to be replaced, do not disconnect brake line fitting from caliper.
5. Remove two mounting bolts, Fig. 4, and lift caliper away from disc. If only shoe and lining assemblies are to be replaced, suspend caliper from
chassis using suitable hanger. Do not allow caliper to hang by brake hose.
INSTALLATION
1. Position caliper over disc, lining up holes in caliper with holes in mounting bracket. If brake hose was not disconnected during removal, be sure
not to kink it during installation.
2. Start mounting bolts through sleeves in inboard caliper ears and mounting bracket, making sure ends of bolts pass under ears on inboard shoe.
Right and left calipers must not be interchanged.
3. Push mounting bolts through to engage holes in outboard ears. Then thread mounting bolts into bracket.
4. Tighten mounting bolts to specifications.
5. Check dimensions between each caliper stop and caliper, Fig. 8.
6. If brake hose was removed, reconnect it and bleed calipers.
7. Replace front wheels, lower vehicle and add brake fluid to master cylinder to bring level to 1/4 inch from top. Before moving vehicle, pump
brake pedal several times to be sure it is firm. Do not move vehicle until a firm pedal is obtained. On some models with low drag calipers,
apply approximately 175 pounds of pressure to brake pedal three times to properly seat caliper and related components.