
Roadmaster Estate Wagon V8-305 5.0L (1991)
With the glass in the down position, pull down and outboard on the run channel to remove it from the retainer. Using bedding and glazing
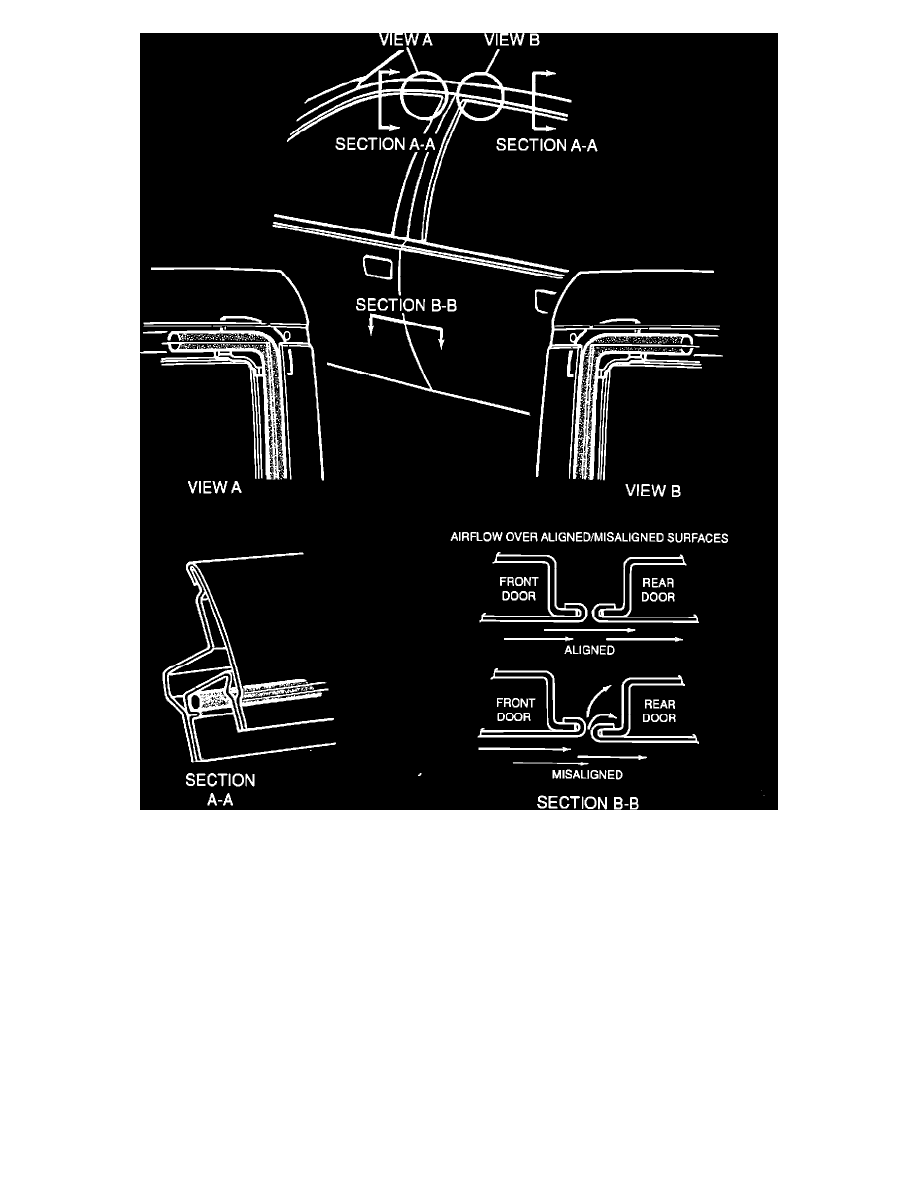
compound, run a 5 mm bead on the inboard edge of the retainer, see SECTION A-A, starting at the base of the mirror all the way along the top to
the rear corner. In the upper rear corner, (see VIEW B) it will be necessary to add a larger bead of compound. From the upper rear corner continue
running the bead down to the belt line.
3.
Rear door window run channel to door frame.
With the glass in the down position, pull down and outboard on the run channel to remove it from the retainer, remove only the front and top
portion of the run channel from the retainer. With bedding and glazing compound run a 5 mm bead of sealer to the inboard edge of the run channel
(see SECTION A-A) starting in the front at the belt line all the way up to the top and along the top to the rear corner. In the upper rear corner (see
VIEW B) it will be necessary to pull down slightly on the weatherstrip and fill the cavity in that corner.
4.
The front edge of the rear door may be outboard slightly of the front door (see SECTION A-A) . Adjust the front of the rear door inboard so the
rear door is flush to 1.5 mm, inboard of the front door.
5.
Windshield side reveal molding gap to glass along the "A" pillar.
Windshield side reveal molding gap to glass may be repaired by removing the auxiliary seal to gain access to the retaining screws. With the
molding removed, elongate the retaining holes in the molding in the direction of movement needed with a small rattail file.