
Roadmaster Estate Wagon V8-350 5.7L (1993)
Remove or Disconnect
1. Drain engine coolant.
2. Bolt/screw (66) holding hose assembly (84) to cowl panel.
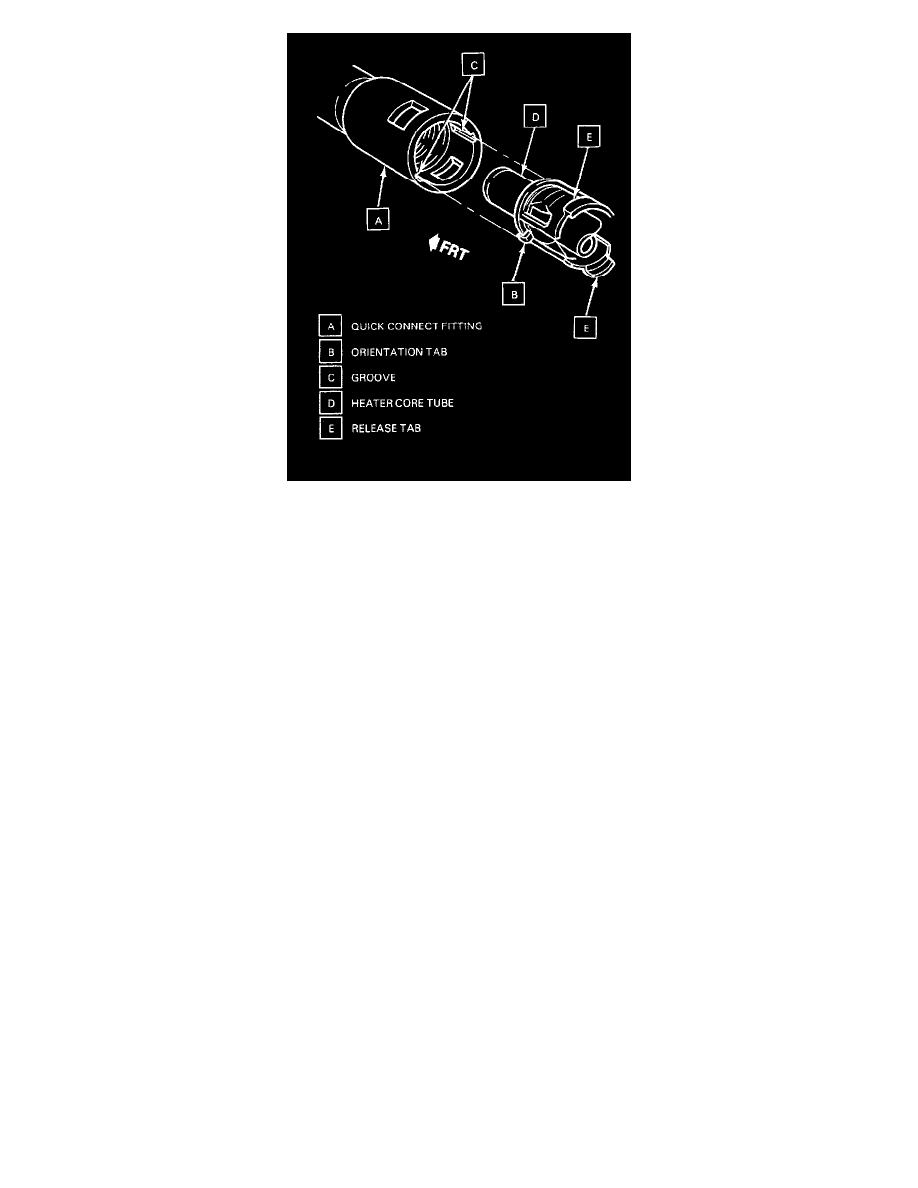
3. Heater inlet and outlet pipe quick connect fittings from heater core tubes.
-
Release quick connect fittings by squeezing both release tabs at base of heater core tube and pulling on pipe to disengage fitting.
4. Lower evaporator module case.
5. Heater core (8).
A. Remove heater core mounting straps and bolts/screws.
B. Pull heater core (8) rearward, working heater core tubes out of seal.
Install or Connect
Important: If installing new heater core, transfer quick connect tabs from tubes of the original heater core to tubes of replacement heater core.
1. Heater core (8).
A. Move heater core into position, carefully guiding heater core tubes through round holes in tube seal at cowl panel.
B. Install heater core mounting straps and bolts/screws.
2. Lower evaporator module case.
Notice: Make sure quick connect orientation tabs are aligned correctly before connecting heater inlet and outlet pipes to heater core inlet and outlet
tubes. If these parts are incorrectly connected, coolant leakage and damage to parts may occur. The quick connect fitting at each connection must be
pushed on, then pulled back to verify proper connector engagement. Do not rely on an audible click or visual verification to check for proper
connections, use only the approved service kit provided by GMSPO.
3. Heater inlet and outlet pipe quick connect fittings.
A. Hold control valve assembly (67) and hose assembly in position.
B. Align quick connect fitting orientation tabs with grooves in fitting sleeve, then push sleeve into place on heater core tube.
C. Pull back on sleeve to check for proper installation of connector.
D. Connect other quick connect connector in same way.
4. Bolt/screw (66). Tighten bolt/screw (66) to 1.9 Nm (17 lb in).
5. Coolant.
Inspect
-
With engine warmed up and running, and with air conditioning controls set for "HTR" (heater) and full "WARM", inspect both quick connect
fittings for leaks.
-
Also carefully feel control valve to assure that warm coolant is flowing through heater core.