
Roadmaster Estate Wagon V8-350 5.7L VIN P SFI (1996)
Ball Joint: All Technical Service Bulletins
Service Procedure
INSPECTION - NUT TORQUE
(To Be Performed On Both Sides)
1.
Rotate vehicle steering wheel to the extreme right stop position.
2.
Gain access to right front lower ball stud attachment area through the forward area of the wheel well, remove lower ball joint cotter pin.
3.
Utilizing a clicker type torque wrench set at 60 Nm (44 lb. ft.) and while attempting to tighten lower ball stud nut, determine which of the
following conditions exists and proceed as required:
A.
Torque Wrench Clicks Prior To Nut Rotation [Nut torqued to more than 60 Nm (44 lb. ft.) as installed]
I.
Reset torque wrench to between 95 Nm (70 lb. ft.) to 112 Nm (83 lb. ft.). Tighten ball joint nut until wrench clicks.
II.
Install new cotter pin. If pin can not be installed, tighten nut enough to align slot in nut with hole in ball stud and install new cotter
pin. Nut rotation to align cotter pin hole is not to exceed one flat (60 degrees).
III.
Proceed to Step 4.
B.
Nut Rotates Prior To Torque Wrench Clicking [Nut torqued to less than 60 Nm (44 lb. ft.) as installed].
I.
DO NOT perform any further work on this attachment at this time. Proceed to Step 4.
4.
Rotate steering wheel to extreme left stop position and repeat Steps 2 and 3 on left ball stud attachment.
5.
If either the right/left or both lower ball stud nuts were torqued to LESS than 60 Nm (44 lb. ft.) as determined in Step 3,. proceed to Step 6, "Nut
Gap Inspection". If both lower ball joints were found to be torqued to MORE than 60 Nm (44 lb. ft.) as determined in Step 3, proceed to Step 10.
6.
Raise and suitably support vehicle in such a manner that front suspension is hanging fully extended (full rebound position).
7.
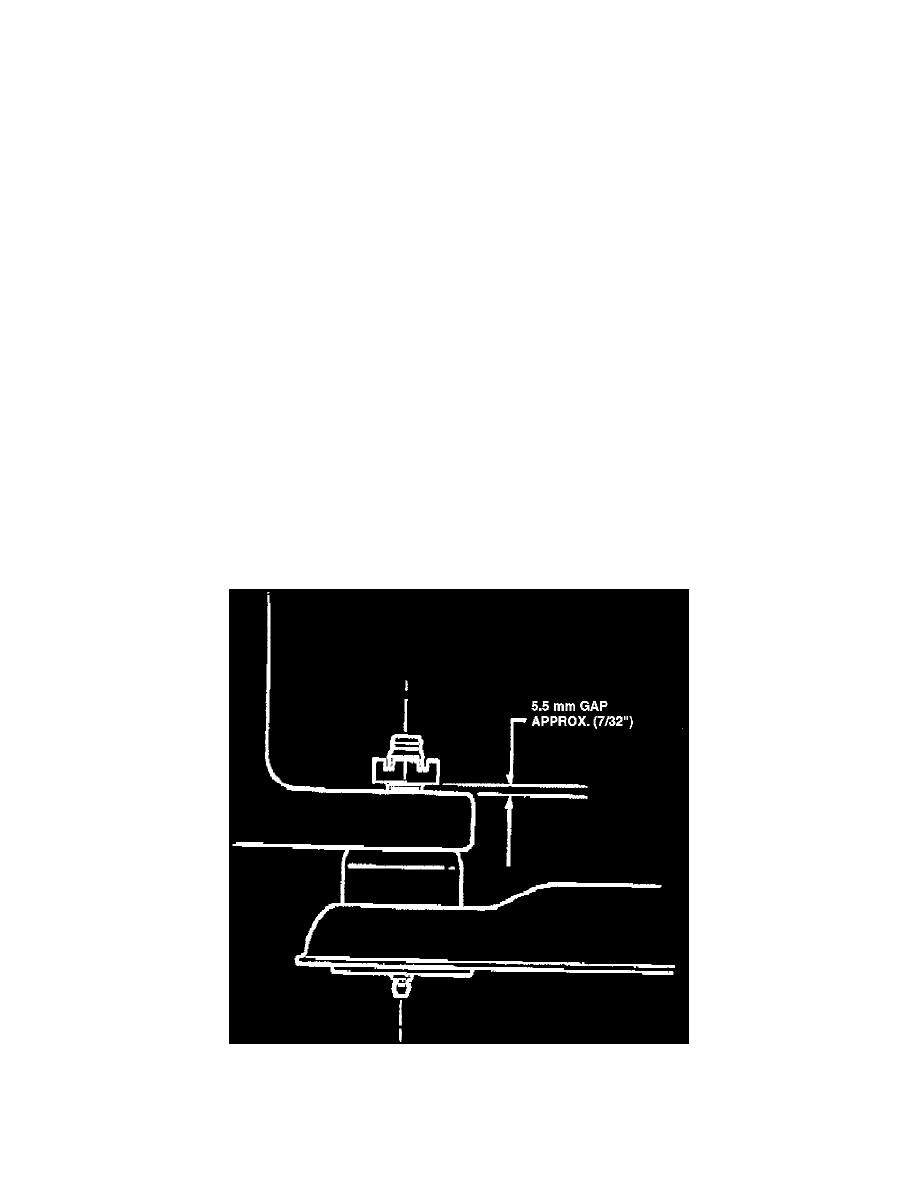
Loosen ball stud nut(s) at suspect attachment(s) four (4) complete revolutions. Inspect gap between nut lower surface and upper contact surface of
knuckle (see Figure 1).
8.
NO GAP: (Ball stud IS NOT seated in knuckle)