
Skyhawk L4-112 1.8L VIN 0 TBI (1982)
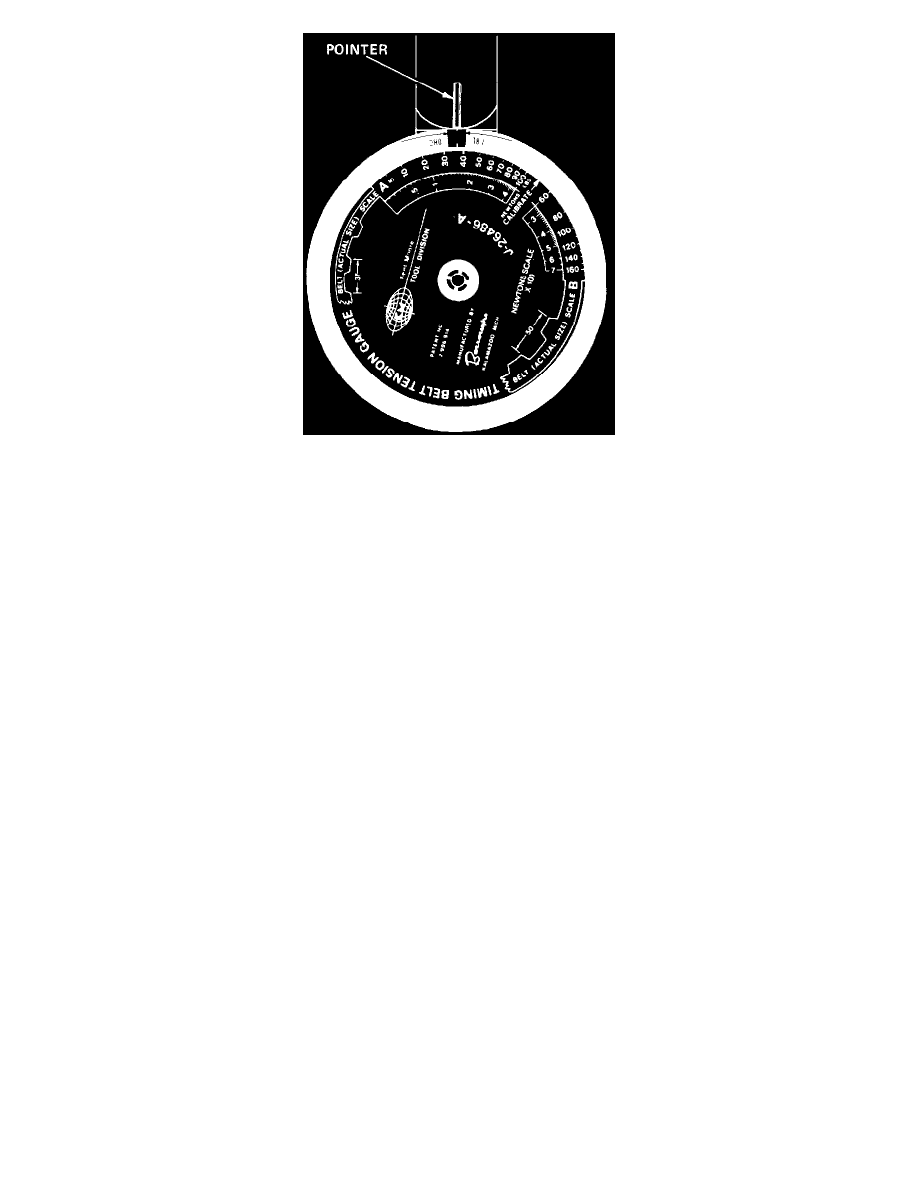
(Figure 4) Tool J-26486-A Dial Reading
SPECIAL TOOLS REQUIRED (or equivalents)
^
J-26486-A, Tension gage.
^
J-33039, Adjustment tool.
NOTE: O.E. manuals do NOT provide images of the timing marks, however, the alignment marks are located on the camshaft and crankshaft gears and
the rear timing belt cover.
REMOVE OR DISCONNECT
1. Battery ground cable, then partially drain cooling system.
2. Serpentine, A/C and/or P/S drive belts (if equipped).
3. Raise vehicle and remove crankshaft pulley.
4. Lower vehicle and remove coolant reservoir.
5. Timing belt cover.
6. Loosen water pump bolts and remove timing belt.
INSTALL OR CONNECT
1. New timing belt.
2. Crankshaft pulley.
3. Check if the mark on the camshaft sprocket lines up with mark on the rear timing belt cover. The timing mark on the crankshaft pulley should line
up at 10° BTDC on the indicator scale.
CAUTION: Do not turn camshaft. Use only crankshaft nut to turn. Turning the nut on the camshaft directly can damage the camshaft bearings.
4. Adjust timing belt to specifications using tool J-26486-A. With gage (tool J-26486-A) installed, tension to within band shown in figure 4.
Adjusting the tension with the gage installed on the belt will insure an initial over-tensioning with the new belt.
5. Crank engine (without starting) approximately ten revolutions. As the new belt takes a set position, a substantial tension loss will occur.
6. Recheck tension with gage on belt to within prescribed band on gage.
NOTES:
^
If reset of tension is required, it is imperative that gage be removed from belt before the readjustment is performed. If gage is left on belt
during the reset of tension, the reading will be incorrect. In other words, the gage must not be installed during tensioning due to a possible
over-tensioning effect.
^
The timing mark on the camshaft gear and rear timing belt cover must be aligned during the final tension recheck or reset.
7. Tighten water pump bolts to 24 Nm (18 lb ft).
8. Timing belt cover.
9. Raise vehicle and install crankshaft pulley.
10. Serpentine, A/C and/or P/S drive belts (if equipped).