
Skyhawk L4-121 2.0L VIN P TBI (1984)
screwdriver towards the end of the crankshaft pilot. Repeat as required around the seal until seal is removed. Care must be taken not to damage
crankshaft O.D. surface.
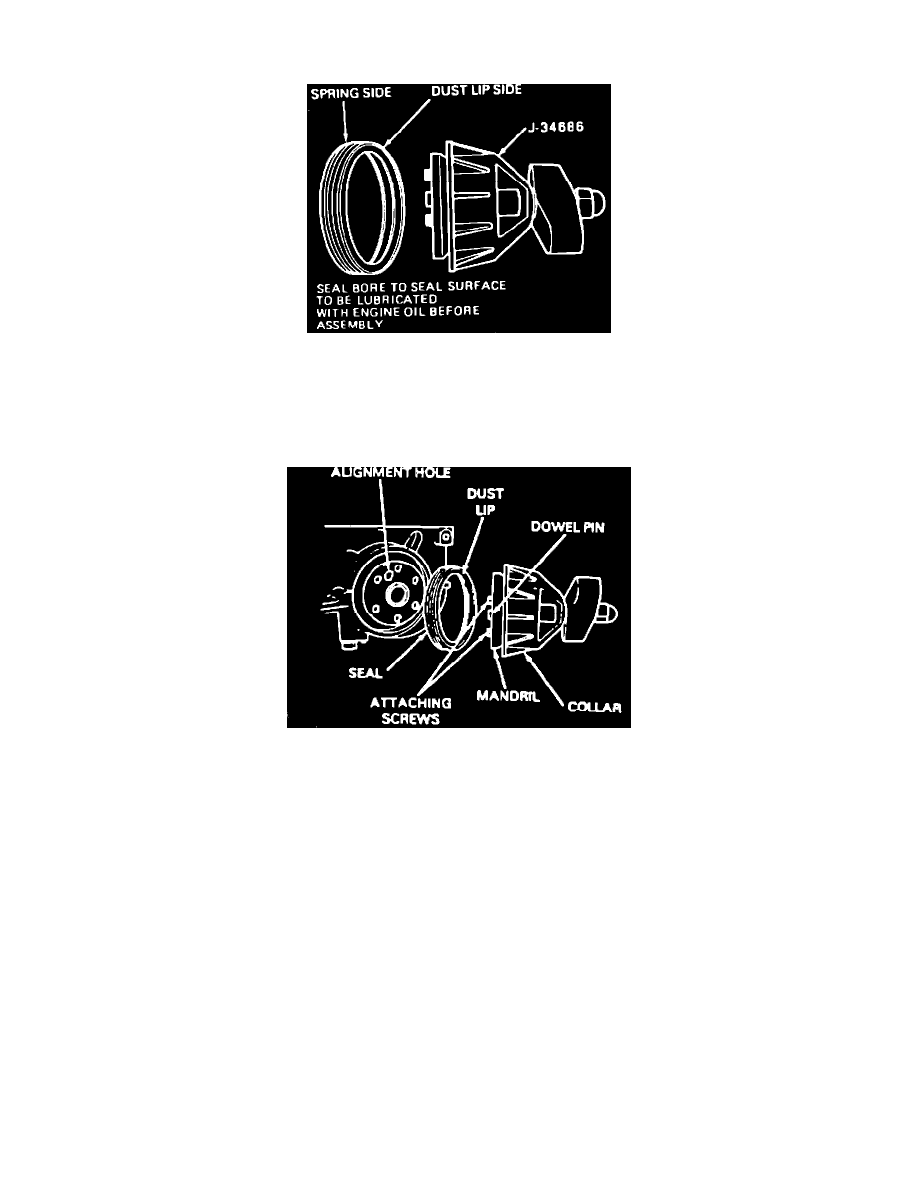
FIGURE 3 - SEAL INSTALLATION
5.
Check I.D. of bore for knicks or bores and correct as required. Inspect crankshaft for bores or nicks on surface which contacts seal. Repair or
replace crankshaft as required.
6.
Install new seal using tool J-34686 (Figure 3).
FIGURE 4 - SEAL INSTALLATION
7.
Install seal over mandrel, slide the seal on the mandrel until dust lip (back of seal) bottoms squarely against collar of tool (Figure 4).
8.
Align dowel pin of tool with dowel pin hole in crankshaft and attach tool to crankshaft by hand, or torque attaching screws to 2-5 ft.lbs.
9.
Turn "T" handle of tool so that collar pushes seal into the bore, until the collar is tight against case. This will insure the seal is seated properly.
10.
Loosen the "T" handle of the tool until it comes to a stop. This will insure that the collar will be in the proper position for installing a new seal.
Remove attaching screws.
11.
Check seal, making sure seal is seated squarely in bore.
12.
Install flywheel.
13.
Start engine, check for leaks.
14.
Install transmission.