
Skylark L4-138 2.3L DOHC VIN D MFI QUAD 4 (1989)
3. Cover to block bolts hand tight.
4. Pump to chain housing nuts hand tight.
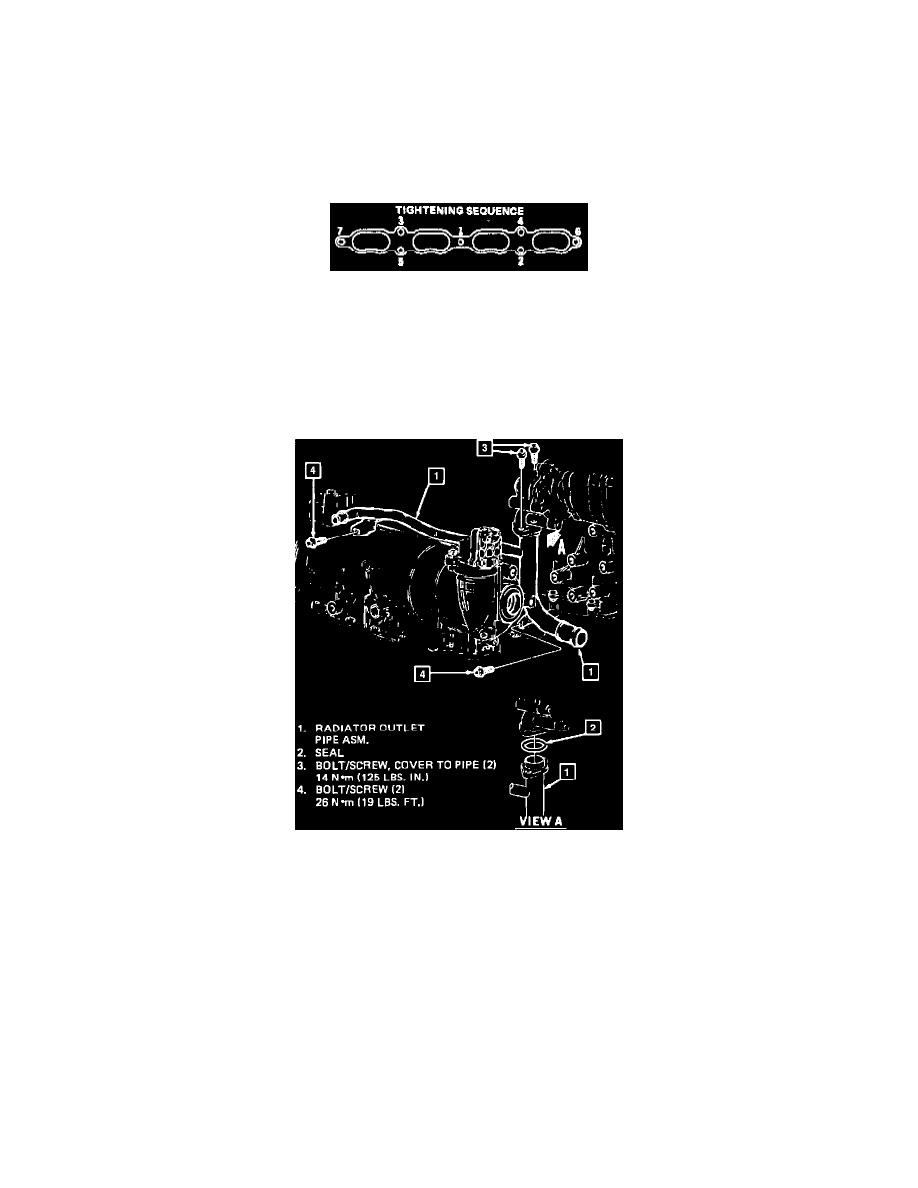
5. Lube "0" ring on radiator outlet pipe with an anti-freeze solution and slide pipe into coolant pump cover install bolts hand tight.
6. With all gaps closed, torque in sequence as follows:
a. Pump assembly to chain housing nuts and torque to 26 Nm (19 lbs. in.)
b. Pump cover to pump assembly and torque 14 Nm (124 lbs. in.).
c. Cover to block, bottom bolt first and torque to 26 Nm (19 lbs. in.).
d. Radiator outlet pipe assembly to cover and torque to 14 Nm (124 lbs. in.)
7. Exhaust manifold and new gaskets. Refer to Exhaust Manifold. See: Exhaust System/Exhaust Manifold
Tightening Sequence
8. Exhaust manifold to cylinder head retaining nuts. Follow the tightening sequence and tighten to 42 Nm (31 lbs ft).
9. Raise vehicle.
10. Index exhaust manifold bolts into exhaust pipe flange.
11. Exhaust pipe to exhaust manifold. Tighten the manifold to exhaust pipe nuts to 26 Nm (19 lbs. ft.).
12. Turn both bolts in evenly to avoid cocking the exhaust pipe and binding the bolts. Turn bolts in until fully seated.
Outlet Pipe Assembly
13. Radiator outlet pipe to transaxle and oil pan.
-
Install the exhaust manifold brace and torque to 54 Nm (40 lbs. ft.).
14. Lower vehicle.
15. Exhaust manifold brace to manifold bolt and torque to 54 Nm (40 lbs. ft.).
16. Tighten the manifold to exhaust pipe nuts to 26 Nm (19 lbs. ft.).
17. Upper and lower heat shields.
18. Oxygen sensor connector.
19. Fill radiator with coolant until coolant reaches heater hose coolant outlet then install hose (this assists with complete cylinder block fill) then
continue fill.
20. Negative battery cable.
21. Start engine.
22. Inspect for leaks.