
Skylark L4-138 2.3L DOHC VIN D MFI QUAD 4 (1989)
5.
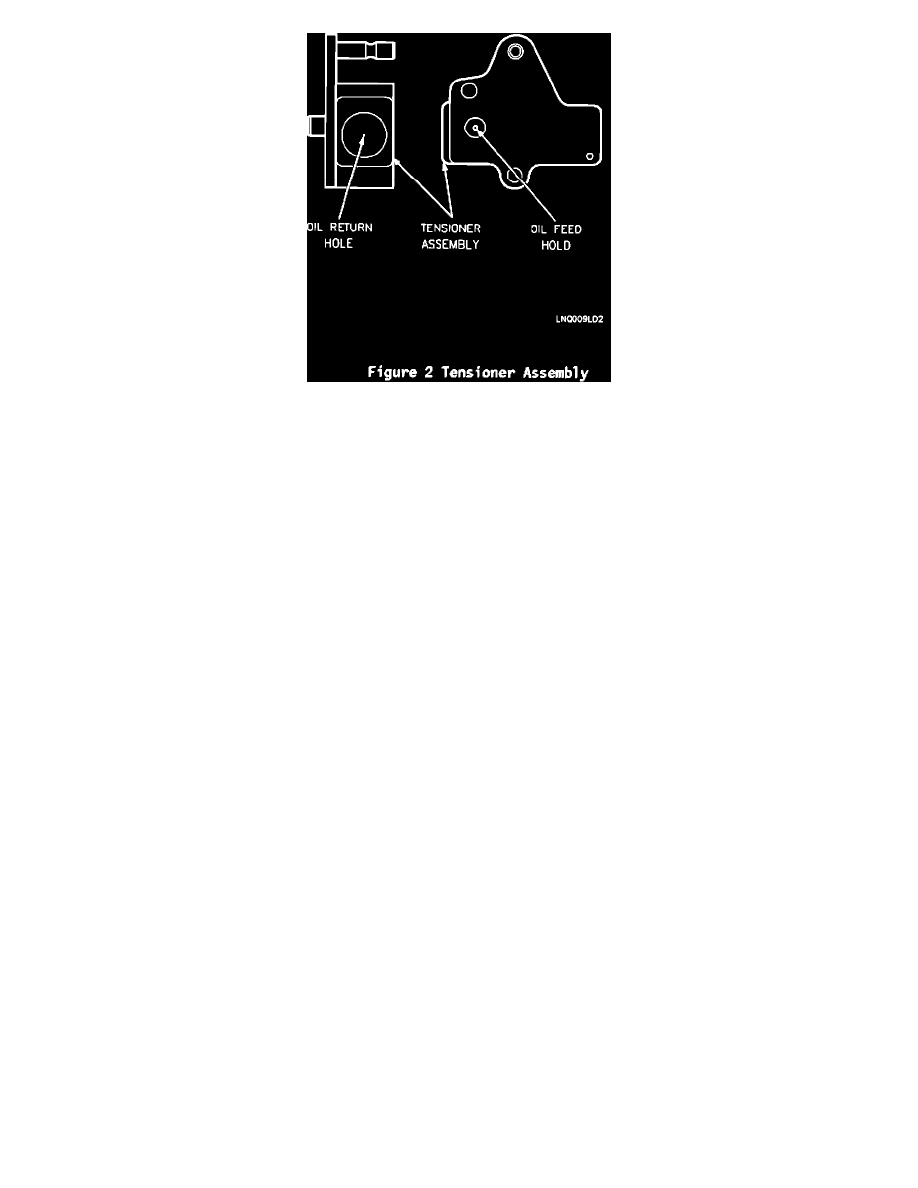
Disassemble, clean and inspect the tensioner assembly. Be sure to pay special attention to the oil feed and drain holes, refer to Figure 2. Make sure
the oil holes are free of dirt so they will allow proper oil flow. If there is varnish in the tensioner bore or on the plunger that may cause the plunger
to stick in the bore, LIGHTLY polish the plunger or bore with SCOTCH BRITE or equivalent. Do not use any other method or technique to clean
the plunger or bore. Smooth surfaces will ensure the plunger will not stick in the bore. If the plunger still does not operate smoothly use GM P/N
24570356 to replace the parts. Store the tensioner assembly until it is needed for assembly in a location (ex. the parts cleaner) where dirt will not
get into the oil holes. DO NOT USE ANY CLEANING MATERIAL OR METHOD THAT WILL REMOVE METAL FROM THE PLUNGER
OR BORE.
6.
Inspect the cylinder head bolts for damaged threads or for damaged heads caused by improper use of tools. Replace head bolts if necessary.
7.
Thoroughly clean the cylinder head and block surfaces and check for flatness.
NOTICE:
DO NOT USE POWERED ABRASIVE PADS TO CLEAN THE CYLINDER HEAD OR BLOCK SURFACES. A POWERED ABRASIVE
PAD MAY DAMAGE THE CYLINDER HEAD AND BLOCK.
A.
Carefully remove all gasket material. Use only a plastic or wood scraper. Use Loctite brand "Chisel Gasket Remover" (P/N 79040) or
Permatex brand "Gasket Remover" (P/N 4MA), or equivalent. Do not use any other method or technique to remove gasket material.
IMPORTANT:
DO NOT USE A TAP TO CLEAN THE HEAD BOLT HOLES.
B.
Check cylinder head for flatness. Refer to service manual Section 6A7 for cylinder head checking procedures and specifications.