
Skylark L4-138 2.3L DOHC VIN D MFI QUAD 4 (1989)
ACR4 couplers to connect.
Fitting Type
High Side
Low Side
Straight
52467941
52467943
Straight Two-piece
52467324
N/A
90° Elbow
52469054
52469055
The fittings should be installed as follows:
a.
Remove the caps from the R-12 fittings. Remove any dirt or grease from the port threads using the thread cleaning wire brush, J 41265.
Inspect the fittings for thread damage. If any damage is found, use the port thread restorer (J 41266 low side, J 41267 high side) to repair the
thread.
For the two-piece fitting, remove the existing R-12 fitting and discard it. Use tool J 38704A (previously released, not part of the above kit)
to remove the fitting. Make sure to hold the line securely to prevent damage when removing the existing fitting. If the fitting cannot be
removed easily, use the saddle clamp valve listed below and seal the R-12 port and cap permanently.
b.
Install the selected fitting onto the existing R-12 fitting. Leave the valve core in the straight fittings, and remove the valve core when using
the 90° fittings.
If the valve cores need to be removed at a later time, they can be removed with the straight conversion fittings in place. On the low side
straight fitting, use the J 34611-A tool to remove the core pin in the conversion fitting, then remove the core valve from the original R-12
fitting. Always recover the charge before valve core removal.
Use the octagon sockets on the straight fittings (J 39037 high side, and J 41256 low side). Torque the new fitting until it seats. The fitting should
seat fully BEFORE reaching 11 N.m (8 lb ft). If 11 N.m (8 lb ft) of torque is reached and the fitting has not seated, it is probable that the threads
have been damaged. In this case, remove the fitting and use the thread restorer listed above. Reinstall the fitting, adding one drop of a thread
locking compound such as Loctite(R) 242.
The fittings (except the two-piece) have a thread locking compound applied to the threads. This compound will set up enough to restrict removal
of the fitting in about 15 minutes. The fittings can now be used to evacuate the system (see Step 5).
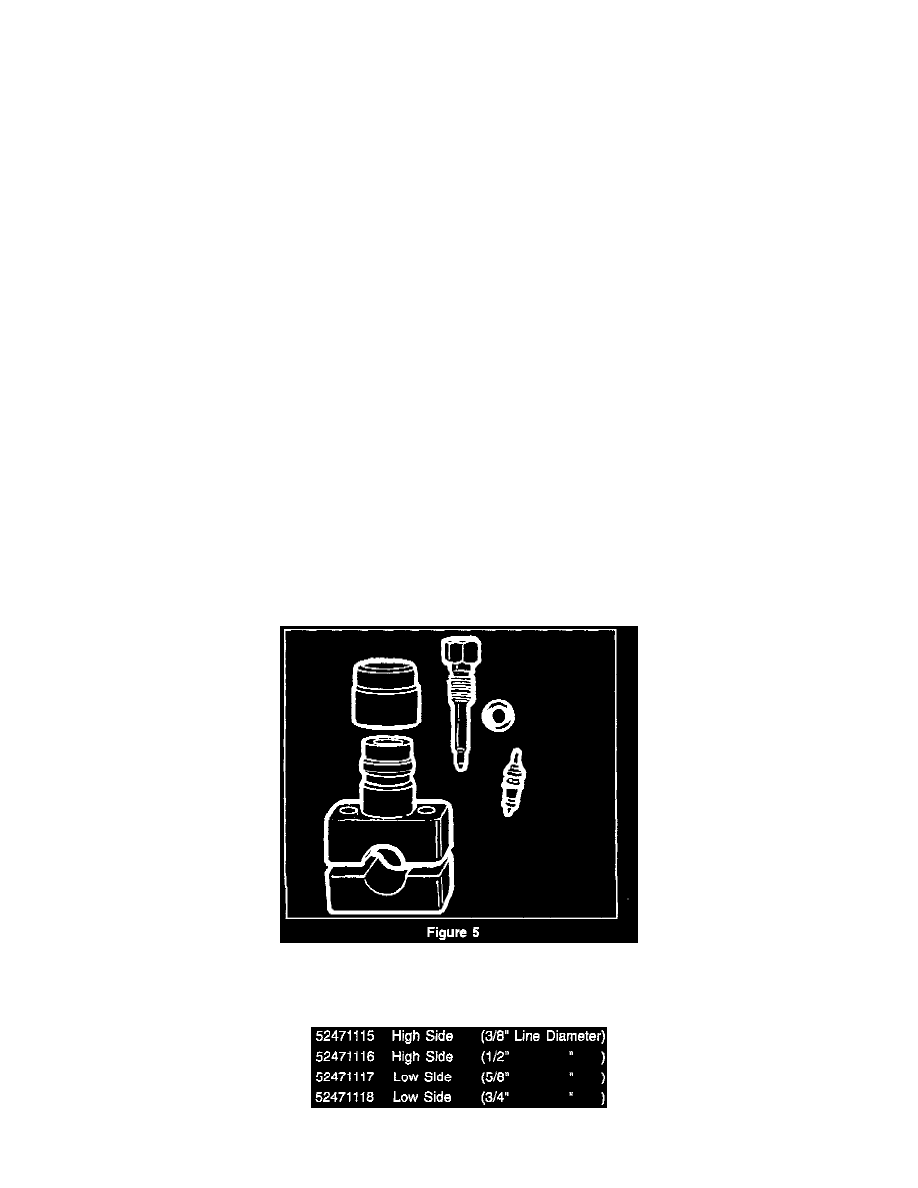
An additional type of conversion port fitting has been developed. This fitting is called a saddle clamp valve (see Figure 5). It can be clamped
directly on a metal refrigerant line, and will be used if the existing fitting is damaged or is inaccessible. A drop of a thread locking compound, such
as Loctite(R) 242, should be used on each bolt to prevent the threads from loosening.
The R134a saddle clamp valve part numbers are: