
Skylark L4-138 2.3L SOHC VIN 3 MFI QUAD 4 (1992)
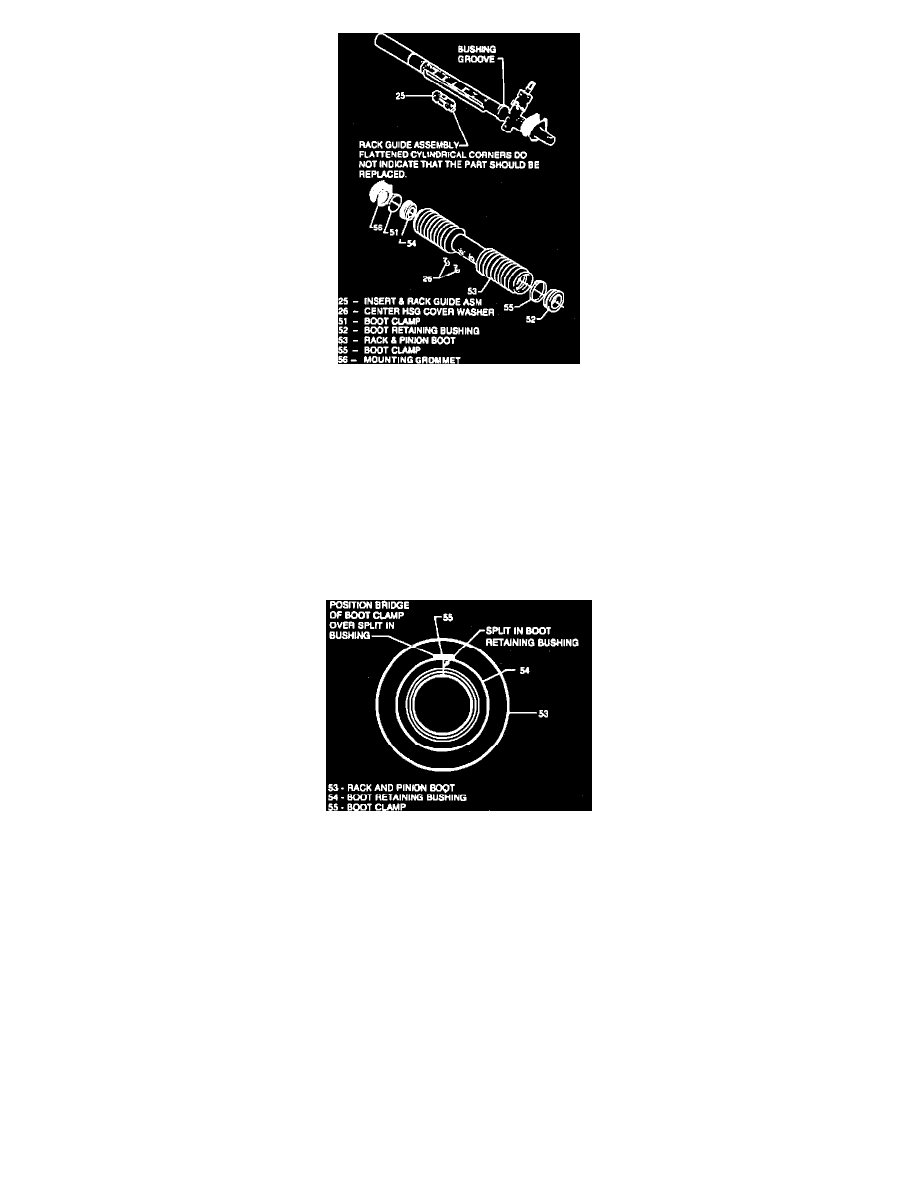
Fig. 17 Boot & Rack Guide Assembly
Refer to Fig. 11, for replacement procedure. Ensure new ``O'' rings are installed. Torque line fittings at valve end to 14 ft. lbs. and at cylinder end to
20 ft. lbs. RACK GUIDE
Removal
1.
Remove rack and pinion steering assembly from vehicle.
2.
Remove and dispose lock plate from inner tie rod bolts, Figs. 11 and 17.
3.
Remove inner tie rod bolts, bolt support plate, cylinder lines and inner tie rod assemblies.
4.
Cut and remove mounting grommet and boot clamp.
5.
Slide boot retaining bushing from rack and pinion boot, then boot assembly from rack and pinion housing.
6.
Insert rack guide assembly from rod and rack assembly if necessary.
Fig. 18 Boot Clamp Position
Installation
1.
Slide boot retaining bushing from rack and pinion housing.
2.
Slide new boot clamp on rack and pinion boot and install boot retaining bushing into rack and pinion boot.
3.
Install rack guide on rack.
4.
Coat inner lip of boot retaining bushing lightly with grease, then install boot on housing. Ensure that center housing cover washers are in place on
boot.
5.
Install inner tie rod bolts bolts through cover washers and rack and pinion boot. Screw into rack lightly.
6.
Slide boot and boot retaining bushing until seated in bushing groove in housing. Crimp new boot clamp.
7.
Slide other end of boot into boot groove on cylinder end of housing.
8.
Slide other end of boot into boot groove on cylinder end of housing and crimp new boot clamp. Bridge of boot clamp must be crimped over
split in boot retaining bushing to ensure proper sealing, Fig. 18.
9.
Install new lock plate with notches in proper position over flats of inner tie rod bolts.